
Foxit eSign is an electronic signature solution that lets individuals and businesses sign, send, and manage documents online. Users can create legally binding eSignatures, prepare forms, and track document status in real time. Reusable templates, automated workflows, and audit trails reduce manual paperwork and keep signing processes moving.
At the simplest level, a user can log into the eSign dashboard and handle 100% of their signing needs. For example, they can upload a Microsoft Word template and drag and drop fields for the signing process. I did this with a simple Word document, and after uploading, the editor let me place fields exactly where I needed them:
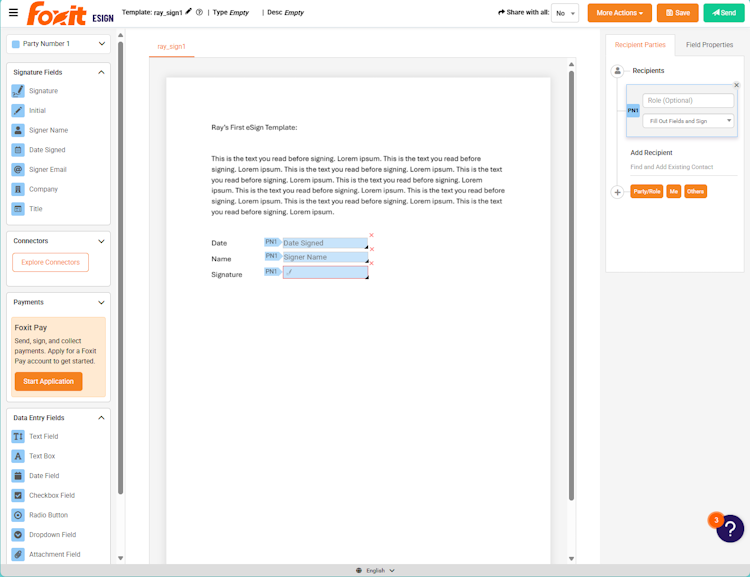
That screenshot shows three fields added to my document: a date field, a signer name field, and the actual signature spot. Each field has many configuration options, and your own documents could have far more or far fewer. You can design these forms to meet whatever need you have. You can also do all of this directly within Word. The docs explain how to add fields directly into Word that become active during the signing process.
Once you’ve set up your template, you can initiate the signing process right from the app. The dashboard gives you a full history and audit trail covering whether someone has signed, when they signed, and who signed. As a developer, you’re probably wondering whether this process can be automated. It can.
If you’d rather watch an introduction first, the API introduction video walks through the same material.
eSign Via API
Before digging into the APIs, take a quick look at the API Reference. The signing process itself can get complex. Two, three, or more people may need to sign a document in a specific order, and the template field setup can be done entirely in Word. The focus here is a simple signing example, but nothing stops you from building more advanced, flexible workflows.
The full signing flow this article walks through, end to end:

The first step in any API usage is authentication. When you have an eSign account with API access, you receive a client_id and client_secret value, both of which you exchange for an access token at the appropriate endpoint. You’ll find the client_id and client_secret under the API tab in your Foxit eSign account settings once you’ve activated API access. A simple Python implementation looks like this:
CLIENT_ID = os.environ.get("CLIENT_ID")
CLIENT_SECRET = os.environ.get("CLIENT_SECRET")

def getAccessToken(id, secret):
	url = "https://na1.foxitesign.foxit.com/api/oauth2/access_token"
	payload=f"client_id={id}&client_secret={secret}&grant_type=client_credentials&scope=read-write"
	headers = {
	'Content-Type': 'application/x-www-form-urlencoded'
	}

	response = requests.request("POST", url, headers=headers, data=payload)

	token = (response.json())["access_token"]
	return token

access_token = getAccessToken(CLIENT_ID, CLIENT_SECRET)
In this code, you pull the client_id and client_secret from environment variables, post them as application/x-www-form-urlencoded to na1.foxitesign.foxit.com/api/oauth2/access_token with the client_credentials grant and read-write scope, and read access_token off the JSON response. Every subsequent call in this article reuses that token in the Authorization: Bearer ... header.
The example uses the US region host (na1.foxitesign.foxit.com). If your account is in another region, swap in the appropriate host: eu1.foxitesign.foxit.com for EU, na2.foxitesign.foxit.com for Canada, or au1.foxitesign.foxit.com for Australia.
All remaining demos use this method, and at the end of this post you’ll find GitHub links for the full source.
Kicking Off the Signing API Process
With authentication handled, the code can drive the full signing process. The first thing to add is a signing flow using the template shown above. From the dashboard I noted the template ID, 392230, though APIs for working with templates let you retrieve that via code as well.
The Create Envelope from Template endpoint starts the signing process. An envelope is a set of documents a user must sign. For this demo it’s one document, but you can include multiple. The API reference example shows a large input body because the electronic signing process can be complex. For this simple demo, you only need the signer’s name and email address. This Python utility handles that:
def sendForSigning(template_id, first_name, last_name, email, token):
	url = "https://na1.foxitesign.foxit.com/api/templates/createFolder"
	body = {
		"folderName":"Sending for Signing",
		"templateIds":[template_id],
		"parties":[
		{
			"permission":"FILL_FIELDS_AND_SIGN",
			"firstName":first_name,
			"lastName":last_name,
			"emailId":email,
			"sequence":1
		}
		]
	}

	headers = {
		'Authorization': f'Bearer {token}',
	}

	response = requests.request("POST", url, headers=headers, json=body)
	return response.json()
The code above builds the create-envelope payload, with the folder name, the template ID list, and a single-element parties array carrying the signer’s name, email, and FILL_FIELDS_AND_SIGN permission, then POSTs it to /api/templates/createFolder with the bearer token and returns the parsed JSON. parties is an array because real signing flows often need multiple signers, and permission is required on each entry because it defines the role that party plays.
Passing in the template ID and signer details works like this:
# Hard coded template id
tid = "392230"

sendForSigningResponse = sendForSigning(tid, "Alex", "Rivera", "[email protected]", access_token)
The call returns a large set of data. For now, pull out just the envelope ID:
envelopeId = sendForSigningResponse['folder']['folderId']
print(f"ID of the envelope created: {envelopeId}")
Note: You’ll see ‘folder’ referenced in the API endpoints and results, but the eSign API is migrating to the ‘envelope’ term. Both terms are used interchangeably in the current API.
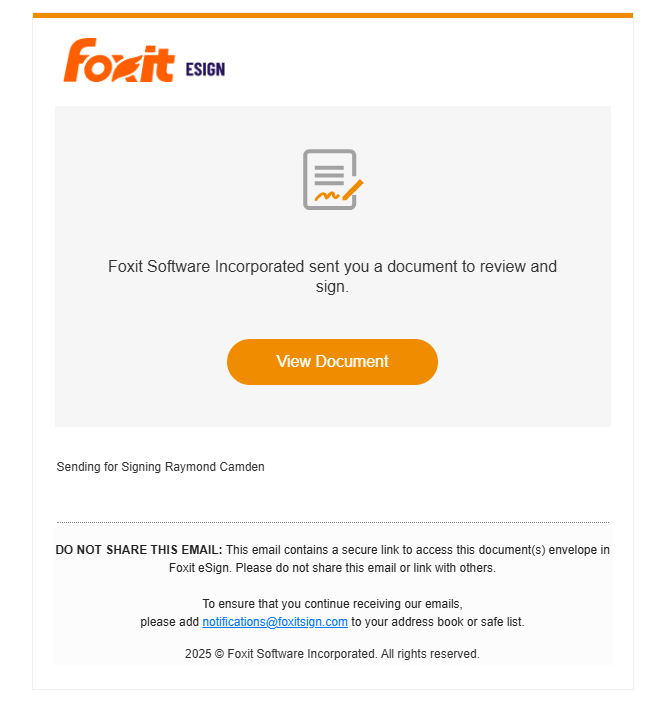
A few seconds after running this code, the signing email appeared in my account:
Sending out Electronic Reminders
To nudge signers who haven’t acted yet, use the Send Signature Reminder endpoint. It takes the envelope ID created earlier (and again, see the note above about envelope vs folder):
def sendReminder(envelope_id, token):
	url = "https://na1.foxitesign.foxit.com/api/folders/signaturereminder"
	body = {
		"folderId":envelope_id
	}
	headers = {
		'Authorization': f'Bearer {token}',
	}

	response = requests.request("POST", url, headers=headers, json=body)
	result = response.json()
	return result
In this code, you build a one-key body containing the envelope ID, attach the bearer token, POST to /api/folders/signaturereminder, and return the parsed JSON. The endpoint is fire-and-forget from the client’s perspective, so a 2xx response means Foxit has queued the reminder email to the outstanding signer.
With the access token and envelope ID in hand, triggering a reminder takes a single call:
access_token = getAccessToken(CLIENT_ID, CLIENT_SECRET)
result = sendReminder(envelope_id, access_token)
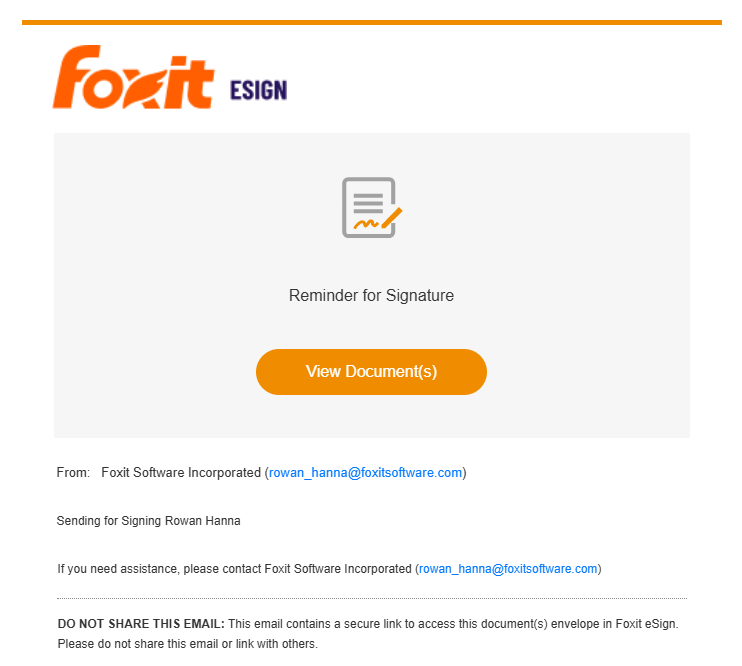
Running this sends an email reminder to the signer:
Ok, But Did They Sign Their Document Yet??
To check whether the signer has completed the process, use the Get Envelope Details endpoint. It takes the envelope ID from before. Here’s a Python wrapper for that API:
def getStatus(envelope_id, token):
	url = f"https://na1.foxitesign.foxit.com/api/folders/myfolder?folderId={envelope_id}"

	headers = {
		'Authorization': f'Bearer {token}',
	}

	response = requests.request("GET", url, headers=headers)
	result = response.json()
	return result
The code above issues a GET to /api/folders/myfolder with the envelope ID as a query-string parameter, sends the bearer token in the Authorization header, and returns the parsed JSON. The full response body carries every audit-trail field the dashboard surfaces (parties, timestamps, folder status), and the next snippet pulls just folderStatus out for a quick yes/no.
Checking status against the envelope ID:
result = getStatus(envelope_id, access_token)

print(f"Envelope status: {result['folder']['folderStatus']}")
The endpoint returns a lot of information, but printing just the status gives you a high-level view of where the process currently stands.
With the example shown above, the envelope status is SHARED. Clicking the link in the signing email opens the signing view:
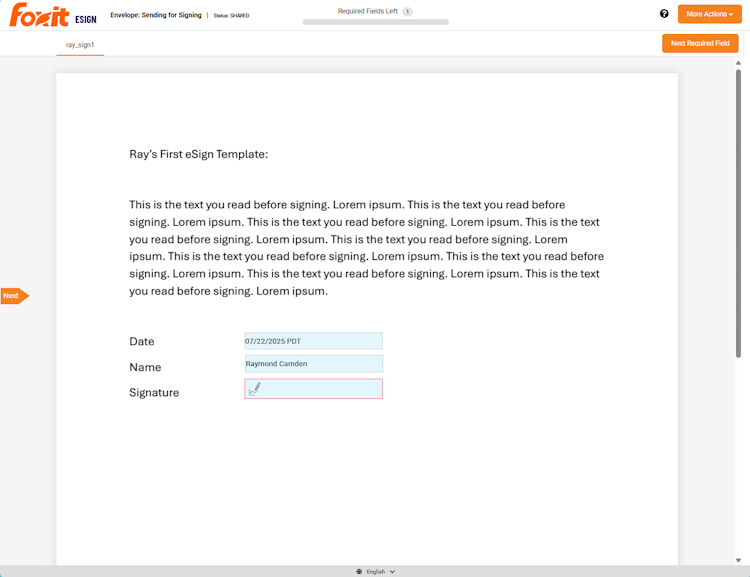
The date is already filled to today’s date, and the name is pre-filled because eSign knows who the document was sent to. Clicking to sign is all that remains. Once the signer does that, the same status call returns EXECUTED.
Next Steps
If you’re new to eSign, the main homepage gives you a solid introduction, and the Foxit eSign YouTube channel has video content covering the service in depth.
Beyond the basics covered here, the API has significantly more to offer. Webhooks deliver automatic notifications when envelope events fire, so you don’t need to poll for status. The API also supports embedded signing sessions for keeping signers inside your own application, SSO authentication for signers, and multi-party workflows with sequential or parallel signing order. The API Reference covers all of these in full.
All three code examples from this post are available in the GitHub repo. The eSign API is also part of the broader Foxit developer platform, which includes APIs for PDF processing, document generation, and embedded PDF viewing. Bring your questions to the developer forums.
Ready to wire signing into your own product? Create a free developer account directly at account.foxit.com/site/sign-up (no credit card required). The direct URL skips the pricing-page redirect from the developer portal and drops you on the account form, with API credentials waiting in the API Keys section once you’re in.
eSign API FAQ
How do I embed e-signatures in my app with the Foxit eSign API?
You authenticate with OAuth2 to get an access token, then call Create Envelope from Template to send a document for signature. In this article’s flow, the signer completes signing through an emailed link. For a fully in-app experience where signers never leave your interface, the Foxit eSign API also supports embedded signing sessions, which you load directly inside your app and pair with webhooks to capture completion events.
What is an embedded signature?
An embedded signature is one a signer applies inside your own application’s interface rather than on a separate hosted signing page. Instead of redirecting the signer to an external Foxit eSign page, your app presents the signing experience in context, keeping users in your product end to end. With the Foxit eSign API, this is delivered through embedded signing sessions rather than the standard email-based envelope flow.
What is an embedded signing API?
An embedded signing API generates a secure signing session you load inside your own app — typically in an iframe or web view — so signers complete documents without leaving your interface. The Foxit eSign API provides this through embedded signing sessions, alongside the email-based flow demonstrated in this article (create an envelope, signer signs via an emailed link). Webhooks then notify your app the moment an envelope reaches EXECUTED status.
How do I authenticate with the Foxit eSign API?
Authentication uses the OAuth2 client-credentials grant. You exchange your client_id and client_secret — found under the API tab in your Foxit eSign account settings — for an access token by POSTing to the regional OAuth2 endpoint (for example, na1.foxitesign.foxit.com for the US, or eu1 for the EU). Send that token as a Bearer header on every subsequent call; the same token is reused across envelope creation, reminders, and status checks.
How do I check whether a signer has completed a document?
Call the Get Envelope Details endpoint with your envelope ID, passing the Bearer token in the Authorization header. The response carries the full audit trail — parties, timestamps, and status. Reading folderStatus gives a quick state: SHARED while the document is out for signature, and EXECUTED once the signer finishes. For real-time updates instead of polling, the Foxit eSign API offers webhooks that fire on envelope events.
Why does the Foxit eSign API use both "folder" and "envelope"?
They refer to the same thing. An envelope is the set of documents a signer must complete. The Foxit eSign API is migrating from the older term “folder” to “envelope,” so you’ll still see folder in endpoint paths and response fields — for example, createFolder, folderId, and folderStatus — while the documentation increasingly uses envelope. Both terms are interchangeable in the current API.