
6 Best DocuSign API Alternatives for Developers in 2026

Comparing a DocuSign API alternative can eat hours of research time. This guide breaks down six eSign APIs, including Dropbox Sign, Adobe Acrobat Sign, PandaDoc, SignNow, BoldSign, and Foxit eSign, against the six criteria that matter most for integration speed and long-term maintenance.
DocuSign’s API works, but redirecting signers to an external DocuSign-hosted page puts a seam in your user experience you can’t fully control, pricing tiers require a sales call to decode, and per-envelope costs escalate unpredictably at scale. If you’ve already decided DocuSign isn’t the right fit, this roundup gives you a structured way to narrow the field fast.
Six alternatives are covered here (Dropbox Sign, Adobe Acrobat Sign, PandaDoc, SignNow, BoldSign, and Foxit eSign), evaluated against six criteria that directly affect integration time and long-term maintainability. Each tool is broken down the same way, so you can compare like against like rather than marketing page against marketing page.
What to evaluate in an eSign API
The six criteria below separate APIs worth building on from ones that will cost you significant refactoring time later. Pin them down before you compare options.
Embedded signing depth. An iframe-based session keeps signers inside your application, while a redirect-based session hands them off to a third-party URL. The delta between “supports embedded signing” and “delivers a fully iframe-native experience” is significant.
Auth model. OAuth2 client credentials gives your backend a machine-to-machine token with no user interaction required. API key auth is simpler but typically coarser in permission scope and harder to rotate safely at scale.
Webhook event granularity. A single “document completed” event isn’t enough if your workflow needs to react to individual signer events, field changes, or expiration triggers. Check what event names are actually documented, not listed on a marketing page.
SDK language coverage. Confirm whether the vendor ships official SDKs for Python, Java, Node.js, and Go. If raw REST calls are your only option, factor in the maintenance overhead for your team.
Compliance certifications. eIDAS, ESIGN, UETA, HIPAA, GDPR, and 21 CFR Part 11 have different requirements. Confirm which certifications are documented and current, not featured in a hero banner.
Pricing model transparency. Envelope-based, seat-based, and consumption-based pricing each carry different risk profiles at scale. If you can’t read the pricing page without talking to sales, add that friction to your evaluation score.
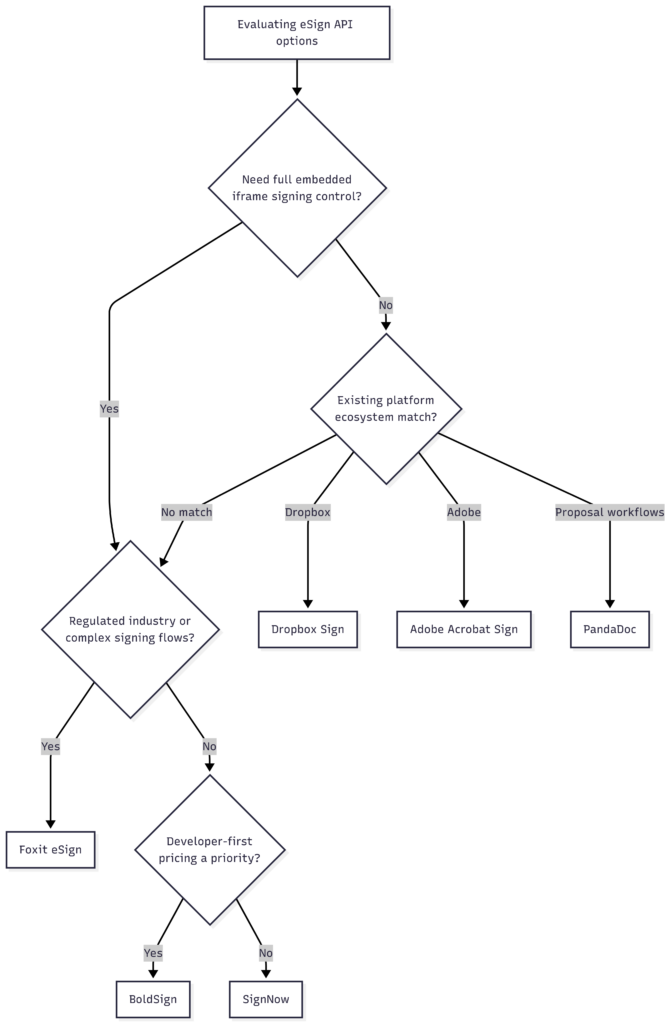
The six alternatives at a glance
The table summarizes where each tool lands on the criteria above. Treat it as a shortlist filter, then read the section for any tool that survives. Compliance and pricing move often, so the linked pages are the source of truth, not this table.
| Tool | Auth | Embedded signing | Webhooks | Official SDKs | Pricing model |
|---|---|---|---|---|---|
| Dropbox Sign | OAuth2 + API key | Iframe via sign_url | Signer-level events | Python, Node, Java, Ruby, PHP | API tier, published |
| Adobe Acrobat Sign | OAuth2 | Transient docs + widgets | Extensive | Java, plus REST | Enterprise, sales-led |
| PandaDoc | OAuth2 + API key | Iframe (send + sign) | Document lifecycle | Node, Python, plus REST | Document/seat-based |
| SignNow | OAuth2 + API key | Embedded session URLs | Functional, coarser | Fewer official SDKs | Per-envelope, published |
| BoldSign | OAuth2 + API key | Iframe embedded | Documented events | .NET, Java, Node, Python | Tiered, transparent |
| Foxit eSign | OAuth2 client credentials | Iframe / web view, no redirect | 9 events incl. folder_executed, HMAC-signed | REST, examples in Python | Tiered, published |
Dropbox Sign
Dropbox Sign (formerly HelloSign) runs a clean REST API with solid embedded signing and documentation that developers consistently rate as approachable. If you’re already in the Dropbox ecosystem and don’t need heavy customization, it provides a reliable, well-documented API. But it does have thinner webhook payloads and narrower embedded-UX control than purpose-built full-control APIs.
- Auth model. OAuth2 for multi-account apps, plus straightforward API key auth for single-account integrations.
- Embedded signing. Embedded requests return a
sign_urlyou load directly into an iframe, keeping signers in your app. - Webhook granularity. Events fire at each signer-level state change, though payloads are less granular than the top-tier options.
- SDKs. Official SDKs for Python, Node.js, Java, Ruby, and PHP.
- Compliance. Positioned for general business use; confirm the current certification list in their docs before relying on a specific standard.
- Pricing model. API pricing is published as its own tier, separate from the end-user product.
See the developer docs and API pricing.
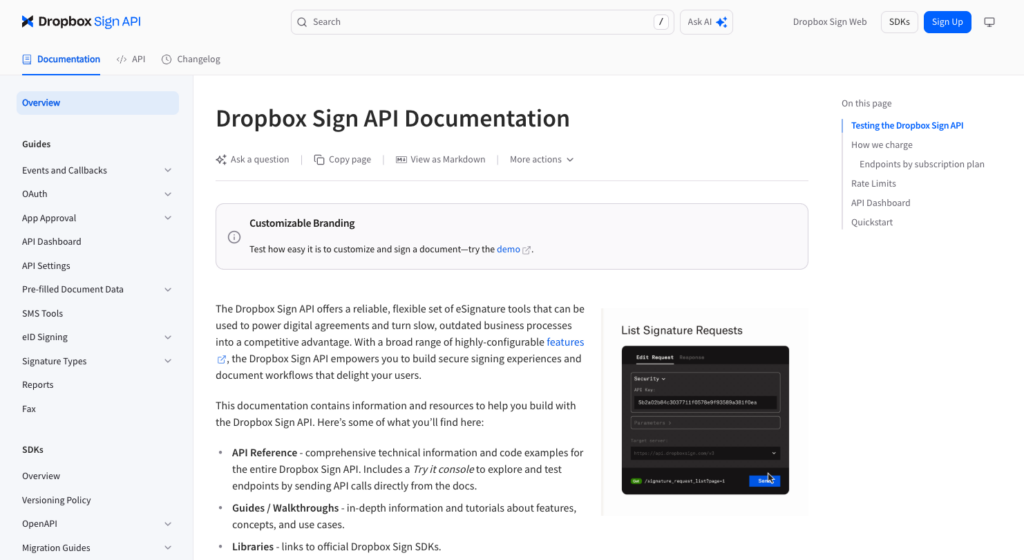
Dropbox Sign’s developer documentation. The organized reference and SDK list are the reason it scores well on the docs-quality criterion.
Adobe Acrobat Sign
Adobe Acrobat Sign brings enterprise-scale infrastructure and a deep compliance footprint to its REST API, at the cost of a larger, more complex surface area. It’s a reasonable fit for large enterprises already standardized on Adobe Document Cloud with compliance needs that benefit from Adobe’s footprint. On the other side, it also has the largest integration overhead on this list and pricing that is not self-serve.
- Auth model. OAuth2, integrated with Adobe’s broader identity and Document Cloud platform.
- Embedded signing. Supported via Transient Documents and widget-based flows rather than a single drop-in iframe call.
- Webhook granularity. Extensive event coverage, appropriate for large multi-step enterprise workflows.
- SDKs. An official Java SDK plus a broad REST surface; other languages typically integrate at the REST level.
- Compliance. Strong certification footprint aimed at healthcare, finance, and government; verify the specifics for your regulatory context.
- Pricing model. Enterprise-tier and sales-led; expect a conversation rather than a public per-call rate.
See the developer guide and Adobe’s Acrobat business pricing page.
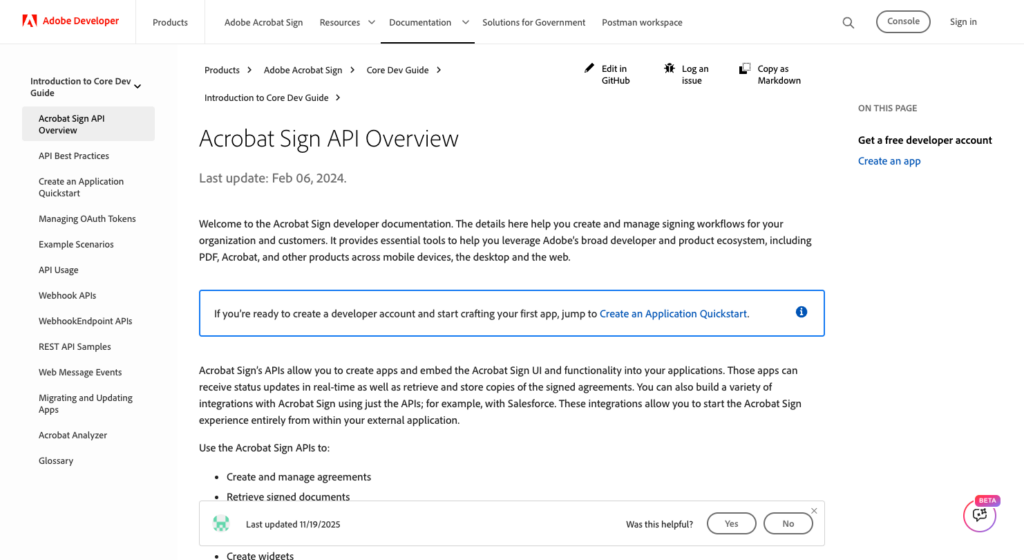
The Acrobat Sign API overview. The breadth here is the point, and also the integration-overhead warning.
PandaDoc
PandaDoc’s API sits closer to document-creation-plus-signing than pure eSignature, which is a strength if you need both from one integration. It works well for building quote-to-sign or proposal-to-signature workflows where generation and signing happen through one API. The tradeoffs are document-based pricing that adds up at volume, and thinner signing-order controls than purpose-built eSign APIs.
- Auth model. OAuth2 and API key options.
- Embedded signing. Embedded sending and signing via iframe, alongside template-driven document generation.
- Webhook granularity. Document-lifecycle events covering creation, sending, and completion.
- SDKs. Official Node.js and Python SDKs, plus a documented REST API.
- Compliance. Business-grade; confirm the current list against your requirements in their docs.
- Pricing model. Document-centric and can climb at high envelope volumes, so model your cost at target scale.
See the developer documentation and pricing.
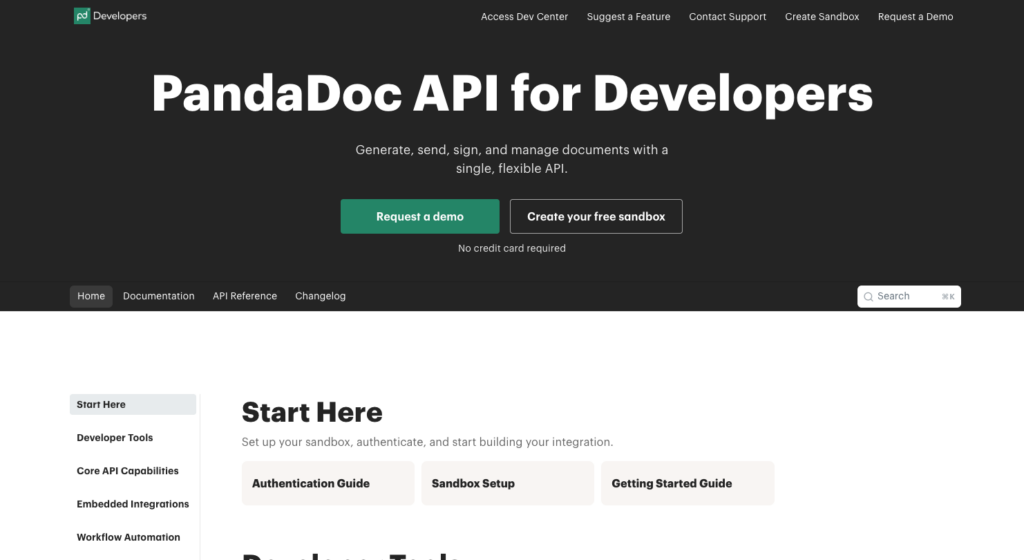
PandaDoc’s developer hub. Document generation sitting next to signing is what distinguishes it from pure eSign APIs.
SignNow
SignNow offers a capable REST API that is frequently competitive on per-envelope cost at volume, which makes it a common pick for high-throughput, straightforward signing. It’s a cost-sensitive option that can handle high-volume, straightforward signing if you don’t have any complex embedded-UX requirements. However, its coarser webhooks and narrower SDK coverage will push you toward raw REST.
- Auth model. API key and OAuth2 authentication.
- Embedded signing. Embedded session URL generation for in-app signing.
- Webhook granularity. Functional, but event types are coarser than the top-tier options.
- SDKs. Narrower official SDK coverage, so expect more raw REST work outside the main supported languages.
- Compliance. Business and industry compliance is advertised; verify the current certifications in their docs.
- Pricing model. Per-envelope pricing that is published and tends to reward volume.
See the API documentation and pricing.
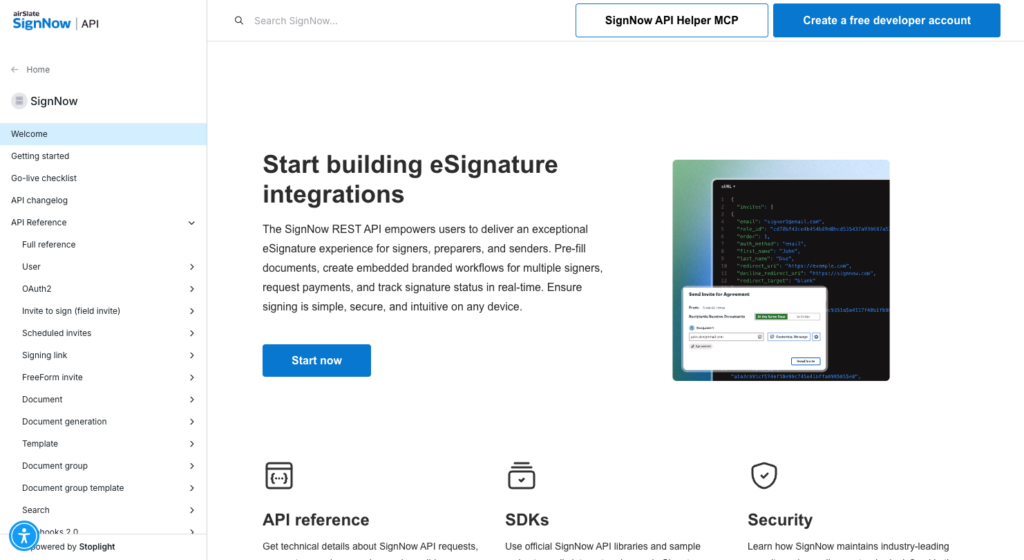
SignNow’s REST API documentation. Envelope creation, signer routing, and embedded session URLs are all covered here.
BoldSign
BoldSign is a developer-first eSign API with a clean REST interface and pricing that is more transparent than most enterprise alternatives at the lower tiers. This option offers a modern, well-documented API with straightforward pricing, outside the most heavily regulated industries. Worth noting is a smaller compliance footprint than the established players.
- Auth model. OAuth2 and API key options.
- Embedded signing. Solid iframe-based embedded signing built for developer integration.
- Webhook granularity. Documented event types suitable for most integration workflows.
- SDKs. Official SDKs including .NET, Java, Node.js, and Python.
- Compliance. A newer entrant with a smaller certification footprint than established players, so verify current standards before committing in a regulated industry.
- Pricing model. Tiered and transparent, published without a mandatory sales call at the lower tiers.
See the developer portal and pricing.
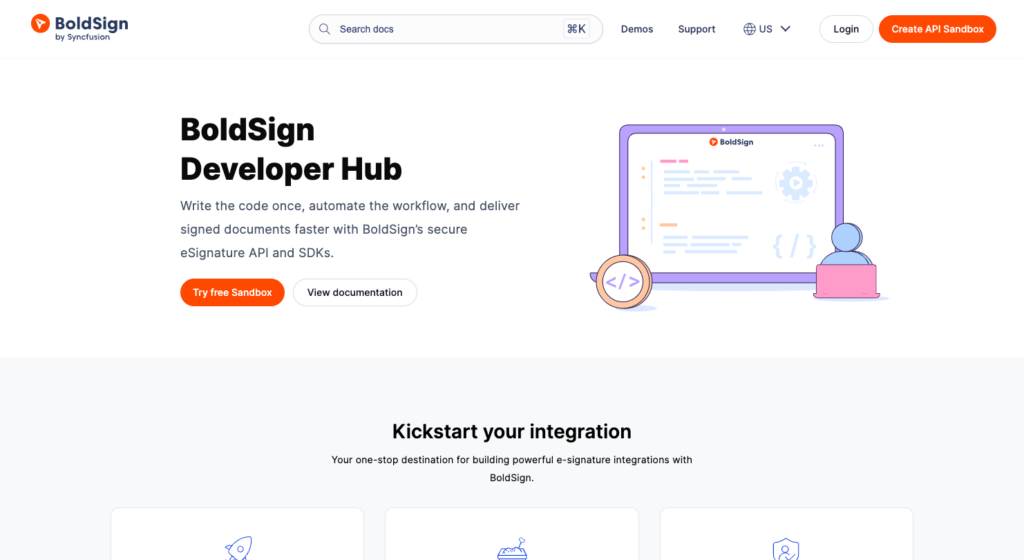
The BoldSign Developer Hub. Transparent pricing and a self-serve sandbox are its main developer-experience draws.
Foxit eSign
Foxit eSign gives developers full control over the signing experience, with no redirect to an external Foxit-hosted page at any point. This is the tool covered in the most technical depth here, and the getting-started section below runs against its live API.
- Auth model. OAuth2 client credentials. Your backend gets a machine-to-machine Bearer token with no user login in the loop.
- Embedded signing. Signing sessions load inside an iframe or web view within your own application. You control the header, sidebars, and the exact page signers land on after finishing.
- Webhook granularity. Nine event types, including
folder_executed, and every callback is signed with an HMAC-SHA-256 digest of the raw body so you can verify authenticity. - SDKs. A documented REST API with worked examples; the getting-started code below is Python.
- Compliance. eIDAS at the AES and QES levels (QES requires pairing with a qualified trust service provider), plus the ESIGN Act, UETA, HIPAA, GDPR, 21 CFR Part 11, CCPA, FINRA, FERPA, and SOC 2 Type II infrastructure.
- Pricing model. Tiered and published, with a free developer account to build against.
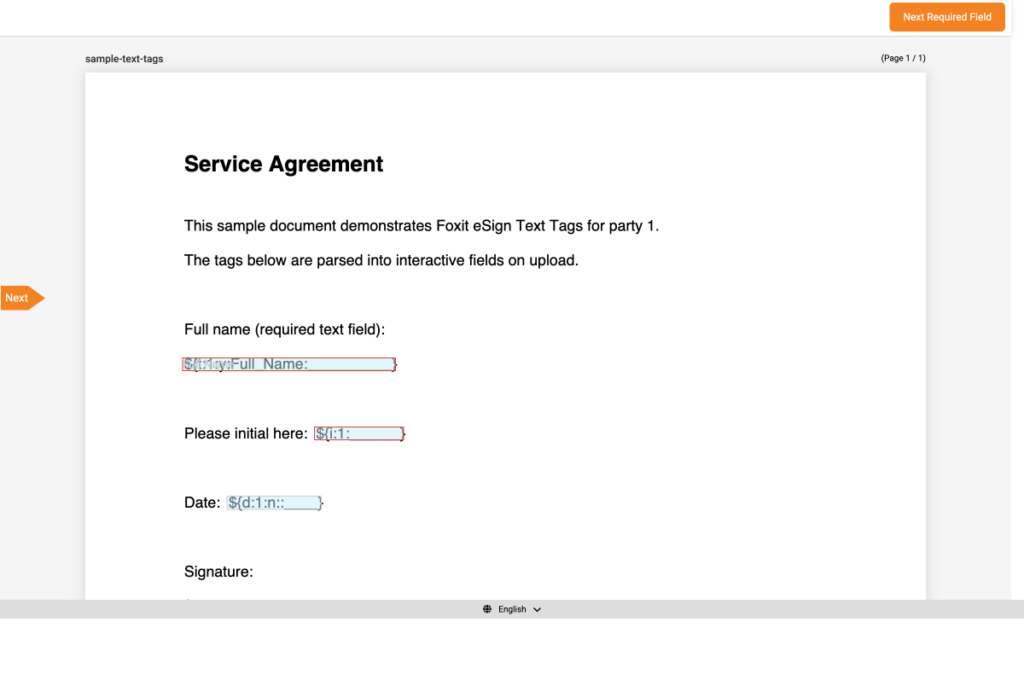
The Foxit eSign embedded signing session, loaded in-app. Text tags in the source PDF are parsed into the interactive Full name, initial, date, and signature fields shown here, with no redirect to an external page.
Signing order control
Setting signInSequence to false on a folder request puts all recipients into parallel mode, while leaving it true enforces the sequence you define. Hybrid flows mix both, so some signers proceed in parallel while others wait on prior steps.
Compliance coverage
Full details live at the Foxit compliance page and the Foxit Trust Center.
Best for development teams that need full embedded-signing control, flexible signer routing, and broad compliance coverage from a single integration, especially in regulated industries.
Watch out for planning your regional endpoint (the instance_url returned at auth) into your configuration rather than hardcoding one.
Getting started with the Foxit eSign API
Three steps take you from zero to your first signed document. The code below runs end to end against the live API.
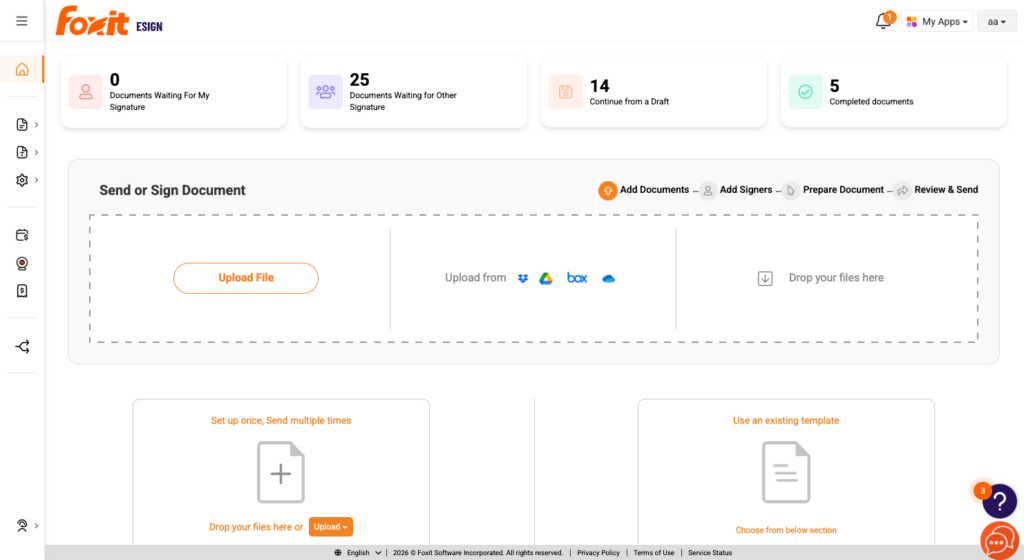
The Foxit eSign dashboard you land on after signing in. The API you are about to call drives the same envelopes shown here.
Step 1. Activate the API tab. Log into your Foxit eSign account, navigate to Settings, and open the API tab. Fill out the form to receive your client_id and client_secret.
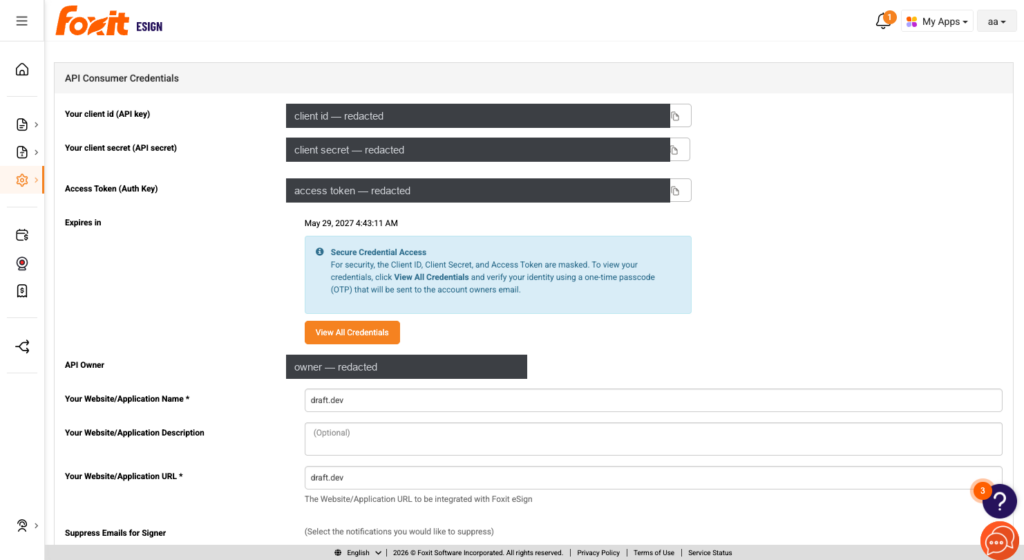
The API Consumer Credentials screen. Foxit masks the client id, secret, and access token by default and requires a one-time passcode to reveal them, which is the credential-handling behavior worth knowing before you build.
Step 2. Obtain a Bearer token. POST to the regional OAuth2 endpoint with a form-encoded body (sending a JSON body returns HTTP 415 Unsupported Media Type). The response includes access_token, token_type, expires_in, and instance_url.
Step 3. Create an envelope and register a webhook. Use the Bearer token in the Authorization header to create an envelope (Foxit calls it a folder) from a source document, then register a webhook targeting the folder_executed (EXECUTED) event to be notified once every party has signed and the document is executed.
The code reads credentials from environment variables. It exchanges credentials for a token, then creates a draft envelope from a sample PDF without emailing anyone.
import os
import requests

# The token endpoint requires a form-encoded body
# (application/x-www-form-urlencoded). Sending a JSON body returns
# HTTP 415 Unsupported Media Type.
TOKEN_URL = "https://na1.foxitesign.foxit.com/api/oauth2/access_token"

# Step 1: Exchange credentials for a Bearer token.
token_response = requests.post(
    TOKEN_URL,
    data={  # use data= (form-encoded), NOT json=
        "grant_type": "client_credentials",
        "client_id": os.environ["FOXIT_ESIGN_CLIENT_ID"],
        "client_secret": os.environ["FOXIT_ESIGN_CLIENT_SECRET"],
        "scope": "read-write",
    },
)
token_response.raise_for_status()
token_data = token_response.json()

access_token = token_data["access_token"]     # Bearer token
instance_url = token_data["instance_url"]      # already a full URL, e.g. https://na1.foxitesign.foxit.com/
base = instance_url.rstrip("/")                # trim trailing slash; do NOT re-add https://

# Step 2: Create an envelope (folder) from a document.
# sendNow=False creates a DRAFT and emails no one.
headers = {
    "Authorization": f"Bearer {access_token}",
    "Content-Type": "application/json",
}
payload = {
    "folderName": "Service Agreement",
    "fileUrls": ["https://your-app.example.com/agreement.pdf"],
    "fileNames": ["agreement.pdf"],
    "sendNow": False,                          # DRAFT; set True to dispatch to signers
    # signInSequence True  = signers proceed in the sequence you define
    # signInSequence False = all signers receive the document in parallel
    "signInSequence": True,
    "parties": [
        {
            "firstName": "Jane",
            "lastName": "Doe",
            "emailId": "[email protected]",
            "sequence": 1,
        }
    ],
}
resp = requests.post(f"{base}/api/folders/createfolder", headers=headers, json=payload)
resp.raise_for_status()
folder_id = resp.json()["folder"]["folderId"]  # the id nests under "folder"
print("Envelope created:", folder_id)
The code above reads your client id and secret from the environment, POSTs them form-encoded to the regional token endpoint, and reads the access_token and instance_url from the response. Because instance_url is already a complete URL, you strip its trailing slash and use it directly rather than prepending a scheme. You then POST to /api/folders/createfolder with the source document, the signing parties, and sendNow set to false so the envelope is created as a draft without notifying anyone, and read the new folder’s id from folder.folderId in the response.
Registering the executed webhook
You register webhooks once in the eSign portal’s API settings, not through the token flow above. Add your endpoint URL and a webhook secret, then enable the events you care about. The screenshot below shows the real configuration screen with folder_executed selected.
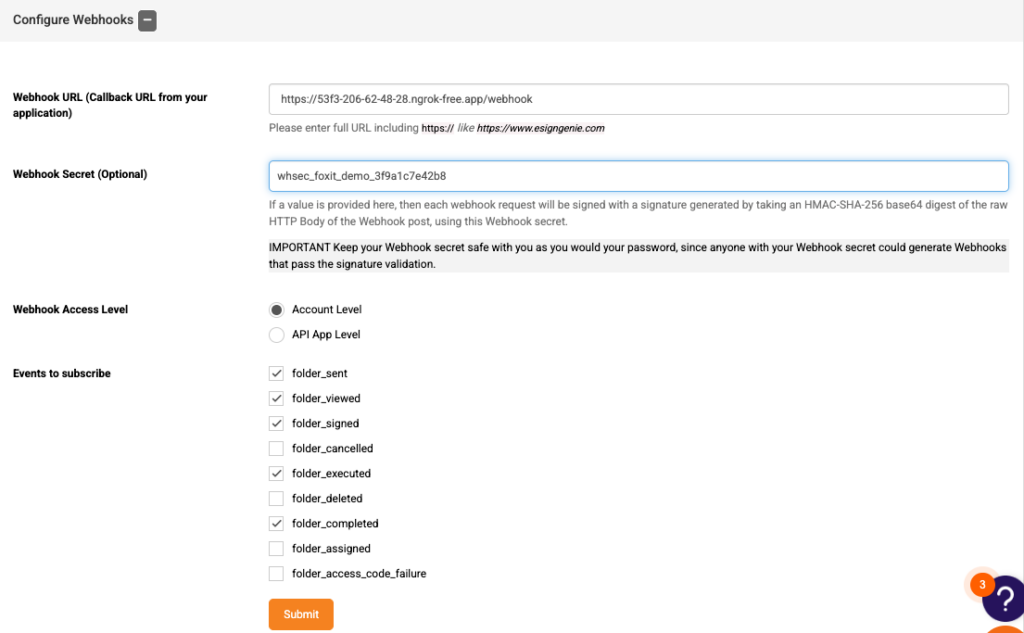
The Configure Webhooks page. Note the nine event checkboxes, folder_executed selected, and the field note confirming each request is signed with a Base64 HMAC-SHA-256 digest of the raw body.
folder_executed fires when all parties have signed and the document reaches the EXECUTED state, which is the point at which the completed, legally binding PDF is ready to archive. Foxit delivers each event as an HTTP POST with the signature appended as a query parameter (?signature=...), where the signature is the Base64-encoded HMAC-SHA-256 of the raw request body keyed with your webhook secret. Recompute that digest on receipt and compare it before you act on the callback.
import base64, hashlib, hmac

def verify_webhook(raw_body: bytes, signature: str, secret: str) -> bool:
    """Return True only if the callback's signature matches the raw body."""
    expected = base64.b64encode(
        hmac.new(secret.encode(), raw_body, hashlib.sha256).digest()
    ).decode()
    return hmac.compare_digest(expected, signature)
The full API reference is at developersguide.foxitesign.foxit.com.
Docusign API FAQ
What is an eSignature API?
An eSignature API lets your application send, track, and complete legally binding signature requests without building a separate signing portal. Your app calls the endpoints to create the workflow, route the document to signers, capture their signatures, and pull the completed, audit-ready record, all without anyone leaving your product.
What are the best DocuSign API alternatives for developers in 2026?
Six strong alternatives worth evaluating are Dropbox Sign (well-documented, fits the Dropbox ecosystem), Adobe Acrobat Sign (enterprise compliance depth), PandaDoc (proposal-to-signature workflows), SignNow (cost-effective at volume), BoldSign (developer-first, clean REST interface), and Foxit eSign (full embedded control and multi-standard compliance across eIDAS, ESIGN, UETA, HIPAA, GDPR, and 21 CFR Part 11).
Does the Foxit eSign API support embedded signing?
Yes. Signing sessions load inside an iframe or web view within your own application, with no redirect to an external Foxit page. You can customize headers and sidebars, and configure where signers land after completing the document. The experience stays inside your product throughout.
What compliance standards does the Foxit eSign API meet?
Foxit eSign meets eIDAS at the AES (Advanced Electronic Signature) and QES (Qualified Electronic Signature) levels (QES requires pairing with a qualified trust service provider). Additional certifications include the ESIGN Act, UETA, HIPAA, GDPR, 21 CFR Part 11, CCPA, FINRA, FERPA, and SOC 2 Type II infrastructure. Full details are at the Foxit compliance page.
How do I get started with the Foxit eSign API?
Create an account at developer-api.foxit.com, activate the API tab in your eSign account settings to receive your client_id and client_secret, then POST to https://na1.foxitesign.foxit.com/api/oauth2/access_token with a form-encoded body to obtain a Bearer token. Use that token in the Authorization header to make your first envelope call.
How does OAuth2 client credentials auth work in the Foxit eSign API?
Your backend POSTs a form-encoded request to the regional token endpoint using your client_id and client_secret. The response returns a Bearer token with a defined expiry and a region-specific instance_url. Every subsequent API call passes that token in the Authorization header, with no session-level user login required at any point.
What webhook events does the Foxit eSign API support?
You register webhooks through the eSign API Settings page and configure them to fire on specific event types, nine in total, spanning sent, viewed, signed, cancelled, executed, deleted, completed, assigned, and access-code-failure. The folder_executed event fires when all parties have completed signing. Foxit signs each webhook POST with an HMAC-SHA-256 digest of the raw body, giving you a verifiable authenticity signal on every inbound notification.
How does Foxit eSign handle parallel and sequential signing flows?
Setting signInSequence to false on a folder request sends the document to all recipients simultaneously. Setting it to true enforces the order you define in the sequence field on each party. Hybrid flows combine both modes, so some signers proceed in parallel while others wait on prior steps, all from a single API call.
Which eSign API is best for regulated industries?
Foxit eSign covers the broadest compliance footprint across eIDAS (AES and QES), HIPAA, GDPR, 21 CFR Part 11, FINRA, FERPA, CCPA, and SOC 2 Type II. Adobe Acrobat Sign also carries strong enterprise certifications relevant to healthcare and finance. Teams in regulated industries should verify current certification status directly with each vendor before committing.
What is the difference between envelope-based and consumption-based eSign pricing?
Envelope-based pricing charges a fixed fee per document sent for signature, which makes costs predictable at low volumes but expensive at scale. Consumption-based pricing ties costs to actual usage metrics (API calls, active users, or data volume), which can reduce spend at high volume but introduces budget variability. Seat-based pricing charges per licensed user regardless of volume, which suits teams with consistent, predictable signing activity.
Picking the right eSign API
The six criteria (embedded signing depth, auth model, webhook event granularity, SDK language coverage, compliance certifications, and pricing transparency) cut the field quickly when you apply them consistently.
Dropbox Sign fits teams in the Dropbox ecosystem who want reliable coverage without high complexity. Adobe Acrobat Sign suits large enterprises with existing Adobe infrastructure and deep compliance footprints. PandaDoc is the right call for proposal-to-signature workflows. SignNow works for cost-sensitive, high-volume signing at scale. BoldSign offers a clean developer experience outside the most heavily regulated industries.
If you need full embedded-signing control, flexible signer routing, and compliance coverage across eIDAS, HIPAA, GDPR, and 21 CFR Part 11 bundled without piecing those certifications together from add-ons, Foxit eSign is worth a close look. Once a folder reaches the EXECUTED state, the completed document carries a full audit trail and signer certificate, which is what you archive as the legal record.
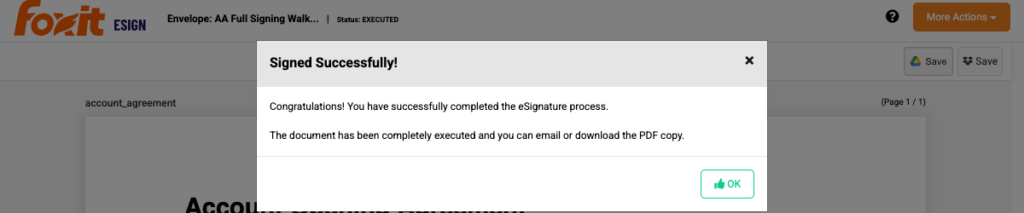
An executed Foxit eSign agreement. The EXECUTED state is the archival point the folder_executed webhook announces.
Visit developer-api.foxit.com to create a free developer account and try the full signature flow with no commitment.
eSignature API: A Developer’s Guide to Adding Signing to Your App
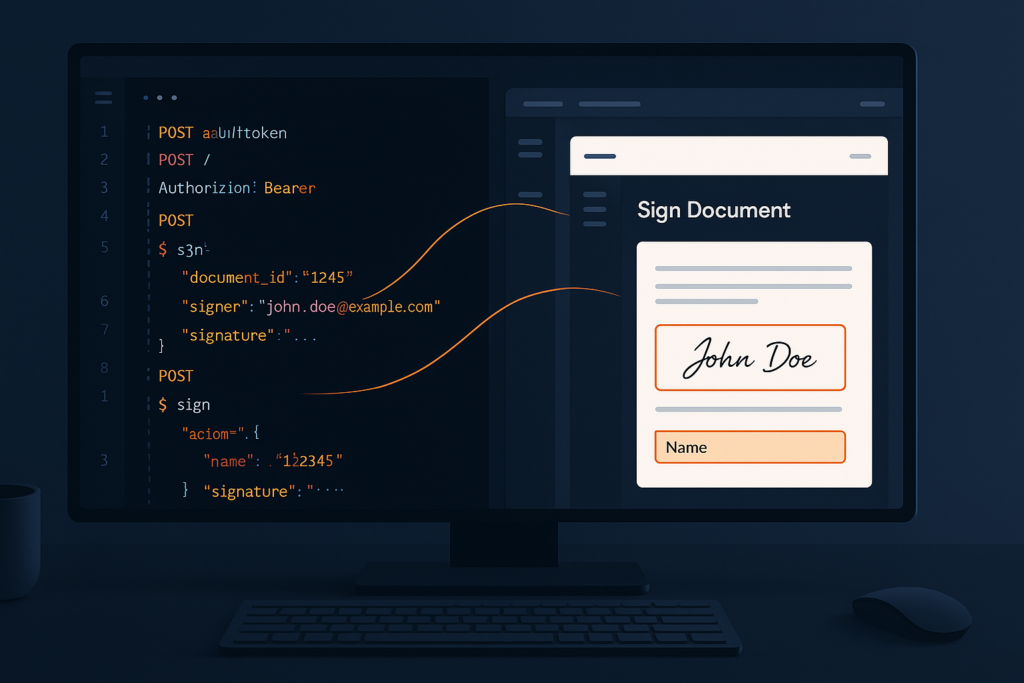
Adding a signing step to your app involves more than it first appears. Authentication, document preparation, session handling, and completion tracking all need to work together. This guide walks through a full esignature API integration with Foxit eSign, from your first authenticated request to a signed, webhook-confirmed document.
Adding a signing step to an existing app sounds straightforward until you try to implement it. Getting a document signed is a simple idea, but the actual API surface, how authentication works, how you mark up a PDF, and how you learn that signing finished all take longer to figure out than they should. This guide walks a complete Foxit eSign API integration from the first authenticated request through to a webhook-confirmed, digitally signed document. Comfort with REST APIs and bearer tokens is enough to follow along.
What an eSignature API is and how signing workflows work
An eSignature API is a REST interface that owns the document-signing lifecycle, covering preparation, delivery, the signing session, and the audit trail. You supply the document and the signers, and the API handles field rendering, identity capture, signature application, and tamper-evident recordkeeping, so none of that infrastructure is yours to build.
The distinction that matters most for app developers is redirect-based versus embedded signing. Redirect-based signing sends the user to a hosted URL to sign and returns them afterwards, which means they leave your product mid-task. Embedded signing renders the session inside your own application, typically in an iframe, so the user never changes context. If signing sits in the middle of an onboarding or checkout flow, embedded keeps that flow intact.
Foxit eSign supports both. The lifecycle you implement runs through five stages, starting with OAuth 2.0 authentication, then PDF preparation with Text Tags, a POST to /esign/api/v1/folders/createfolder that defines signers and mints a session, the signer completing the embedded session, and a folder_executed webhook confirming the document is final.

The five stages this guide implements in order. Each one maps to a section below.
Prerequisites
Signing up for eSign API access is self-serve on the Foxit API Platform — no sales ticket and no waiting for an administrator. The platform provisions a trial eSign account for you and manages its credentials, so the whole setup is a short walkthrough:
- Create and sign in to your Foxit API Platform account. You need an active Foxit API plan and a complete CAS profile — first name, last name, email address, and company name (a company address is required for eSign provisioning). Your eSign account is provisioned from those profile details, so complete them before you start.
- Open the Dashboard and select Get started with eSign in the Dashboard header. That takes you to the eSign activation page.
- Choose your document-storage region. The activation card preselects United States, with European Union and Canada as alternatives. Select Activate with [region] storage. Confirm the region before activating: once the remote account exists, the region is locked, and changing it later means submitting a case with Foxit Support.
- Wait for provisioning to complete. You may see “Creating your eSign account” and then “Confirming your eSign account” — the second is a reliability check that reconciles ambiguous creation results, so let it finish instead of retrying activation.
- Confirm eSign is ready. A successful activation displays “eSign is ready”, your eSign company number, and the selected region. The platform manages the API account and its credentials, and the same unified
client_id/client_secretyou use for PDF Services also authenticate eSign API, Document Generation, and Embed API — there is no separate eSign key pair to generate. If credential retrieval is still pending or failed, use Resume credentials or Retry credentials on the page; the first-call button stays disabled until credentials are ready. - (Optional but worth it) Run the sample request on the activation page. It uses your profile’s name and email as the first signing party, sends a Base64-encoded one-page contract, adds Signer Name, Today’s Date, Signature, and Date Signed fields, creates a draft with sending disabled, and returns an embedded sending session URL — a quick end-to-end check that everything is wired up. The button switches to Running and then reports “Sample draft created. The embedded sending session is ready.”
Two things to know before you build: your provisioned account is an eSign Business trial that lasts 30 days and starts in TEST mode, so every envelope carries a watermark. Moving the account to Production mode is a Sales/Operations step performed in Foxit Monitor, not something the API can do.
Beyond the account, the rest of the prerequisites are lightweight:
- Python 3.8+ with pip and a venv, for the webhook handler later in this guide.
- Flask and requests for the sample code.
- curl for the token exchange, and ngrok or any tunnel that gives your local webhook endpoint a public HTTPS URL.
- A code editor, VS Code with the Python extension being a reasonable default alongside PyCharm.
- A tagged sample PDF, so you do not have to author one. This guide uses agreement-signable.pdf, which already carries Text Tags for a single signer.
Scaffold the workspace in one shot:
mkdir foxit-esign && cd foxit-esign
python3 -m venv .venv && source .venv/bin/activate
pip install flask requests
export ESIGN_HOST="https://na1.foxitesign.foxit.com"export ESIGN_CLIENT_ID="your_api_key"
export ESIGN_CLIENT_SECRET="your_api_secret"
export WEBHOOK_SECRET="your_webhook_secret"
Step 1: Authenticate with the Foxit eSign API
The platform provisions your eSign account and manages its credentials, and that single pair is shared across eSign API, PDF Services, Document Generation, and Embed API. No bearer token, no client_credentials grant, no expires_in to watch.
The quickest way to prove a credential pair works is a minimal folder creation — the same /esign/api/v1/folders/createfolder endpoint Step 3 explains field by field:
curl -X POST "$ESIGN_HOST/esign/api/v1/folders/createfolder" \
  -H "client_id: $ESIGN_CLIENT_ID" \
  -H "client_secret: $ESIGN_CLIENT_SECRET" \
  -H "Content-Type: application/json" \
  -d '{
    "folderName": "Auth check",
    "inputType": "url",
    "fileUrls": ["https://github.com/lucienchemaly/foxit-demo-templates/raw/main/esign/agreement-signable.pdf"],
    "fileNames": ["agreement.pdf"],
    "parties": [
      {
        "firstName": "Jane",
        "lastName": "Smith",
        "emailId": "[email protected]",
        "permission": "FILL_FIELDS_AND_SIGN",
        "sequence": 1
      }
    ],
    "processTextTags": false,
    "processAcroFields": false,
    "createEmbeddedSigningSession": false,
    "createEmbeddedSendingSession": true,
    "sendNow": false
  }'
A valid credential pair returns JSON with a folder object carrying folderId and folderStatus (DRAFT here, since sendNow is false), so the response doubles as your auth check — a rejected pair comes back as an error before any folder exists. Send the same two headers on every subsequent request. There is nothing to mint or refresh like an OAuth token; if the platform ever flags the stored credentials as stale, refresh them from the activation page with Resume credentials or Retry credentials. And because eSign shares the PDF Services credential pair, the two integrations are interchangeable — one pair of credentials covers both.
Step 2: Prepare a document and define signature fields with Text Tags
Foxit eSign reads field definitions out of the PDF itself at upload time. You embed them as Text Tags, plain-text strings placed where each field belongs, and the API converts them into interactive fields on ingest.
The syntax is ${fieldtype:party_number:required:field_name:width}, where y marks a field required and n marks it optional, the party number maps to a signer’s sequence, and width is expressed as underscores.
${signfield:1:y:____}                 # required signature, party 1
${datefield:1:y::____}                # required date, party 1
${i:1:______}                         # initials field, party 1
${t:1:y:Full_Name:__________}         # required text field, party 1, named "Full_Name"
${signfield:2:y:____}                 # required signature, party 2
Each tag names a type, either in full or by its short alias. The supported set covers signfield (s), initialfield (i), datefield (d), textfield (t), textboxfield (tb), checkboxfield (c), radiobuttonfield (rb), securedfield (sc), attachmentfield (a), imagefield (img), accept (ab), decline (db), payfield (pf), and formulafield (ff). Author them in lowercase to match the documented syntax.
Express width as underscores and never as a literal space, because a space stops the tag from being recognized. A tag written ${s:1: } renders in the signing UI as plain ${s:1: } text with no field attached, while ${signfield:1:y:____} becomes a real signature field. That failure is silent, so the create call still succeeds and you only notice when a signer has nothing to sign.
Two preparation details save support tickets later. Foxit eSign converts tags to fields but does not delete the tag text, so set the tag’s text color to match the page background if you do not want signers reading raw ${...} strings. And paste tags through a plain-text editor first, because smart-quote autocorrect in Word or Google Docs silently swaps straight ASCII characters for typographic ones and tag parsing then fails without an error.
If you would rather not tag a document by hand for a first run, agreement-signable.pdf is already prepared and hosted at a public URL you can pass straight to the next step.
Step 3: Send the document and mint an embedded session
One call to /esign/api/v1/folders/createfolder submits the document, defines the signers, and, when you ask for it, returns a ready-to-render signing URL. Foxit calls the signing container a folder rather than an envelope.
{
  "folderName": "Customer Agreement - Acme Corp",
  "fileUrls": ["https://github.com/lucienchemaly/foxit-demo-templates/raw/main/esign/agreement-signable.pdf"],
  "fileNames": ["agreement.pdf"],
  "parties": [
    {
      "firstName": "Jane",
      "lastName": "Smith",
      "emailId": "[email protected]",
      "permission": "FILL_FIELDS_AND_SIGN",
      "sequence": 1
    }
  ],
  "processTextTags": true,
  "createEmbeddedSigningSession": true,
  "embeddedSignersEmailIds": ["[email protected]"],
  "sendNow": false
}
In this body you point the API at the tagged PDF with fileUrls and give it a display name through fileNames, define the single signer in parties with firstName, lastName, emailId, the FILL_FIELDS_AND_SIGN permission and a signing sequence, then set processTextTags to true so the embedded tags become real fields. Asking for createEmbeddedSigningSession and naming the signer in embeddedSignersEmailIds returns a session URL in the same response, and sendNow set to false keeps Foxit from emailing an invitation, which is what you want while testing.
One nuance to expect here. sendNow: false on its own produces a DRAFT folder, but pairing it with createEmbeddedSigningSession returns folderStatus of SHARED, since the folder has to be live for the session URL to open. No email goes out either way, so the flag still suppresses the invitation, and the status you see just reflects that the document is now signable. To attach the file as bytes instead of a URL, send base64FileString as an array together with inputType set to "base64".
The response nests the folder identifier at folder.folderId and carries an embeddedSigningSessions array. Each entry holds emailIdOfSigner, the raw embeddedToken, and the renderable embeddedSessionURL, which follows this shape:
https://{HOST_NAME}/embedded/embeddedsign?eetid={URL-ENCODED-EMBEDDED-TOKEN}
Three behaviors are worth designing around before you ship. Omitting embeddedSignersEmailIds returns email id of embedded signer(s) not submitted, so always list embedded signers explicitly. Every party number used in a Text Tag needs a matching entry in parties, because a sendNow: true create still reports success while silently dropping the fields of a party that is not listed, which means a mandatory signature is never routed. And for a multi-party document where everyone signs in your app, createEmbeddedSigningSessionForAllParties set to true covers all recipients rather than naming them one by one.
To dispatch a draft later, POST to /api/folders/sendDraftFolder.
Folder state moves through DRAFT, SHARED, COMPLETED, and finally EXECUTED once the digital signature is applied. A run of this guide’s single-signer flow produced exactly that path, with the activity log labelling the creation event CREATED and then recording Envelope viewed, Jane Smith signed this folder at COMPLETED, and Document(s) successfully executed at EXECUTED. PARTIALLY SIGNED appears only when a folder has more than one party and some but not all of them have signed, so you will not see it on a single-signer document.
Step 4: Render the signing session in your app
Load the embeddedSessionURL in an iframe. The sandbox attribute needs a specific minimum set of permissions, and trimming it is a common way to break the signing UI with no visible error.
<iframe
  id="signing-session"
  src="PASTE_EMBEDDED_SESSION_URL_HERE"
  width="100%"
  height="780px"
  style="border: none;"
  sandbox="allow-scripts allow-same-origin allow-forms allow-popups allow-top-navigation"
></iframe>
In this markup the src receives the embeddedSessionURL from the createfolder response, and the five sandbox permissions are the minimum the signing UI needs. Removing allow-popups or allow-top-navigation breaks the flow in ways that surface no obvious error, so keep all five unless you have tested a reduced set end to end. Session URLs are short-lived, so generate one when the user is ready to sign rather than caching it, and request a fresh one per signer through /esign/api/v1/embedded/regenerateEmbeddedSigningSession when a session goes stale.
To check the flow before wiring it into your own UI, download the ready-to-run iFrame test page, open it in a browser, paste your embeddedSessionURL into the input, and load it. A correctly tagged document renders with active signing controls.
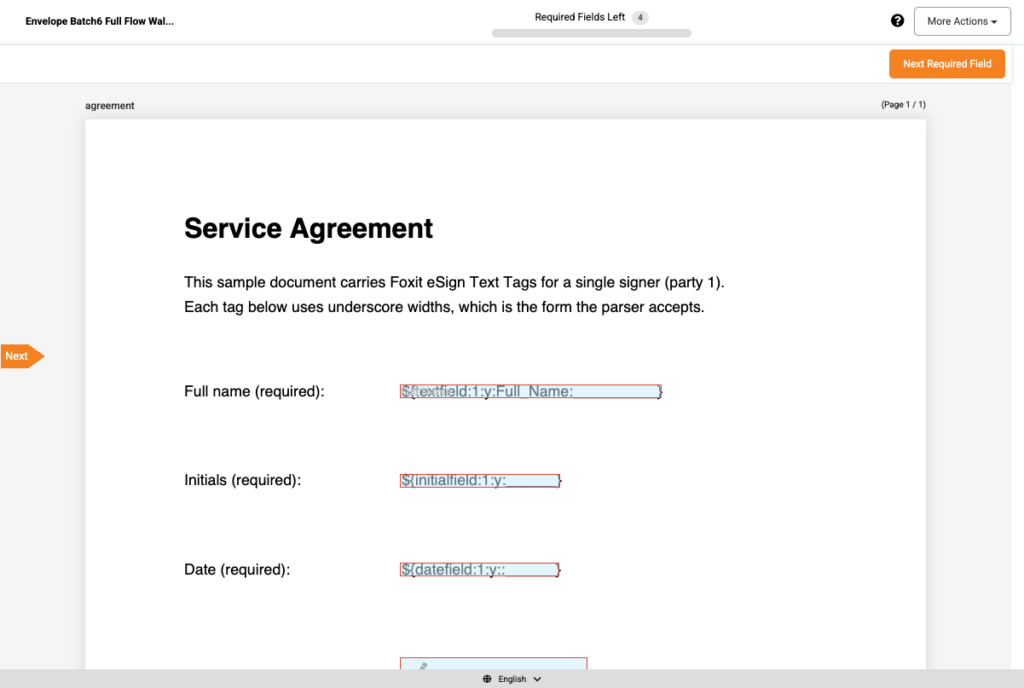
A real session opened from the embeddedSessionURL this guide’s request returns. All four tags in the sample became required fields, which is what the counter is reporting. The raw tag text still shows through each box, which is exactly why you color it to match the page background before shipping.
Step 5: Confirm completion with webhooks
Polling for completion wastes requests and adds latency. Register a webhook instead and Foxit eSign posts to your endpoint as each signing event happens.
Registration lives on the eSign portal’s API settings page at /consumer/consumerdetails, under Configure Webhooks, where you set the callback URL, a webhook secret, and the events you want. That page is visible only to the account owner, so an admin-level user will not find it. Your endpoint has to be reachable over public HTTPS.
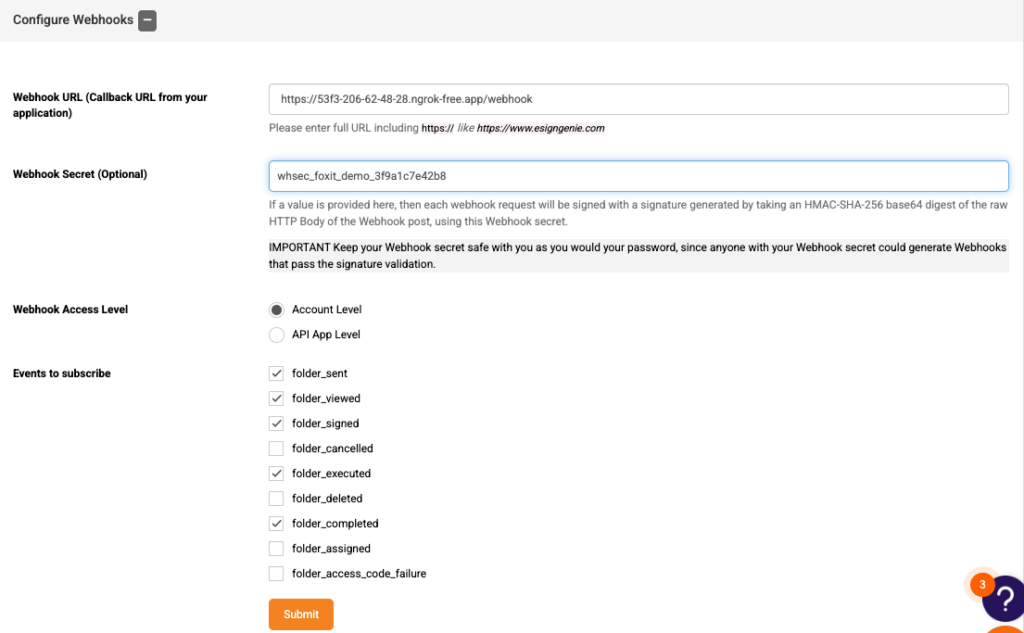
The owner-only webhook settings. The event checkboxes control which callbacks reach your endpoint.
The events available are folder_sent, folder_viewed, folder_signed, folder_cancelled, folder_executed, folder_deleted, folder_completed, folder_assigned, and folder_access_code_failure. In practice folder_viewed, folder_signed, folder_completed, and folder_executed are the ones that fire on an API-dispatched folder.
The event to build on is folder_executed. folder_completed fires once every party has signed, but folder_executed fires after Foxit applies the digital signature and locks the audit trail, so it is the point at which a download gives you the final document.
Foxit signs every callback. It delivers the POST as <your-url>?signature=<base64>, where the signature is the base64 of an HMAC-SHA-256 over the raw request body keyed with your webhook secret. Verify it against the unparsed bytes, since re-serializing the JSON changes whitespace or key order and breaks the comparison.
import base64
import hashlib
import hmac
import os

from flask import Flask, request, jsonify

app = Flask(__name__)
WEBHOOK_SECRET = os.environ["WEBHOOK_SECRET"]


def verify_signature(raw_body: bytes, signature: str) -> bool:
    expected = base64.b64encode(
        hmac.new(WEBHOOK_SECRET.encode(), raw_body, hashlib.sha256).digest()
    ).decode()
    return hmac.compare_digest(expected, signature)


@app.route("/webhooks/esign", methods=["POST"])
def handle_esign_event():
    raw_body = request.get_data()
    if not verify_signature(raw_body, request.args.get("signature", "")):
        return jsonify({"error": "invalid signature"}), 403

    payload = request.get_json(silent=True) or {}
    event_name = payload.get("event_name")
    folder = payload.get("data", {}).get("folder", {})

    if event_name == "folder_executed":
        # The document is final here. Archive it, update your record, notify the user.
        app.logger.info("Signing finished for folder %s", folder.get("folderId"))

    return jsonify({"status": "received"}), 200
In this handler you read the unparsed body first, recompute the HMAC over those exact bytes with your webhook secret, and compare it against the signature query parameter using hmac.compare_digest so the check is not timing-dependent. A mismatch returns 403 before any business logic runs, which stops a spoofed POST to your public URL from triggging an archive. Only after the signature passes do you parse the JSON, read event_name, and branch on folder_executed to run downstream work, returning 200 so Foxit records the delivery as successful. A ready-to-run version of this receiver lives at webhook_receiver.py in the demo repo.
Test the whole path against a draft. Create the folder with sendNow set to false, dispatch it, sign in the embedded session, and watch the events arrive. Once the signer finishes, the session redirects to a result URL carrying event=signing_success, and the document reaches EXECUTED within a few seconds.
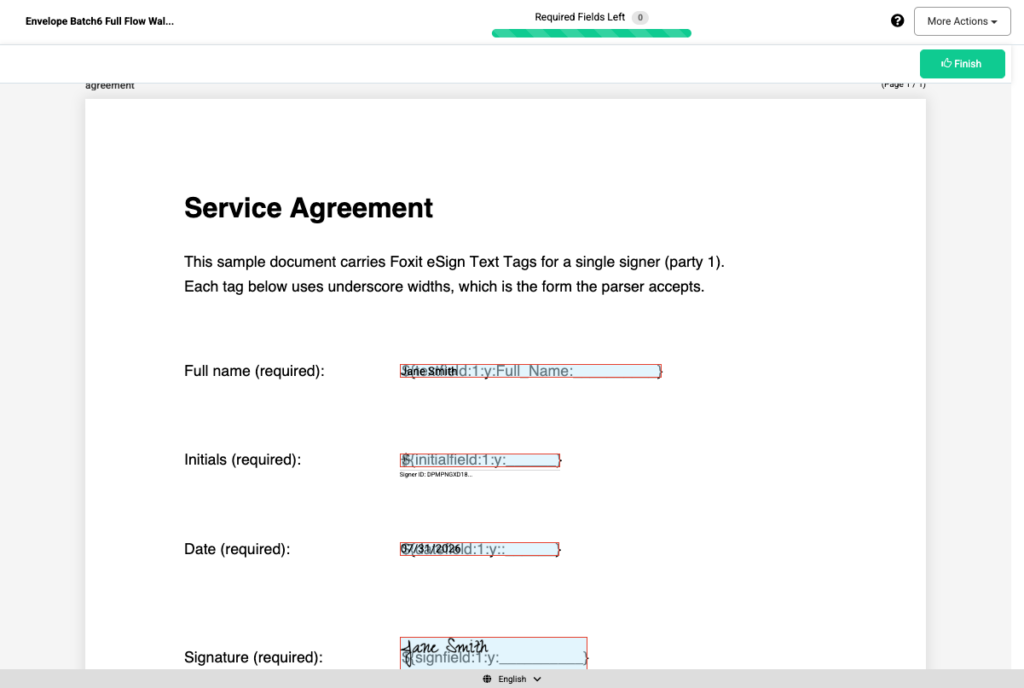
The session once every field is filled. The counter reads zero and Finish activates, which is the state that produces folder_completed and then folder_executed.
Step 6: Retrieve the executed document and its audit trail
With folder_executed in hand, pull the final PDF. The download takes the folder id as a query parameter.
curl -o executed.pdf \
  "$ESIGN_HOST/api/folders/download?folderId=35117696" \
  -H "Authorization: Bearer $ACCESS_TOKEN"
The response streams the executed PDF, which arrives with a content type of application/octet-stream rather than application/pdf, so write the bytes to a file rather than sniffing the header. The returned document carries the filled field values and the signature certificate, so a text extraction of it contains the signer’s typed name, the date, and the per-signer Signer ID recorded on the certificate page.
For the audit trail itself, GET /api/folders/viewActivityHistory?folderId={id} returns a details object holding the folder metadata plus an activities array, where each entry carries an activity description and the folderStatus at that moment. That endpoint is GET-only and only returns data once the folder has been shared, so a pure DRAFT folder reports nothing useful.
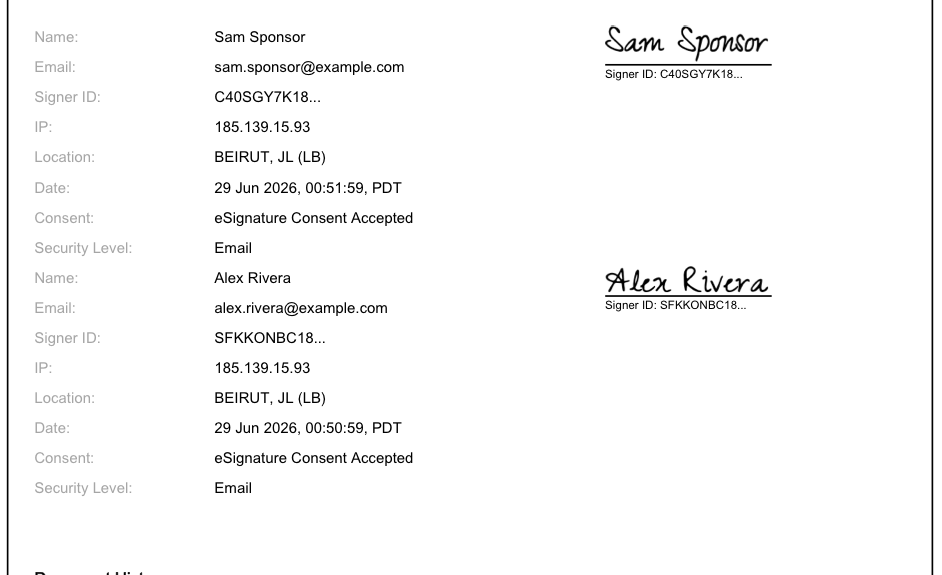
The signature certificate attached to a document once folder_executed has fired. Each signer’s adopted signature sits beside the identity record Foxit captured, which is the tamper-evident audit trail you are archiving alongside the PDF.
Common mistakes
- Dropping the
/api/prefix : every eSign path sits under/api/, so it is/api/folders/createfolder, not/folders/createfolder. - snake_case request fields : the body is camelCase.
folderName,fileUrls,emailId, andsendNowwork, whilefolder_name,document_url,email, andsend_nowdo not. - Omitting
processTextTags: without it the tags stay inert text, the signer sees raw${...}strings, and they can finish without signing anything. - A tag party with no matching
partiesentry : the create returns success and that party’s fields disappear silently, so their signature is never collected. - Skipping signature verification : a public webhook URL that acts on any POST is a spoofing target. Verify the HMAC before you touch the payload.
- Archiving on
folder_completed: that fires before the digital signature is applied. Wait forfolder_executed. - Caching an
embeddedSessionURL: sessions expire. Mint one when the signer is ready, and regenerate when needed. - Trimming the iframe
sandboxlist : removingallow-popupsorallow-top-navigationbreaks signing with no error message. - Smart quotes or a space inside a tag : both stop tag recognition. Use straight ASCII and underscores.
- Reusing PDF Services credentials : eSign has its own portal, host, and key pair.
eSignature API FAQ
What is an eSignature API?
A REST interface that handles the document-signing lifecycle, covering preparation, delivery, the signing session, and the audit trail, so your app makes calls rather than building signing infrastructure.
What is embedded signing and why does it improve the user experience?
Embedded signing renders the session inside your own application instead of redirecting to a hosted page, so the signer finishes without leaving your product. That matters most when signing sits inside a flow you do not want to interrupt, like onboarding or checkout.
How do Text Tags relate to the parties in the API call?
The party number in a tag maps to a signer’s sequence in the parties array, so ${s:1: } is signed by the party with sequence: 1. Keeping those aligned is the difference between fields routing correctly and vanishing silently.
What is the difference between folder_completed and folder_executed?
folder_completed fires when all parties have signed. folder_executed fires after Foxit applies the digital signature and locks the audit trail, which is why downstream archiving should trigger on folder_executed.
How do I verify a webhook actually came from Foxit?
Recompute a base64 HMAC-SHA-256 of the raw request body using your webhook secret and compare it with the signature query parameter. Verify against raw bytes, never re-serialized JSON.
Can one folder hold several documents?
Yes. Pass additional entries in fileUrls with matching fileNames. Each document carries its own Text Tags, and party assignments stay consistent across the folder.
Do I need a paid plan to build this?
No. The free tier gives you credentials and lets you run the full flow, and no credit card is required to create the account.
Can I review a document before it reaches signers?
Yes. Create it with sendNow set to false for a DRAFT folder, inspect it in the eSign dashboard, then dispatch with /api/folders/sendDraftFolder.
Wrapping up
That is the full path for an eSignature API integration. Authenticate with the client_credentials grant, prepare a PDF with Text Tags, create the folder with processTextTags and an embedded session, render the returned embeddedSessionURL in an iframe, and act on a signature-verified folder_executed webhook.
The same shape extends to multi-signer approval chains, CRM-triggered signing when a deal closes, and template-based documents where fields arrive pre-filled from your own data. Those build on the pieces already in place rather than replacing them.
Ready to build? Create a free account (no credit card required) at account.foxit.com/site/sign-up, generate your API Key and Secret from the API tab, and run the token call above against agreement-signable.pdf to see a session URL come back.
Build a CRM-Triggered PDF Generation and eSign Workflow in Power Automate with Foxit’s REST APIs
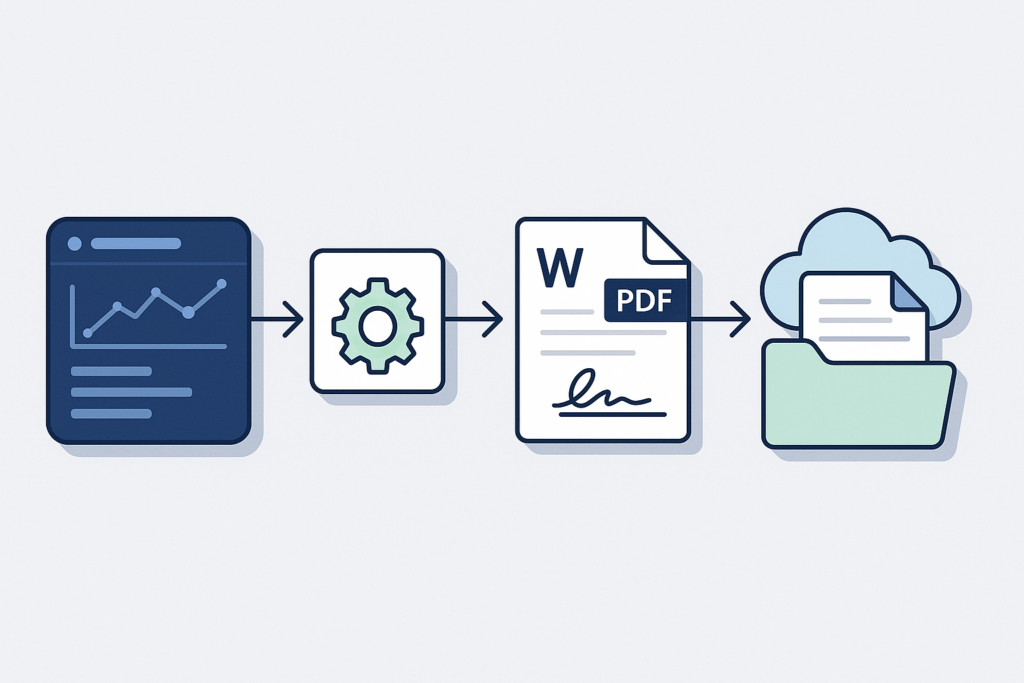
This guide shows how to trigger a Word-to-PDF contract from a closed CRM deal, route it for signature through Foxit’s eSign API, and archive the signed copy automatically, using nothing but HTTP actions and a webhook.
Most Power Automate document tutorials stop at a SharePoint file move or an AI Builder extraction, and the ones that touch signatures assume a native connector that does not exist for a headless, API-first pipeline. The gap is the full chain, where a CRM deal closes, a contract is generated from a Word template, the PDF is routed for signature, and the signed copy is archived, with no manual export and no polling. This article builds that pipeline in Power Automate using the HTTP action to call Foxit’s REST endpoints directly, which is the same pattern that carries over to n8n, Zapier, or any orchestrator that can make an HTTP request.
Foxit exposes two REST APIs that chain cleanly for this. The Document Generation API takes a base64-encoded Word template plus a JSON payload and returns a base64 PDF, and the eSign API handles the signing lifecycle behind an OAuth2 token. The base64 PDF from generation drops straight into the eSign upload call, so the handoff stays inside one flow with no SDK to install and no desktop agent. This Power Automate Foxit API integration walks the two hosts and their two auth models, the document generation call, the send-for-signature call with embedded signature fields, and a second flow that receives Foxit’s webhook and archives the executed document.
Prerequisites
Power Automate runs in the browser, so there is no local runtime to install. What you need are the right accounts and one sample file.
A Power Automate account with the HTTP action : the HTTP action is a premium connector, so you need a per-user or per-flow premium license. This is the one paid dependency in the tutorial. On the free Microsoft 365 tier you will hit a wall at the first HTTP action, so confirm the plan before you start.
A Foxit Developer account : create one at account.foxit.com/site/sign-up and activate the free Developer plan, which includes 500 credits per year with no credit card. From the APIs Dashboard, copy the Document Generation Client ID and Secret, and separately the eSign Client ID and Secret. These are two different credential pairs for two different APIs.
A CRM that can trigger a flow : this article uses the Salesforce connector as the example. Any CRM with a Power Automate connector, or any system that can POST to a webhook URL, works the same way.
The sample contract template : download contract_signing.docx so you do not have to author one. It already carries both Document Generation merge tags and eSign signature tags, which is what makes the two-API handoff work.
A REST client : Postman or curl, to test each Foxit call in isolation before wiring it into a flow.
Store both Foxit credential pairs in the Power Automate secure store or as environment variables in your solution, never pasted as literals into an action, so they do not travel in exported flow definitions.
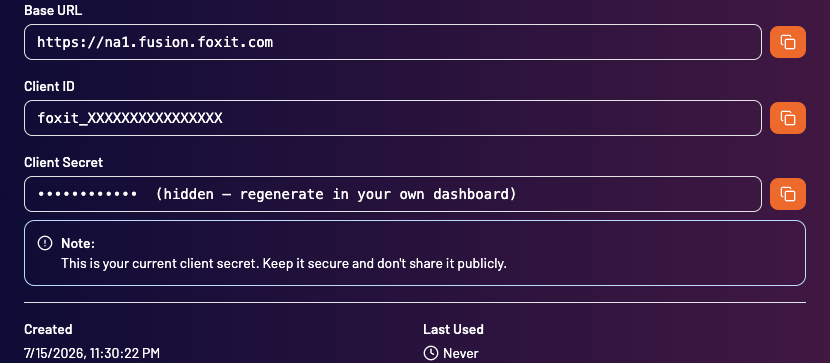
The APIs Dashboard is where you retrieve the Client ID and Secret. Document Generation and eSign each have their own pair.
How the Power Automate Foxit API Integration Works: Two APIs, Two Hosts, Two Flows
The pipeline has four stages. A CRM Closed Won event triggers document generation, the generated PDF is sent for signature, and the executed document is archived once every party has signed.
Salesforce: Opportunity → Closed Won
        │
        ▼
HTTP: POST GenerateDocumentBase64   (na1.fusion.foxit.com)   → base64 PDF
        │
        ▼
HTTP: POST createfolder             (na1.foxitesign.foxit.com) → folderId, email sent
        │
   … signer signs (async) …
        ▼
Flow 2: When a HTTP request is received  <- Foxit webhook (folder_executed)
        │
        ▼
HTTP: GET download → OneDrive: Create file
Power Automate owns orchestration and control flow. Foxit owns document rendering and the signature lifecycle. The single most common mistake in this integration is treating the two Foxit products as one, so keep them separate from the start. Document Generation runs on https://na1.fusion.foxit.com and authenticates with lowercase client_id and client_secret request headers. eSign runs on https://na1.foxitesign.foxit.com and authenticates with an OAuth 2.0 bearer token obtained from its own credential pair. They do not share credentials or a portal.
The work also splits into two flows for a reason. Generation and sending are synchronous, so they belong in one flow that runs when the deal closes. Signing completes minutes or days later, so a second flow triggered by Foxit’s webhook handles the archive step. That separation is what removes any polling from the design.
Here is the main flow built in the Power Automate designer, with the four HTTP actions chained after the trigger.
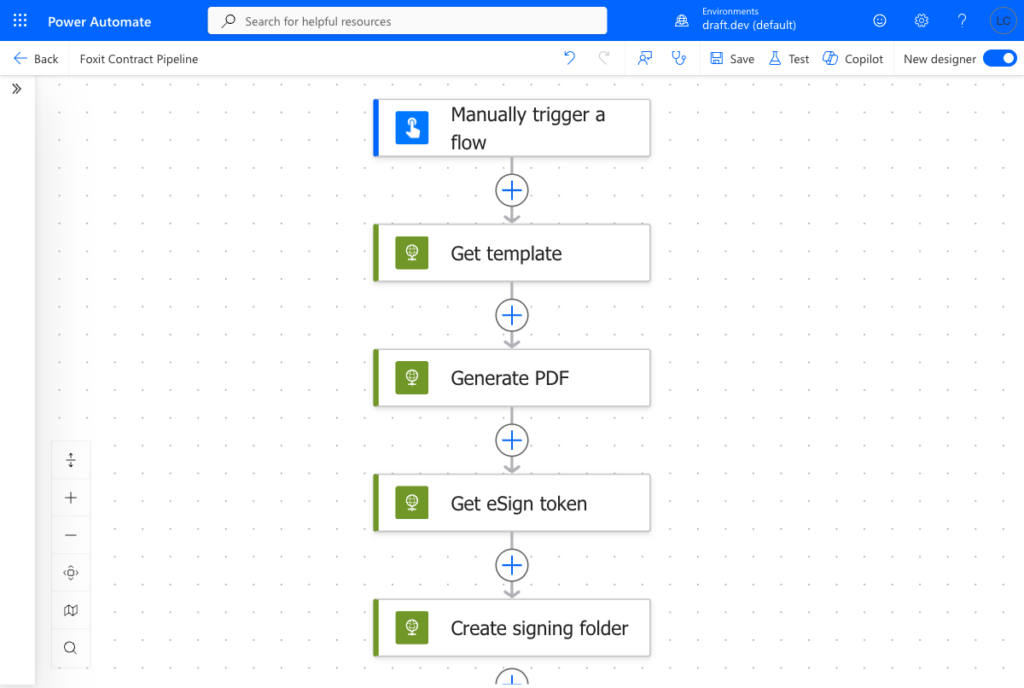
The four HTTP actions in order. This build uses a manual trigger so the flow runs on demand while you test; in production the Salesforce trigger from Step 1 takes its place as the entry point, and nothing downstream changes.
Step 1: CRM Trigger, Firing the Flow on a Closed Deal
Create an automated cloud flow and choose the Salesforce trigger for a created or modified record, pointing it at the Opportunity object. Add a condition so the flow only proceeds when the Stage equals Closed Won, which keeps every mid-pipeline edit from generating a contract.
Map the CRM fields the contract needs. For the sample template, that is the client name, the contract date, the deal value, and the signer’s name and email. Read them from the trigger output with expressions like triggerOutputs()?['body/Account_Name'] and store each in a variable or reference it inline, so the next two steps can assemble their payloads cleanly.
This step is swappable. Any CRM with a Power Automate connector, or any system that can POST JSON to a Power Automate HTTP-request trigger, drops in here without touching the Foxit calls that follow. If you use HubSpot or Dynamics 365, only the trigger and field paths change, so the rest of this tutorial stays identical.
Step 2: Generate the Contract PDF with GenerateDocumentBase64
The contract_signing.docx template drives this step. It contains Document Generation merge tags for the scalar fields and a table loop for line items, using Foxit’s {{ }} syntax:
{{clientName}}
{{contractDate \@ MM/dd/yyyy}}
{{dealValue \# "$#,##0.00"}}

{{TableStart:lineItems}} {{description}}   {{amount}} {{TableEnd:lineItems}}
The \@ switch formats a date and the \# switch formats a currency value, so you can pass a raw ISO date and a plain number and let the template render them. The {{TableStart:lineItems}} and {{TableEnd:lineItems}} tokens sit in a single Word table row and repeat that row for each object in the lineItems array.
Before the flow can send the template, it needs the file as a base64 string. The build here gets it with an HTTP GET action named Get template, pointed at the raw contract_signing.docx URL, and base64-encodes the response with the base64() expression. For a template you maintain yourself, store it in OneDrive or SharePoint and use a Get file content action instead of the GET. Then add a second HTTP action named Generate PDF, set to POST https://na1.fusion.foxit.com/document-generation/api/GenerateDocumentBase64 with client_id and client_secret headers and this JSON body:
{
  "base64FileString": "@{base64(body('Get_template'))}",
  "documentValues": {
    "clientName": "@{variables('clientName')}",
    "contractDate": "2026-07-17",
    "dealValue": 48500,
    "lineItems": [
      { "description": "Platform license (annual)", "amount": "$36,000.00" },
      { "description": "Onboarding and training", "amount": "$12,500.00" }
    ]
  },
  "outputFormat": "pdf"
}
In this code, you send the base64-encoded template as base64FileString, pass the CRM-sourced fields as documentValues whose keys match the template tags exactly, and request a PDF with outputFormat set to the lowercase "pdf". The keys clientName, dealValue, and the lineItems array with its description and amount fields have to match the tag names in the Word file, since a mismatch leaves the tag unrendered rather than raising an error. The call is synchronous and returns HTTP 200 with a JSON response containing message, fileExtension, and base64FileString, where base64FileString is the rendered PDF as a base64 string.
The call is synchronous, so there is no task to poll and no status to check, and the generated contract is available immediately. Reference the rendered PDF in the next step directly with the expression body('Generate_PDF')?['base64FileString'], or add a Parse JSON action first if you prefer typed outputs. When you need the raw bytes rather than the string, for archiving or a file action, convert with the base64ToBinary() expression, one of the Workflow Definition Language conversion functions.
One limit to plan for is the upload size. Document Generation rejects .docx payloads larger than 4 MB after base64 encoding, which is roughly a 3 MB raw file, and the limit is not surfaced in a friendly error. If you hit it, compress images through Word’s Picture Format tools, drop embedded fonts and OLE objects, and split oversized templates. The sample here is about 37 KB, so first runs stay well clear of the cap. For template authoring detail and common payload errors, Foxit’s Document Generation API quickstart is the reference.
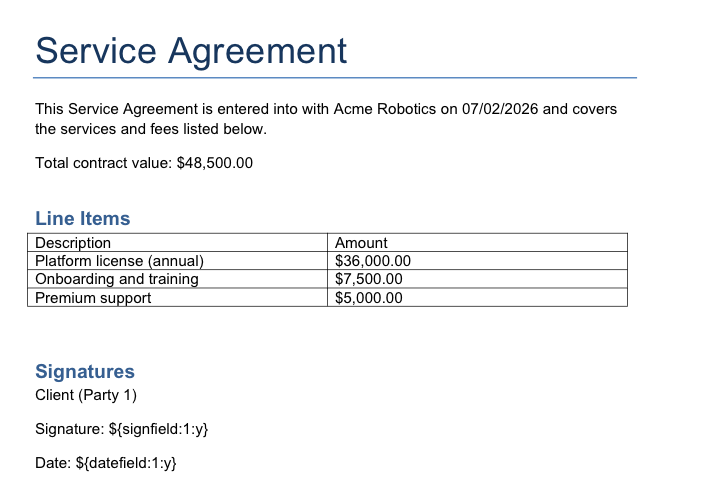
The generated contract. The signature and date fields at the bottom come from the eSign Text Tags embedded in the same template, ready for Step 3.
Step 3: Send for Signature with OAuth2 and createfolder
The eSign API needs a bearer token first. Add an HTTP action that POSTs to https://na1.foxitesign.foxit.com/api/oauth2/access_token with content type application/x-www-form-urlencoded and this body:
grant_type=client_credentials&client_id=YOUR_ESIGN_CLIENT_ID&client_secret=YOUR_ESIGN_CLIENT_SECRET&scope=read-writeName this action Get eSign token. Its JSON response carries access_token, token_type set to bearer, expires_in, and instance_url, and you reference the token in the next call as body('Get_eSign_token')?['access_token']. This is the client-credentials grant, which fits a server-to-server flow where no human is present to log in.
The signature fields are already defined in the template. contract_signing.docx carries two eSign Text Tags, ${signfield:1:y} and ${datefield:1:y}, which follow the ${fieldtype:party:mandatory} syntax. Here both are mandatory fields assigned to party 1, the client who signs. Because the tags live in the Word file, the PDF that Document Generation produced in Step 2 already has a signature and date field in place, so there is no manual field placement after generation. Keep two rules in mind when you author your own tags. Replace any space inside a tag with an underscore, since a literal space breaks tag recognition, and set the tag text color to match the document background so the tokens do not show in the final PDF.
Now add the send action, an HTTP action named Create signing folder, set to POST https://na1.foxitesign.foxit.com/api/folders/createfolder with an Authorization: Bearer @{body('Get_eSign_token')?['access_token']} header and this body:
{
  "folderName": "Acme Corp Contract",
  "inputType": "base64",
  "base64FileString": ["@{body('Generate_PDF')?['base64FileString']}"],
  "fileNames": ["contract_signing.pdf"],
  "parties": [
    {
      "firstName": "Jordan",
      "lastName": "Lee",
      "emailId": "[email protected]",
      "permission": "FILL_FIELDS_AND_SIGN",
      "sequence": 1
    }
  ],
  "processTextTags": true,
  "sendNow": true
}
In this code, you attach the Step 2 PDF by passing it as the single element of the base64FileString array together with inputType set to "base64", which is the pairing the API requires for base64 uploads. The parties array names the signer with firstName, lastName, emailId, and a permission of FILL_FIELDS_AND_SIGN, and its sequence of 1 matches the party number in the ${signfield:1:y} tag. Setting processTextTags to true is what converts those embedded tags into real, interactive fields, and sendNow set to true dispatches the signing invitation immediately. The response returns result as success and nests the identifier at folder.folderId, which you store for the archive flow. Foxit calls this container a folder rather than an envelope.
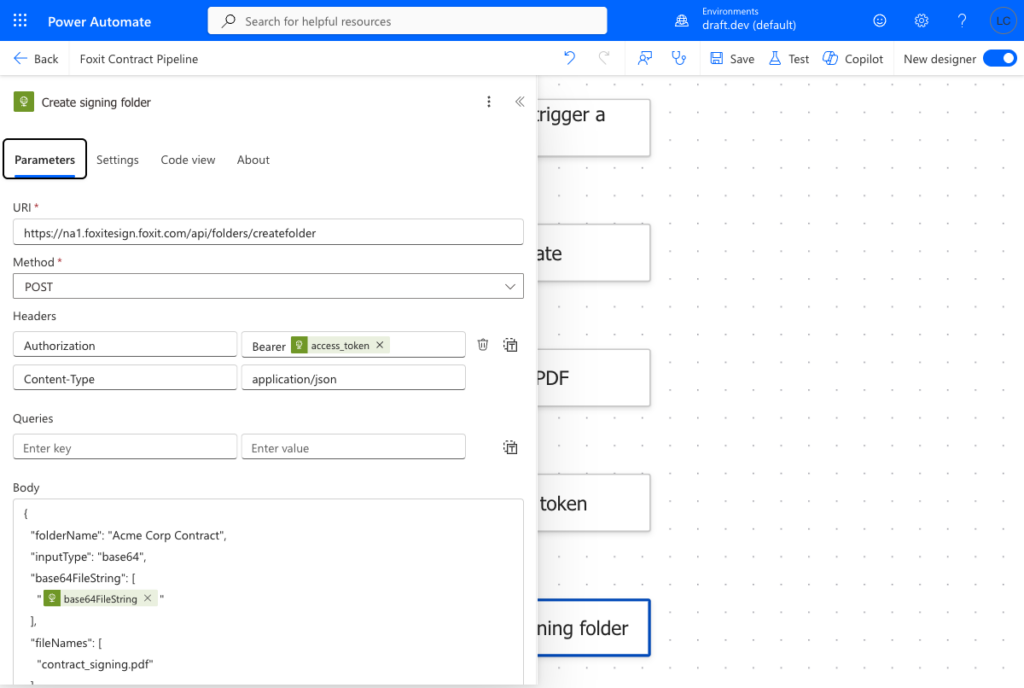
The Create signing folder action. The access_token and base64FileString chips are dynamic references to the two prior HTTP actions, so the eSign token and the generated PDF flow straight into this call with no copy-paste.
Two behaviors are worth handling before you ship. Every party number referenced by a Text Tag must have a matching entry in the parties array, because if a tag points at a party that is not listed, a sendNow: true create still returns success but silently drops that party’s fields, so their signature is never routed. If you need a human to approve the contract before it leaves, set sendNow to false to create a draft without emailing anyone, then dispatch it later with POST https://na1.foxitesign.foxit.com/api/folders/sendDraftFolder.
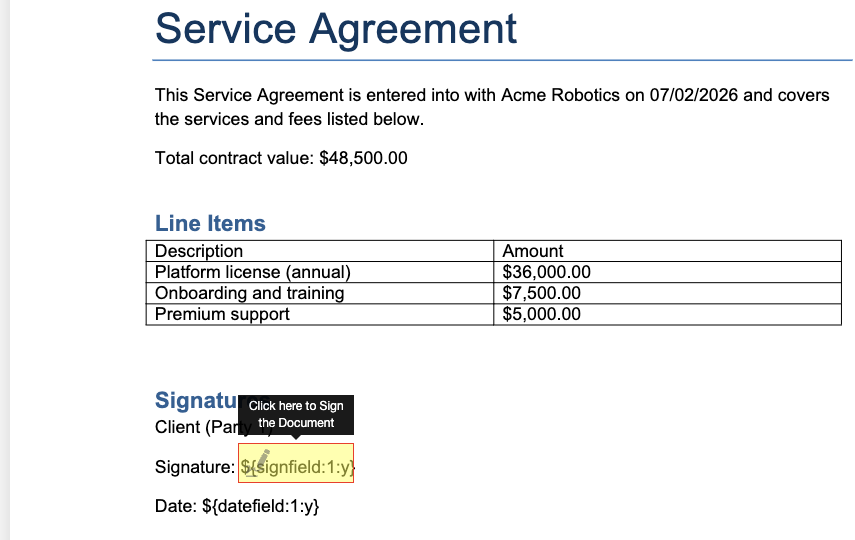
What the recipient sees after createfolder sends the invitation. The signature field is the one defined by the ${signfield:1:y} tag.
Step 4: Receive the Webhook and Archive the Signed Document
Create a second automated flow using the When a HTTP request is received trigger. Saving the flow generates a callback URL. Register that URL as the webhook endpoint on the eSign portal’s API settings page, which is owner-only, and select the signing events you want delivered.
Archive on the right event. The folder status moves through DRAFT, then SHARED, then PARTIALLY SIGNED, then COMPLETED, then EXECUTED. Trigger the archive on folder_executed, not folder_completed. The folder_completed event fires when all signatures are in but before the digital signature has been applied to the PDF, whereas folder_executed guarantees the file you download is the final, digitally signed document.
Verify each callback before acting on it. Foxit delivers every webhook as POST <your-url>?signature=<base64>, where the signature is the base64 of an HMAC-SHA-256 of the raw request body keyed with your webhook secret. Power Automate’s expression language has no native HMAC function, so there are two practical paths. The stronger one calls a small Azure Function or an Office Script that recomputes the HMAC over the raw body and returns a match boolean, which the flow checks in a Condition. The lighter one restricts the trigger to your tenant and treats the webhook secret as a shared value checked in a Condition, which is simpler but weaker. Choose based on how exposed the endpoint is.
Once a callback is verified and the event is folder_executed, parse folderId from the payload and download the signed file. Add an HTTP action with the bearer token set to GET https://na1.foxitesign.foxit.com/api/folders/download?folderId=@{triggerBody()?['folderId']}, which returns the executed PDF as application/pdf. Pass the response body to the OneDrive for Business Create file action, naming the destination folder by deal name or date so contracts stay retrievable.
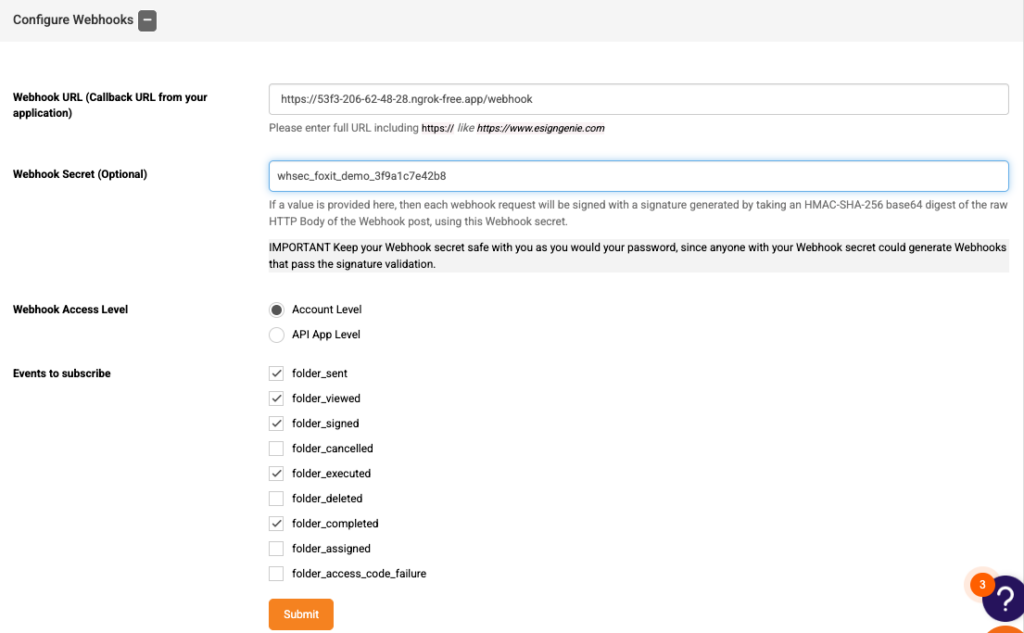
The owner-only webhook settings, where you paste the Power Automate callback URL and pick the events to receive.
If you cannot expose a public endpoint, poll instead. GET https://na1.foxitesign.foxit.com/api/folders/viewActivityHistory?folderId={id} returns the audit trail, with actions such as Created, Invitation Sent, Opened, Viewed, Signed, and Folder Executed. This endpoint is GET-only and only returns data once the folder has been shared or sent, so run it on a schedule from a separate flow.
Common Mistakes
Most failures in this pipeline come from a small set of recurring errors. Check these first when something does not work.
- Using one credential pair or one token for both APIs : Document Generation uses
client_idandclient_secretheaders onna1.fusion.foxit.com, while eSign uses a bearer token onna1.foxitesign.foxit.com. They are separate. - Sending the eSign PDF without
inputType: the base64 upload needsinputTypeset to"base64"alongside thebase64FileStringarray, or the API returnsfileUrls or base64FileString cannot be empty. - Omitting
processTextTags: withoutprocessTextTagsset totrue, the tags stay as inert text and the signer can finish without signing. - A tag party number with no matching party : if
${signfield:2:y}appears but thepartiesarray has no party 2, the send succeeds and that party’s fields vanish silently. - Missing a party email field : each party needs
emailId, notemail. The wrong key returnsemail id of party cannot be empty. - Archiving on
folder_completed: download onfolder_executedinstead, or you may pull a PDF before the digital signature is applied. - A stray space or smart quote in a tag : a literal space inside
${...}or a curly quote from Word autocorrect breaks tag recognition. Use straight quotes and underscores.
API Workflow Automation FAQ
Does this work with n8n or Zapier instead of Power Automate?
Yes. Any platform that can make HTTP requests and receive a webhook works, since the Foxit calls are identical. Only the orchestration layer changes.
Do I need a paid plan to test the Foxit side?
No. The free Developer plan gives 500 credits per year with instant activation and no credit card. The paid dependency here is the Power Automate premium license for the HTTP action.
Are Document Generation and eSign on the same credentials?
No. Each API has its own Client ID and Secret, so store two credential pairs and use each on its own host.
Can I skip generation and send an existing PDF to eSign?
Yes. The createfolder call accepts a base64 PDF directly, or a public file URL through fileUrls and fileNames, so the generation step is optional if you already have the document.
How do I add a second signer?
Add party-2 Text Tags to the template, such as ${signfield:2:y}, and a matching party-2 entry to the parties array. Keep the party numbers in the tags and the array aligned.
Next Step
The fastest way to confirm the pieces before building the flow is to run one call by hand. Create your free Foxit Developer account, pull your Document Generation and eSign Client IDs and Secrets from the APIs Dashboard, and run a single GenerateDocumentBase64 call against contract_signing.docx in a REST client. Once it returns a base64 PDF, you know the credentials and payload are right, and the rest of the Power Automate Foxit API integration is just wiring the same calls into actions. Create your free account to get started.
Embedded Signing with the Foxit eSign API: From Envelope Creation to In-App iFrame in One Session
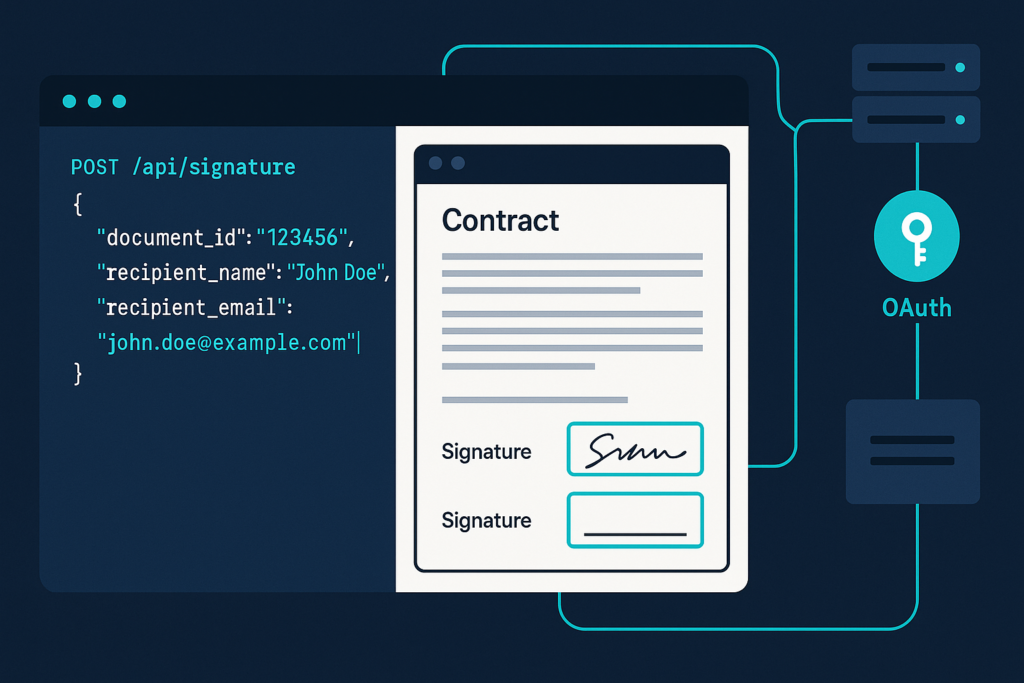
This guide walks through the Foxit eSign API end to end: authenticate, create a folder, generate an embedded session URL, and render the signing experience in an iFrame your users never leave.
Most embedded signing tutorials hand you a three-step abstraction: get a token, create an envelope, open a recipient view. The implementation details live somewhere else, usually mapped to a different API’s object model that doesn’t quite match what you’re working with.
This tutorial covers the Foxit eSign API embedded signing mechanics from start to finish. Authenticate once, create a “folder” (Foxit’s term for what other platforms call an envelope), receive an embedded session URL in that same response, and render it in an iFrame your users never leave. No separate field-placement API call, no client-side SDK to install.
What You’ll Build
By the end of this guide, you’ll have a working embedded signing session: a PDF loaded into your app via iFrame, signature fields defined by Text Tags, a webhook handler that verifies completion events, and a post-signing redirect that keeps users inside your product. Every step runs against the Foxit eSign sandbox with credentials you can generate in under five minutes.
1. Prerequisites and Auth Setup
Before any code runs, make sure you have the following installed and configured:
venv for project isolation
The requests library
A code editor: VS Code with the Python extension is a solid choice. PyCharm, Sublime Text, and JetBrains Fleet work equally well.
A Foxit eSign developer account, available at account.foxit.com/site/sign-up with no credit card required
Set up your workspace:
mkdir foxit-esign-tutorial && cd foxit-esign-tutorial

python3 -m venv .venv && source .venv/bin/activate

pip install requests
The Foxit eSign API Is a Separate Portal from PDF Services
Developers who already use Foxit tools hit this wall first: the Foxit eSign API runs at its own base host, with its own API Key and API Secret. These credentials don’t work with the client_id and client_secret from the PDF Services developer portal at developer-api.foxit.com. The eSign documentation lives at developersguide.foxitesign.foxit.com, separate from docs.developer-api.foxit.com. The API Playground handles PDF Services sandbox testing; eSign sandbox calls go to the eSign portal directly.
The NA environment base host is https://na1.foxitesign.foxit.com. All subsequent code samples reference this as {HOST_NAME}.
Generating an OAuth 2.0 Access Token
Set your credentials as environment variables before running anything:
export FOXIT_ESIGN_CLIENT_ID="your_api_key"

export FOXIT_ESIGN_CLIENT_SECRET="your_api_secret"
Then generate a Bearer token via the OAuth 2.0 client credentials flow:
curl -X POST "https://na1.foxitesign.foxit.com/api/oauth2/access_token" \

-d "client_id=$FOXIT_ESIGN_CLIENT_ID" \

-d "client_secret=$FOXIT_ESIGN_CLIENT_SECRET" \

-d "grant_type=client_credentials" \

-d "scope=read-write"
The response carries an access_token field. Pass it as Authorization: Bearer {token} on every subsequent call, and store it server-side so your credentials never travel to the browser.
2. Creating an Envelope Programmatically with /api/folders/createfolder
Foxit eSign calls what other platforms call an “envelope” a folder. If you’re coming from DocuSign or PandaDoc, that naming difference will catch you on the first read of the docs. The endpoint is POST {HOST_NAME}/api/folders/createfolder. A template-based variant also exists at POST {HOST_NAME}/api/templates/createFolder (note the camelCase) for assembling envelopes from saved templates. This tutorial focuses on the direct document-upload flow.
Defining Signature Fields with Text Tags
Foxit eSign reads signature field definitions from the PDF itself at upload time. You embed them as Text Tags directly in the document, and the API parses the tags on ingest and converts them to interactive fields. The tag syntax follows this structure: ${fieldtype:party_number:required:field_name:width}. Here, y marks a field as required and n marks it as optional. The party number maps to the signing sequence for that recipient. Width is expressed as underscores.
A minimal set covering the four field types required for a real signing flow:
${s:1: } # signature field, party 1

${i:1:______} # initials field, party 1

${d:1:n::____} # optional date field, party 1

${t:1:y:Full_Name:__________} # required text field, party 1, named "Full_Name"
The full set of supported tag types includes signfield (or s), initialfield (or i), datefield (or d), textfield (or t), textboxfield (or tb), checkboxfield (or c), radiobuttonfield (or rb), securedfield (or sc), attachmentfield (or a), imagefield (or img), accept (or ab), decline (or db), payfield (or pf), and formulafield (or ff).
To hide tags in production, set the tag font color to match the page background color. Foxit eSign converts the tags to fields but does not strip them from the rendered document.
Use this sample PDF with Text Tags pre-embedded to follow along. It includes a signature field, initials, a date field, and a text input, all mapped to party 1.
Submitting the createfolder Request
You can supply the PDF two ways against the same endpoint. In URL mode you pass a fileUrls array of publicly reachable PDF links alongside a matching fileNames array. In base64 mode you set "inputType": "base64" and pass a base64FileString array of base64-encoded PDF bytes, again with a matching fileNames array. The API rejects a request that supplies neither, returning fileUrls or base64FileString cannot be empty.
One parameter is easy to miss and breaks the whole flow when omitted. Set processTextTags to true so the API parses the Text Tags embedded in the PDF and converts them into interactive fields. Leave it out and the folder still gets created successfully, but the tags stay inert literal text on the page, the signing UI reports zero required fields, and a signer can reach Finish without ever signing. If your source PDF carries native AcroForm fields instead of Text Tags, the companion processAcroFields flag handles those.
URL-based submission via cURL, pointing at the hosted sample PDF:
curl -X POST "https://na1.foxitesign.foxit.com/api/folders/createfolder" \

-H "Authorization: Bearer $FOXIT_ESIGN_ACCESS_TOKEN" \

-H "Content-Type: application/json" \

-d '{

"folderName": "Service Agreement",

"sendNow": false,

"processTextTags": true,

"createEmbeddedSigningSession": true,

"embeddedSignersEmailIds": ["[email protected]"],

"fileUrls": ["https://github.com/lucienchemaly/foxit-demo-templates/raw/main/esign/sample-text-tags.pdf"],

"fileNames": ["sample-text-tags.pdf"],

"parties": [

{

"firstName": "Alex",

"lastName": "Rivera",

"emailId": "[email protected]",

"permission": "FILL_FIELDS_AND_SIGN",

"sequence": 1

}

]

}'
In this request you ask Foxit eSign to fetch the tagged PDF from its public URL, hold the folder as a draft instead of emailing it by setting sendNow to false, and mint an embedded signing session for the party identified in embeddedSignersEmailIds. The single signer is defined in the parties array with a name, email, the FILL_FIELDS_AND_SIGN permission, and a signing sequence.
Base64 upload via Python, which avoids needing a public URL by sending the file bytes inline:
import os

import base64

import requests


HOST = "https://na1.foxitesign.foxit.com"

TOKEN = os.environ["FOXIT_ESIGN_ACCESS_TOKEN"]


with open("sample-text-tags.pdf", "rb") as pdf:

encoded = base64.b64encode(pdf.read()).decode()


payload = {

"folderName": "Service Agreement",

"sendNow": False,

"processTextTags": True,

"inputType": "base64",

"base64FileString": [encoded],

"fileNames": ["sample-text-tags.pdf"],

"createEmbeddedSigningSession": True,

"embeddedSignersEmailIds": ["[email protected]"],

# Recipient defined in the body overrides any tag-defined party

"parties": [

{

"firstName": "Alex",

"lastName": "Rivera",

"emailId": "[email protected]",

"permission": "FILL_FIELDS_AND_SIGN",

"sequence": 1,

}

],

}


response = requests.post(

f"{HOST}/api/folders/createfolder",

headers={"Authorization": f"Bearer {TOKEN}"},

json=payload,

)


print(response.json())
In this code, you read the local PDF, base64-encode its bytes, and place the result inside the base64FileString array with inputType set to base64 so the API knows to decode it rather than fetch a URL. The rest of the payload mirrors the cURL example, sending the folder as a draft and requesting an embedded session for the listed signer, after which you print the JSON response to read back the folder.folderId and the session URL. When both the PDF’s Text Tags and the API body define recipient parties, the body values take precedence, so you can reuse a tagged PDF template and swap in different signers at request time without touching the document.
3. Generating the Embedded Signing Session and Rendering the iFrame
Setting createEmbeddedSigningSession: true in the createfolder body, paired with an embeddedSignersEmailIds array naming which parties sign in your app, gives you a signed session URL in the same response. No second API call, no separate “recipient view” endpoint. The response carries an embeddedSigningSessions array, and each entry holds the signer email in emailIdOfSigner, the raw token in embeddedToken, and the ready-to-render link in embeddedSessionURL. That URL follows this format, where eetid is the URL-encoded embedded token:
https://{HOST_NAME}/embedded/embeddedsign?eetid={URL-ENCODED-EMBEDDED-TOKEN}
If you omit embeddedSignersEmailIds, the API returns email id of embedded signer(s) not submitted, so always list the embedded signers explicitly. For multi-party workflows you can set createEmbeddedSigningSessionForAllParties: true so every recipient signs in an embedded session rather than over email. When you need each signer’s live URL, request it per signer through the regenerate endpoint described below.
The full lifecycle runs from token request through webhook delivery:
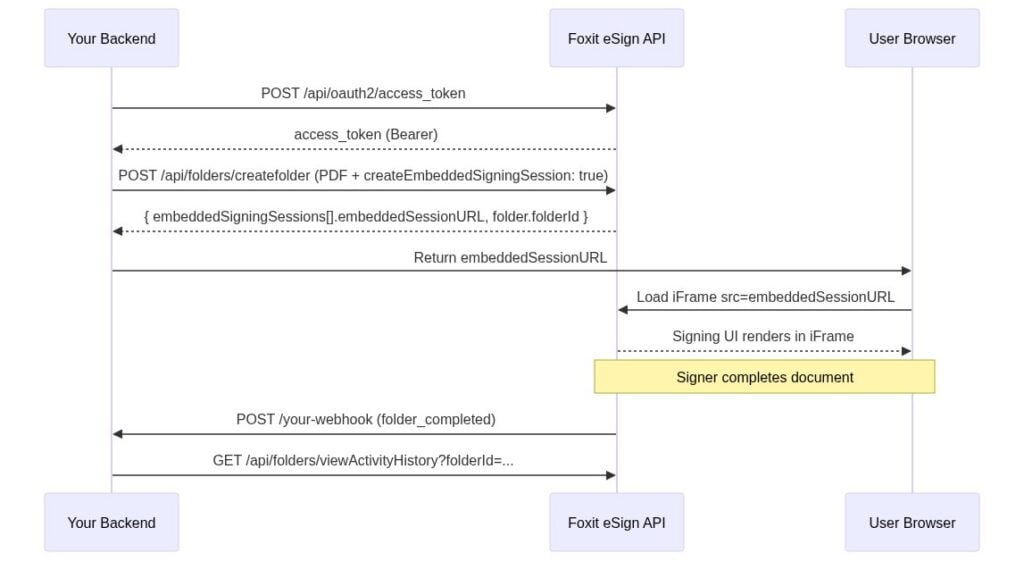
Injecting the Session URL into an iFrame
The signing UI renders entirely inside the iFrame with no additional JavaScript library required.
function launchSigningSession(embeddedSessionURL) {

const iframe = document.createElement("iframe");


// These five sandbox permissions are the minimum required for the signing UI

iframe.setAttribute(

"sandbox",

"allow-scripts allow-same-origin allow-forms allow-popups allow-top-navigation",

);


iframe.src = embeddedSessionURL;

iframe.style.width = "100%";

iframe.style.height = "700px";

iframe.style.border = "none";


iframe.onload = function () {

console.log("Signing session ready");

};


document.getElementById("signing-container").appendChild(iframe);

}
The sandbox attribute matters here. Remove allow-popups or allow-top-navigation and the signing UI breaks in ways that produce no obvious error. The five attributes above are the minimum viable set. Don’t strip them without testing the complete signing flow.
To verify the flow without wiring this into your app first, download the ready-to-run iFrame test page from the demo repo, open it in a browser, paste the embeddedSessionURL from your createfolder response into the input box, and click Load. It applies the same five sandbox permissions shown above. A correctly tagged document renders with the signing controls active, as shown below.
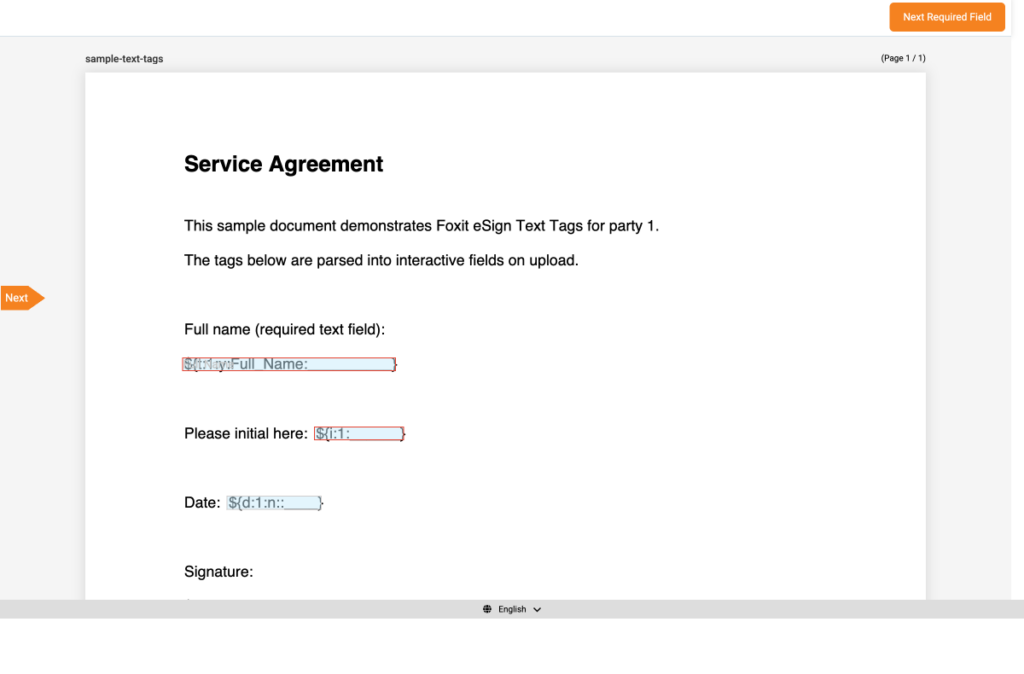
The sample document loaded in the iFrame with processTextTags enabled. The header shows “Required Fields Left: 2” and a “Next Required Field” button, confirming the Text Tags became interactive fields. If that counter reads zero or the page shows the raw ${...} tag text with no input boxes, recheck that processTextTags was set to true on the createfolder request.
Session URLs are short-lived. Generate the URL at request time and pass it directly to the client. Don’t cache it. If a user returns to an incomplete workflow after the session expires, call POST {HOST_NAME}/api/embedded/regenerateEmbeddedSigningSession with the folder ID and the signer email to get a fresh URL. The response mirrors a single embedded session entry, returning emailIdOfSigner, embeddedToken, and the new embeddedSessionURL.
4. White-Labeling the Signing Experience
Foxit eSign exposes branding control at several levels. You can apply a custom logo to the signing UI and outgoing notification emails, set application colors to match your product’s visual design, and configure a personalized sender name so recipients see your company name rather than a generic Foxit sender identity.
For logo and color configuration, manage these settings through the eSign Portal’s branding section. The portal publishes canonical limits on file size and supported formats. Check the branding settings in your account for current specifications rather than relying on numbers printed here that may have changed.
Configuring Post-Signing Redirect URLs
Custom redirect URLs keep users inside your application after they sign, decline, defer, or hit an error. Pass them as parameters in the createfolder body:
payload = {

"folderName": "Service Agreement",

"sendNow": False,

"processTextTags": True,

"createEmbeddedSigningSession": True,

"embeddedSignersEmailIds": ["[email protected]"],

# Return the user to your confirmation page after a successful signature

"signSuccessUrl": "https://app.example.com/contracts/signed",

# Return to a dedicated page when the signer declines

"signDeclineUrl": "https://app.example.com/contracts/declined",

# Return here when the signer chooses to finish later

"signLaterUrl": "https://app.example.com/contracts/later",

# Return here if the signing session errors out

"signErrorUrl": "https://app.example.com/contracts/error",

"parties": [ ... ],

"fileUrls": [ ... ],

"fileNames": [ ... ],

}
Foxit eSign appends two query parameters to your success URL when it redirects, namely folderId for the folder that was signed and event, whose value is signing_success on a completed signature or signing_declined when the signer declines. Without these URLs, signers land on Foxit’s default confirmation page. With them, your application controls the entire post-signing navigation experience.
Tailoring Signer Instructions for Regulated Industries
Regulated workflows often need specific disclosure language in front of signers, which matters for ESIGN Act or eIDAS compliance scenarios where your legal team controls the wording. The createfolder body accepts a signerInstructionId and a confirmationInstructionId that reference instruction templates configured in your account, and you can drop explicit accept and decline button fields into the document itself using the accept (or ab) and decline (or db) Text Tag types. The eSign Developers Guide at developersguide.foxitesign.foxit.com documents these parameters.
5. Handling Webhook Callbacks for Completion Events
Foxit eSign fires HTTP POST requests to your registered endpoint when these lifecycle events occur: folder_sent, folder_viewed, folder_signed, folder_cancelled, folder_completed, folder_executed, and folder_deleted. Register your callback URL in the eSign Portal under API Settings. Make sure the endpoint is publicly reachable over HTTPS before you start testing with the sandbox.
Verifying the Webhook Signature
Every webhook POST includes a signature query parameter. It’s a base64-encoded HMAC-SHA-256 digest of the raw request body, computed using your webhook secret. Recompute the same digest server-side and compare before doing any processing. An unverified webhook is an open door.
import os

import hmac

import hashlib

import base64

from flask import Flask, request, abort


app = Flask(__name__)

WEBHOOK_SECRET = os.environ["FOXIT_ESIGN_WEBHOOK_SECRET"].encode()


@app.route("/webhook/foxit", methods=["POST"])

def foxit_webhook():

# Step 1: Pull the signature from the query string

received_sig = request.args.get("signature", "")


# Step 2: Recompute HMAC-SHA-256 over the raw request body

raw_body = request.get_data()

computed_sig = base64.b64encode(

hmac.new(WEBHOOK_SECRET, raw_body, hashlib.sha256).digest()

).decode()


# Step 3: Constant-time comparison guards against timing attacks

if not hmac.compare_digest(received_sig, computed_sig):

abort(403)


payload = request.json

event_name = payload.get("event_name")

folder_id = payload.get("data", {}).get("folder", {}).get("folderId")


if event_name in ("folder_completed", "folder_executed"):

handle_completion(folder_id)

elif event_name == "folder_cancelled":

handle_cancellation(folder_id)


# A non-2xx response triggers Foxit's automatic retry logic.

# Return 200 once verification and basic parsing succeed.

return "", 200
The payload structure is consistent across all events, carrying a top-level event_name, an event_date timestamp, and a data object whose folder field holds the full folder record. The folder identifier lives at data.folder.folderId, alongside the rest of the envelope-level metadata such as folderName and folderStatus.
Downstream Actions Triggered from folder_completed
When folder_completed or folder_executed fires, two actions cover the majority of production workflows. Fetch the signed document via the documents endpoint using the folder ID and store the result in your document storage layer. For contracts that require sequential agreements (a master services agreement followed by a statement of work, for example), fire the next createfolder call as part of the completion handler.
Audit history is available programmatically via GET {HOST_NAME}/api/folders/viewActivityHistory?folderId={FOLDER_ID}, which returns the full signing log once a folder has been shared or sent. This is a GET-only endpoint, and a folder still in DRAFT returns logs of a non-shared folder can not be viewed.
6. Common Mistakes and Troubleshooting
Text Tag Syntax Breaks on Copy-Paste
Smart-quote autocorrect in Word, Google Docs, and many other editors replaces straight ASCII brackets and quote characters with typographic equivalents. Tag parsing fails silently when this happens. Always paste tags into a plain-text editor first and verify the bracket characters are straight ASCII. The eSign Developers Guide writes every field-type notation in lowercase, such as signfield or s and textfield or t, so author your tags in lowercase to match the documented syntax rather than experimenting with capitalized variants.
Visible Text Tags Reaching Production
Foxit eSign converts embedded tags to fields but does not remove them from the document. If you ship a PDF without setting the tag text color to match the page background, signers see the raw ${...} strings on the page. Build the color-hide step into your PDF preparation pipeline before it becomes a support ticket.
Body-Level parties Overriding Tag-Defined Recipients
Tags define field layout and recipient assignment and must be embedded in the PDF itself, while recipient definitions in the API request body override tag-defined recipient metadata. If you’re seeing the wrong signer name or email appear, check whether a body-level parties definition is overriding the tag.
Expired Session URLs
Embedded session URLs are short-lived. Caching one and reusing it on the next page load will fail. Call POST {HOST_NAME}/api/embedded/regenerateEmbeddedSigningSession with the folder ID and signer email each time a returning user needs access to an incomplete session.
Over-Restrictive sandbox on the iFrame
The five required sandbox permissions are allow-scripts, allow-same-origin, allow-forms, allow-popups, and allow-top-navigation. If the UI loads but behaves unexpectedly, check your sandbox attributes first.
Credential Confusion Between eSign and PDF Services
The API Key and API Secret from the eSign Portal are specific to the eSign API, and the OAuth 2.0 flows also differ between the two. Using PDF Services credentials against the eSign /api/oauth2/access_token endpoint returns an authentication error. Keep the two credential sets separate and named clearly in your environment configuration.
Skipping Webhook Signature Verification
Always verify the signature query parameter before processing any payload. Return a 200-class status code once verification and basic parsing succeed, because a non-2xx response causes Foxit to retry delivery, which can create duplicate processing if your handler is not idempotent.
Embedded Signing FAQ
Can I regenerate an expired embedded signing session?
Yes. Call POST {HOST_NAME}/api/embedded/regenerateEmbeddedSigningSession with the folder ID and signer email. Foxit eSign returns a fresh embeddedSessionURL for the same envelope without resetting the signing state.
Do I need a separate Foxit account if I’m already using Foxit PDF Services?
Yes. The Foxit eSign API operates from a separate portal at na1.foxitesign.foxit.com with its own credentials. The two portals don’t share API keys, secrets, or authentication tokens.
Can I use an existing template instead of uploading a PDF?
Yes. Use POST {HOST_NAME}/api/templates/createFolder to assemble the envelope from a saved template rather than a raw document upload.
Does the embedded signing session work on mobile browsers?
Yes. The iFrame renders responsively on modern mobile browsers without additional configuration.
Is the audit trail accessible programmatically?
Yes. GET {HOST_NAME}/api/folders/viewActivityHistory?folderId={FOLDER_ID} returns the full signing activity log for any shared or sent envelope, including timestamps for each event. A folder still in DRAFT has no shared history to return.
What is the difference between folder_completed and folder_executed?
Both events signal that the folder has been completed with all required parties’ signatures, and the eSign Developers Guide describes them in the same terms, each delivering the folder record in data.folder. Listen for either to trigger downstream retrieval of the signed document, and make your handler idempotent so receiving both for the same folder does not double-process it.
Next Step
Activate your free Foxit eSign developer account at account.foxit.com/site/sign-up, no credit card required. Generate your OAuth token, fire a POST /api/folders/createfolder request with createEmbeddedSigningSession: true against the sandbox, and verify the returned URL loads in a local iFrame. From account creation to a working embedded signing session takes under 30 minutes.
Embed Secure eSignatures into Your App with Foxit API

Foxit eSign makes electronic signatures easy, but developers can take it further by automating the process. This tutorial shows how to use the Foxit eSign API to embed secure eSignatures in your apps. With Python code examples, you’ll learn to send documents for signing, dispatch reminders, and check the signing status programmatically.
Foxit eSign is an electronic signature solution that lets individuals and businesses sign, send, and manage documents online. Users can create legally binding eSignatures, prepare forms, and track document status in real time. Reusable templates, automated workflows, and audit trails reduce manual paperwork and keep signing processes moving.
At the simplest level, a user can log into the eSign dashboard and handle 100% of their signing needs. For example, they can upload a Microsoft Word template and drag and drop fields for the signing process. I did this with a simple Word document, and after uploading, the editor let me place fields exactly where I needed them:
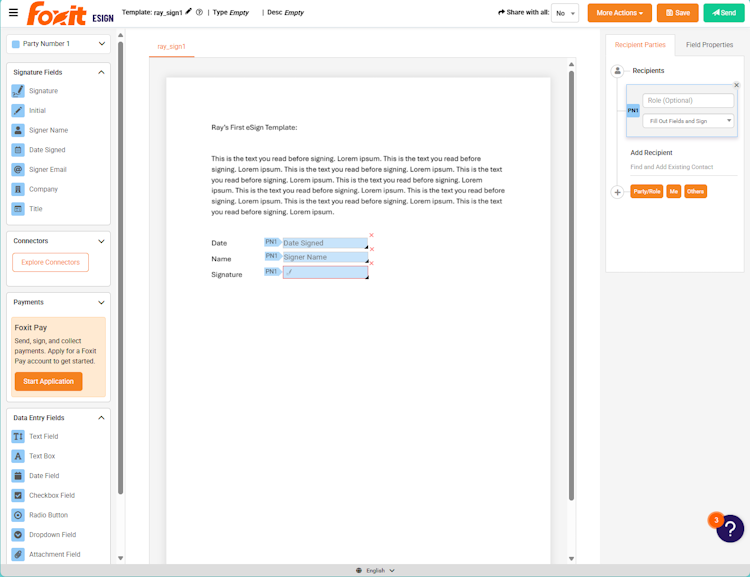
That screenshot shows three fields added to my document: a date field, a signer name field, and the actual signature spot. Each field has many configuration options, and your own documents could have far more or far fewer. You can design these forms to meet whatever need you have. You can also do all of this directly within Word. The docs explain how to add fields directly into Word that become active during the signing process.
Once you’ve set up your template, you can initiate the signing process right from the app. The dashboard gives you a full history and audit trail covering whether someone has signed, when they signed, and who signed. As a developer, you’re probably wondering whether this process can be automated. It can.
If you’d rather watch an introduction first, the API introduction video walks through the same material.
eSign Via API
Before digging into the APIs, take a quick look at the API Reference. The signing process itself can get complex. Two, three, or more people may need to sign a document in a specific order, and the template field setup can be done entirely in Word. The focus here is a simple signing example, but nothing stops you from building more advanced, flexible workflows.
The full signing flow this article walks through, end to end:

The first step in any API usage is authentication. When you have an eSign account with API access, you receive a client_id and client_secret value, both of which you exchange for an access token at the appropriate endpoint. You’ll find the client_id and client_secret under the API tab in your Foxit eSign account settings once you’ve activated API access. A simple Python implementation looks like this:
CLIENT_ID = os.environ.get("CLIENT_ID")
CLIENT_SECRET = os.environ.get("CLIENT_SECRET")

def getAccessToken(id, secret):
	url = "https://na1.foxitesign.foxit.com/api/oauth2/access_token"
	payload=f"client_id={id}&client_secret={secret}&grant_type=client_credentials&scope=read-write"
	headers = {
	'Content-Type': 'application/x-www-form-urlencoded'
	}

	response = requests.request("POST", url, headers=headers, data=payload)

	token = (response.json())["access_token"]
	return token

access_token = getAccessToken(CLIENT_ID, CLIENT_SECRET)
In this code, you pull the client_id and client_secret from environment variables, post them as application/x-www-form-urlencoded to na1.foxitesign.foxit.com/api/oauth2/access_token with the client_credentials grant and read-write scope, and read access_token off the JSON response. Every subsequent call in this article reuses that token in the Authorization: Bearer ... header.
The example uses the US region host (na1.foxitesign.foxit.com). If your account is in another region, swap in the appropriate host: eu1.foxitesign.foxit.com for EU, na2.foxitesign.foxit.com for Canada, or au1.foxitesign.foxit.com for Australia.
All remaining demos use this method, and at the end of this post you’ll find GitHub links for the full source.
Kicking Off the Signing API Process
With authentication handled, the code can drive the full signing process. The first thing to add is a signing flow using the template shown above. From the dashboard I noted the template ID, 392230, though APIs for working with templates let you retrieve that via code as well.
The Create Envelope from Template endpoint starts the signing process. An envelope is a set of documents a user must sign. For this demo it’s one document, but you can include multiple. The API reference example shows a large input body because the electronic signing process can be complex. For this simple demo, you only need the signer’s name and email address. This Python utility handles that:
def sendForSigning(template_id, first_name, last_name, email, token):
	url = "https://na1.foxitesign.foxit.com/api/templates/createFolder"
	body = {
		"folderName":"Sending for Signing",
		"templateIds":[template_id],
		"parties":[
		{
			"permission":"FILL_FIELDS_AND_SIGN",
			"firstName":first_name,
			"lastName":last_name,
			"emailId":email,
			"sequence":1
		}
		]
	}

	headers = {
		'Authorization': f'Bearer {token}',
	}

	response = requests.request("POST", url, headers=headers, json=body)
	return response.json()
The code above builds the create-envelope payload, with the folder name, the template ID list, and a single-element parties array carrying the signer’s name, email, and FILL_FIELDS_AND_SIGN permission, then POSTs it to /api/templates/createFolder with the bearer token and returns the parsed JSON. parties is an array because real signing flows often need multiple signers, and permission is required on each entry because it defines the role that party plays.
Passing in the template ID and signer details works like this:
# Hard coded template id
tid = "392230"

sendForSigningResponse = sendForSigning(tid, "Alex", "Rivera", "[email protected]", access_token)
The call returns a large set of data. For now, pull out just the envelope ID:
envelopeId = sendForSigningResponse['folder']['folderId']
print(f"ID of the envelope created: {envelopeId}")
Note: You’ll see ‘folder’ referenced in the API endpoints and results, but the eSign API is migrating to the ‘envelope’ term. Both terms are used interchangeably in the current API.
A few seconds after running this code, the signing email appeared in my account:
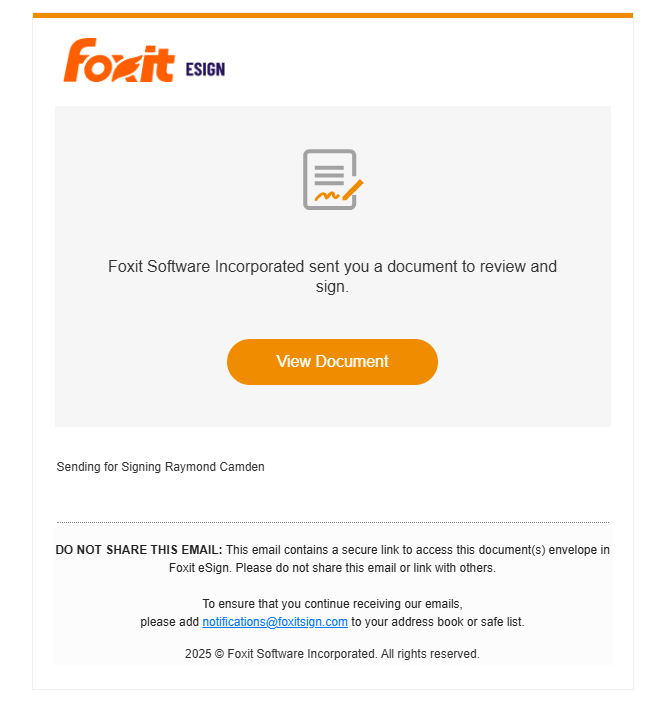
Sending out Electronic Reminders
To nudge signers who haven’t acted yet, use the Send Signature Reminder endpoint. It takes the envelope ID created earlier (and again, see the note above about envelope vs folder):
def sendReminder(envelope_id, token):
	url = "https://na1.foxitesign.foxit.com/api/folders/signaturereminder"
	body = {
		"folderId":envelope_id
	}
	headers = {
		'Authorization': f'Bearer {token}',
	}

	response = requests.request("POST", url, headers=headers, json=body)
	result = response.json()
	return result
In this code, you build a one-key body containing the envelope ID, attach the bearer token, POST to /api/folders/signaturereminder, and return the parsed JSON. The endpoint is fire-and-forget from the client’s perspective, so a 2xx response means Foxit has queued the reminder email to the outstanding signer.
With the access token and envelope ID in hand, triggering a reminder takes a single call:
access_token = getAccessToken(CLIENT_ID, CLIENT_SECRET)
result = sendReminder(envelope_id, access_token)
Running this sends an email reminder to the signer:
Ok, But Did They Sign Their Document Yet??
To check whether the signer has completed the process, use the Get Envelope Details endpoint. It takes the envelope ID from before. Here’s a Python wrapper for that API:
def getStatus(envelope_id, token):
	url = f"https://na1.foxitesign.foxit.com/api/folders/myfolder?folderId={envelope_id}"

	headers = {
		'Authorization': f'Bearer {token}',
	}

	response = requests.request("GET", url, headers=headers)
	result = response.json()
	return result
The code above issues a GET to /api/folders/myfolder with the envelope ID as a query-string parameter, sends the bearer token in the Authorization header, and returns the parsed JSON. The full response body carries every audit-trail field the dashboard surfaces (parties, timestamps, folder status), and the next snippet pulls just folderStatus out for a quick yes/no.
Checking status against the envelope ID:
result = getStatus(envelope_id, access_token)

print(f"Envelope status: {result['folder']['folderStatus']}")
The endpoint returns a lot of information, but printing just the status gives you a high-level view of where the process currently stands.
With the example shown above, the envelope status is SHARED. Clicking the link in the signing email opens the signing view:
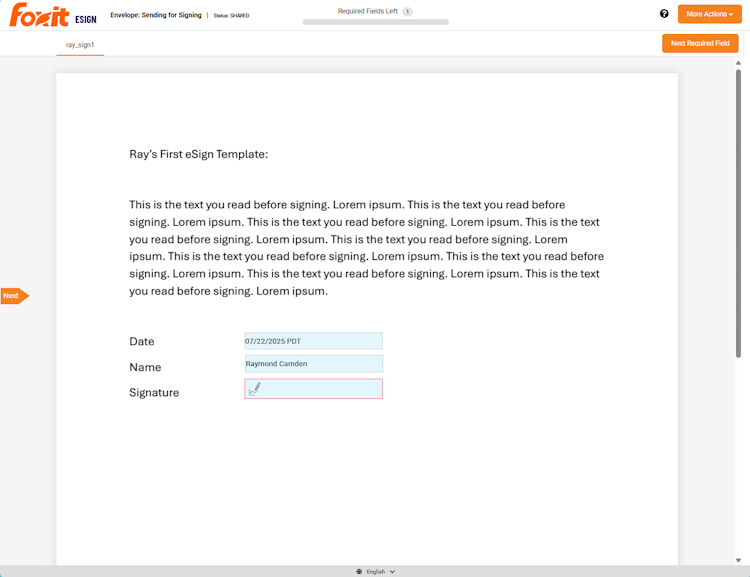
The date is already filled to today’s date, and the name is pre-filled because eSign knows who the document was sent to. Clicking to sign is all that remains. Once the signer does that, the same status call returns EXECUTED.
Next Steps
If you’re new to eSign, the main homepage gives you a solid introduction, and the Foxit eSign YouTube channel has video content covering the service in depth.
Beyond the basics covered here, the API has significantly more to offer. Webhooks deliver automatic notifications when envelope events fire, so you don’t need to poll for status. The API also supports embedded signing sessions for keeping signers inside your own application, SSO authentication for signers, and multi-party workflows with sequential or parallel signing order. The API Reference covers all of these in full.
All three code examples from this post are available in the GitHub repo. The eSign API is also part of the broader Foxit developer platform, which includes APIs for PDF processing, document generation, and embedded PDF viewing. Bring your questions to the developer forums.
Ready to wire signing into your own product? Create a free developer account directly at account.foxit.com/site/sign-up (no credit card required). The direct URL skips the pricing-page redirect from the developer portal and drops you on the account form, with API credentials waiting in the API Keys section once you’re in.
eSign API FAQ
How do I embed e-signatures in my app with the Foxit eSign API?
You authenticate with OAuth2 to get an access token, then call Create Envelope from Template to send a document for signature. In this article’s flow, the signer completes signing through an emailed link. For a fully in-app experience where signers never leave your interface, the Foxit eSign API also supports embedded signing sessions, which you load directly inside your app and pair with webhooks to capture completion events.
What is an embedded signature?
An embedded signature is one a signer applies inside your own application’s interface rather than on a separate hosted signing page. Instead of redirecting the signer to an external Foxit eSign page, your app presents the signing experience in context, keeping users in your product end to end. With the Foxit eSign API, this is delivered through embedded signing sessions rather than the standard email-based envelope flow.
What is an embedded signing API?
An embedded signing API generates a secure signing session you load inside your own app — typically in an iframe or web view — so signers complete documents without leaving your interface. The Foxit eSign API provides this through embedded signing sessions, alongside the email-based flow demonstrated in this article (create an envelope, signer signs via an emailed link). Webhooks then notify your app the moment an envelope reaches EXECUTED status.
How do I authenticate with the Foxit eSign API?
Authentication uses the OAuth2 client-credentials grant. You exchange your client_id and client_secret — found under the API tab in your Foxit eSign account settings — for an access token by POSTing to the regional OAuth2 endpoint (for example, na1.foxitesign.foxit.com for the US, or eu1 for the EU). Send that token as a Bearer header on every subsequent call; the same token is reused across envelope creation, reminders, and status checks.
How do I check whether a signer has completed a document?
Call the Get Envelope Details endpoint with your envelope ID, passing the Bearer token in the Authorization header. The response carries the full audit trail — parties, timestamps, and status. Reading folderStatus gives a quick state: SHARED while the document is out for signature, and EXECUTED once the signer finishes. For real-time updates instead of polling, the Foxit eSign API offers webhooks that fire on envelope events.
Why does the Foxit eSign API use both "folder" and "envelope"?
They refer to the same thing. An envelope is the set of documents a signer must complete. The Foxit eSign API is migrating from the older term “folder” to “envelope,” so you’ll still see folder in endpoint paths and response fields — for example, createFolder, folderId, and folderStatus — while the documentation increasingly uses envelope. Both terms are interchangeable in the current API.