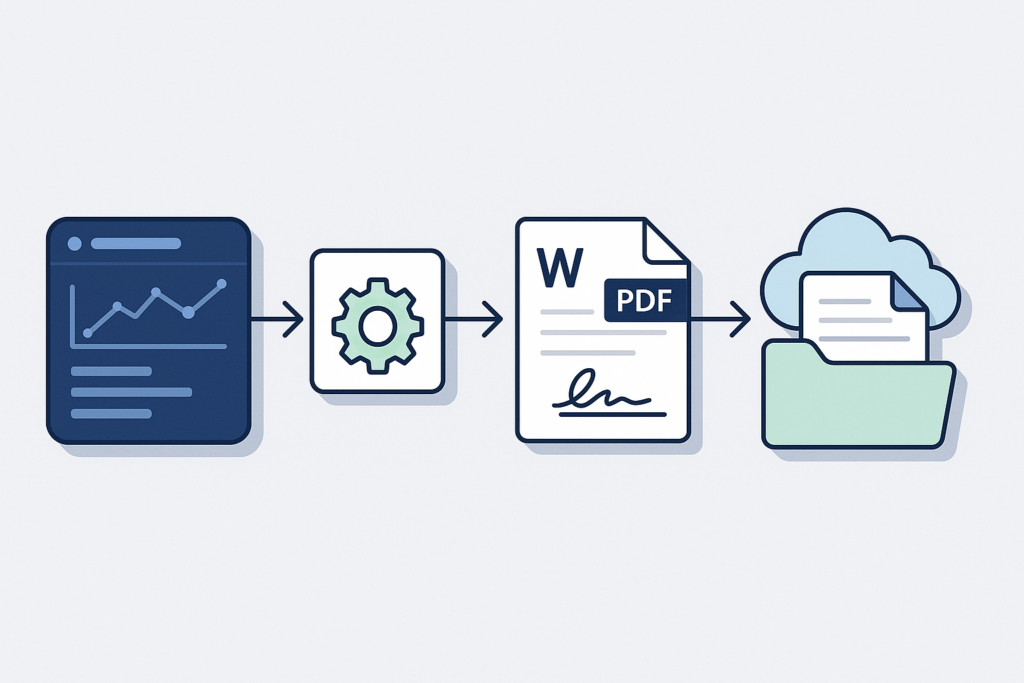
Most Power Automate document tutorials stop at a SharePoint file move or an AI Builder extraction, and the ones that touch signatures assume a native connector that does not exist for a headless, API-first pipeline. The gap is the full chain, where a CRM deal closes, a contract is generated from a Word template, the PDF is routed for signature, and the signed copy is archived, with no manual export and no polling. This article builds that pipeline in Power Automate using the HTTP action to call Foxit’s REST endpoints directly, which is the same pattern that carries over to n8n, Zapier, or any orchestrator that can make an HTTP request.
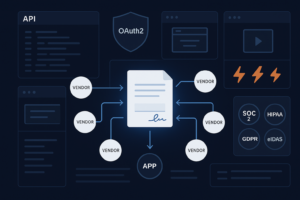
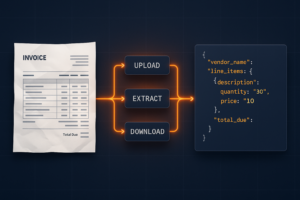
Foxit exposes two REST APIs that chain cleanly for this. The Document Generation API takes a base64-encoded Word template plus a JSON payload and returns a base64 PDF, and the eSign API handles the signing lifecycle behind an OAuth2 token. The base64 PDF from generation drops straight into the eSign upload call, so the handoff stays inside one flow with no SDK to install and no desktop agent. This Power Automate Foxit API integration walks the two hosts and their two auth models, the document generation call, the send-for-signature call with embedded signature fields, and a second flow that receives Foxit’s webhook and archives the executed document.
Prerequisites
Power Automate runs in the browser, so there is no local runtime to install. What you need are the right accounts and one sample file.
A Power Automate account with the HTTP action : the HTTP action is a premium connector, so you need a per-user or per-flow premium license. This is the one paid dependency in the tutorial. On the free Microsoft 365 tier you will hit a wall at the first HTTP action, so confirm the plan before you start.
A Foxit Developer account : create one at account.foxit.com/site/sign-up and activate the free Developer plan, which includes 500 credits per year with no credit card. From the APIs Dashboard, copy the Document Generation Client ID and Secret, and separately the eSign Client ID and Secret. These are two different credential pairs for two different APIs.
A CRM that can trigger a flow : this article uses the Salesforce connector as the example. Any CRM with a Power Automate connector, or any system that can POST to a webhook URL, works the same way.
The sample contract template : download contract_signing.docx so you do not have to author one. It already carries both Document Generation merge tags and eSign signature tags, which is what makes the two-API handoff work.
A REST client : Postman or curl, to test each Foxit call in isolation before wiring it into a flow.
Store both Foxit credential pairs in the Power Automate secure store or as environment variables in your solution, never pasted as literals into an action, so they do not travel in exported flow definitions.
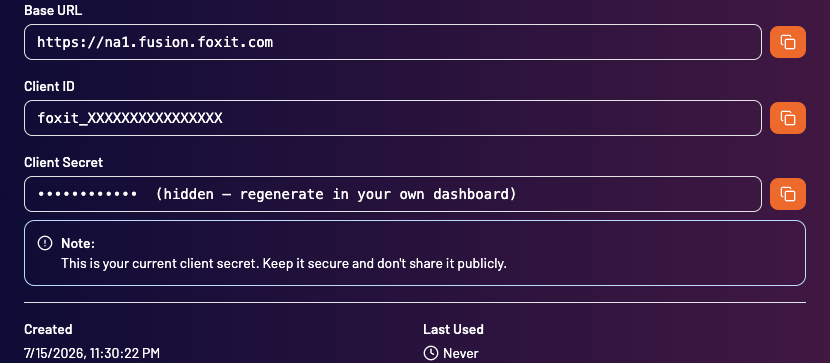
The APIs Dashboard is where you retrieve the Client ID and Secret. Document Generation and eSign each have their own pair.
How the Power Automate Foxit API Integration Works: Two APIs, Two Hosts, Two Flows
The pipeline has four stages. A CRM Closed Won event triggers document generation, the generated PDF is sent for signature, and the executed document is archived once every party has signed.
Salesforce: Opportunity → Closed Won
        │
        ▼
HTTP: POST GenerateDocumentBase64   (na1.fusion.foxit.com)   → base64 PDF
        │
        ▼
HTTP: POST createfolder             (na1.foxitesign.foxit.com) → folderId, email sent
        │
   … signer signs (async) …
        ▼
Flow 2: When a HTTP request is received  <- Foxit webhook (folder_executed)
        │
        ▼
HTTP: GET download → OneDrive: Create file
Power Automate owns orchestration and control flow. Foxit owns document rendering and the signature lifecycle. The single most common mistake in this integration is treating the two Foxit products as one, so keep them separate from the start. Document Generation runs on https://na1.fusion.foxit.com and authenticates with lowercase client_id and client_secret request headers. eSign runs on https://na1.foxitesign.foxit.com and authenticates with an OAuth 2.0 bearer token obtained from its own credential pair. They do not share credentials or a portal.
The work also splits into two flows for a reason. Generation and sending are synchronous, so they belong in one flow that runs when the deal closes. Signing completes minutes or days later, so a second flow triggered by Foxit’s webhook handles the archive step. That separation is what removes any polling from the design.
Here is the main flow built in the Power Automate designer, with the four HTTP actions chained after the trigger.
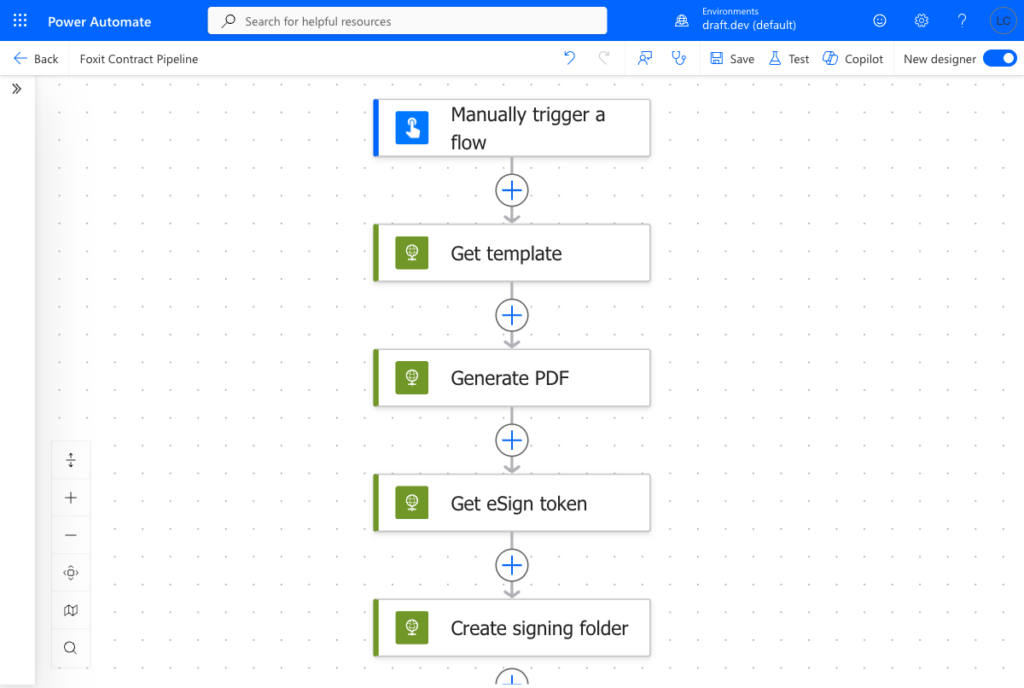
The four HTTP actions in order. This build uses a manual trigger so the flow runs on demand while you test; in production the Salesforce trigger from Step 1 takes its place as the entry point, and nothing downstream changes.
Step 1: CRM Trigger, Firing the Flow on a Closed Deal
Create an automated cloud flow and choose the Salesforce trigger for a created or modified record, pointing it at the Opportunity object. Add a condition so the flow only proceeds when the Stage equals Closed Won, which keeps every mid-pipeline edit from generating a contract.
Map the CRM fields the contract needs. For the sample template, that is the client name, the contract date, the deal value, and the signer’s name and email. Read them from the trigger output with expressions like triggerOutputs()?['body/Account_Name'] and store each in a variable or reference it inline, so the next two steps can assemble their payloads cleanly.
This step is swappable. Any CRM with a Power Automate connector, or any system that can POST JSON to a Power Automate HTTP-request trigger, drops in here without touching the Foxit calls that follow. If you use HubSpot or Dynamics 365, only the trigger and field paths change, so the rest of this tutorial stays identical.
Step 2: Generate the Contract PDF with GenerateDocumentBase64
The contract_signing.docx template drives this step. It contains Document Generation merge tags for the scalar fields and a table loop for line items, using Foxit’s {{ }} syntax:
{{clientName}}
{{contractDate \@ MM/dd/yyyy}}
{{dealValue \# "$#,##0.00"}}

{{TableStart:lineItems}} {{description}}   {{amount}} {{TableEnd:lineItems}}
The \@ switch formats a date and the \# switch formats a currency value, so you can pass a raw ISO date and a plain number and let the template render them. The {{TableStart:lineItems}} and {{TableEnd:lineItems}} tokens sit in a single Word table row and repeat that row for each object in the lineItems array.
Before the flow can send the template, it needs the file as a base64 string. The build here gets it with an HTTP GET action named Get template, pointed at the raw contract_signing.docx URL, and base64-encodes the response with the base64() expression. For a template you maintain yourself, store it in OneDrive or SharePoint and use a Get file content action instead of the GET. Then add a second HTTP action named Generate PDF, set to POST https://na1.fusion.foxit.com/document-generation/api/GenerateDocumentBase64 with client_id and client_secret headers and this JSON body:
{
  "base64FileString": "@{base64(body('Get_template'))}",
  "documentValues": {
    "clientName": "@{variables('clientName')}",
    "contractDate": "2026-07-17",
    "dealValue": 48500,
    "lineItems": [
      { "description": "Platform license (annual)", "amount": "$36,000.00" },
      { "description": "Onboarding and training", "amount": "$12,500.00" }
    ]
  },
  "outputFormat": "pdf"
}
In this code, you send the base64-encoded template as base64FileString, pass the CRM-sourced fields as documentValues whose keys match the template tags exactly, and request a PDF with outputFormat set to the lowercase "pdf". The keys clientName, dealValue, and the lineItems array with its description and amount fields have to match the tag names in the Word file, since a mismatch leaves the tag unrendered rather than raising an error. The call is synchronous and returns HTTP 200 with a JSON response containing message, fileExtension, and base64FileString, where base64FileString is the rendered PDF as a base64 string.
The call is synchronous, so there is no task to poll and no status to check, and the generated contract is available immediately. Reference the rendered PDF in the next step directly with the expression body('Generate_PDF')?['base64FileString'], or add a Parse JSON action first if you prefer typed outputs. When you need the raw bytes rather than the string, for archiving or a file action, convert with the base64ToBinary() expression, one of the Workflow Definition Language conversion functions.
One limit to plan for is the upload size. Document Generation rejects .docx payloads larger than 4 MB after base64 encoding, which is roughly a 3 MB raw file, and the limit is not surfaced in a friendly error. If you hit it, compress images through Word’s Picture Format tools, drop embedded fonts and OLE objects, and split oversized templates. The sample here is about 37 KB, so first runs stay well clear of the cap. For template authoring detail and common payload errors, Foxit’s Document Generation API quickstart is the reference.
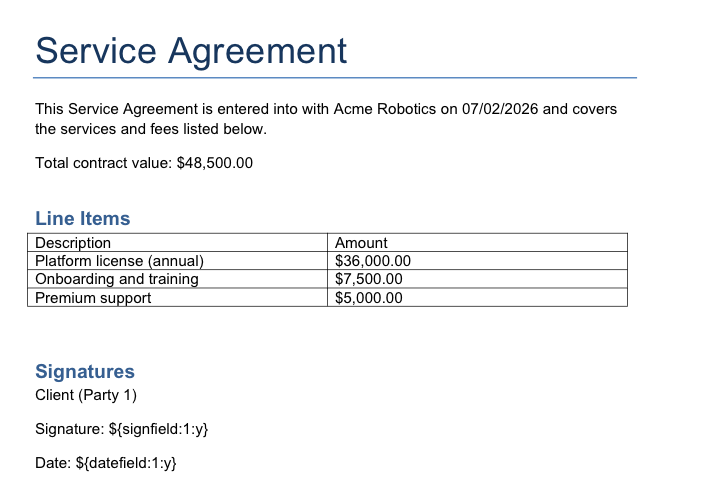
The generated contract. The signature and date fields at the bottom come from the eSign Text Tags embedded in the same template, ready for Step 3.
Step 3: Send for Signature with OAuth2 and createfolder
The eSign API needs a bearer token first. Add an HTTP action that POSTs to https://na1.foxitesign.foxit.com/api/oauth2/access_token with content type application/x-www-form-urlencoded and this body:
grant_type=client_credentials&client_id=YOUR_ESIGN_CLIENT_ID&client_secret=YOUR_ESIGN_CLIENT_SECRET&scope=read-writeName this action Get eSign token. Its JSON response carries access_token, token_type set to bearer, expires_in, and instance_url, and you reference the token in the next call as body('Get_eSign_token')?['access_token']. This is the client-credentials grant, which fits a server-to-server flow where no human is present to log in.
The signature fields are already defined in the template. contract_signing.docx carries two eSign Text Tags, ${signfield:1:y} and ${datefield:1:y}, which follow the ${fieldtype:party:mandatory} syntax. Here both are mandatory fields assigned to party 1, the client who signs. Because the tags live in the Word file, the PDF that Document Generation produced in Step 2 already has a signature and date field in place, so there is no manual field placement after generation. Keep two rules in mind when you author your own tags. Replace any space inside a tag with an underscore, since a literal space breaks tag recognition, and set the tag text color to match the document background so the tokens do not show in the final PDF.
Now add the send action, an HTTP action named Create signing folder, set to POST https://na1.foxitesign.foxit.com/api/folders/createfolder with an Authorization: Bearer @{body('Get_eSign_token')?['access_token']} header and this body:
{
  "folderName": "Acme Corp Contract",
  "inputType": "base64",
  "base64FileString": ["@{body('Generate_PDF')?['base64FileString']}"],
  "fileNames": ["contract_signing.pdf"],
  "parties": [
    {
      "firstName": "Jordan",
      "lastName": "Lee",
      "emailId": "[email protected]",
      "permission": "FILL_FIELDS_AND_SIGN",
      "sequence": 1
    }
  ],
  "processTextTags": true,
  "sendNow": true
}
In this code, you attach the Step 2 PDF by passing it as the single element of the base64FileString array together with inputType set to "base64", which is the pairing the API requires for base64 uploads. The parties array names the signer with firstName, lastName, emailId, and a permission of FILL_FIELDS_AND_SIGN, and its sequence of 1 matches the party number in the ${signfield:1:y} tag. Setting processTextTags to true is what converts those embedded tags into real, interactive fields, and sendNow set to true dispatches the signing invitation immediately. The response returns result as success and nests the identifier at folder.folderId, which you store for the archive flow. Foxit calls this container a folder rather than an envelope.
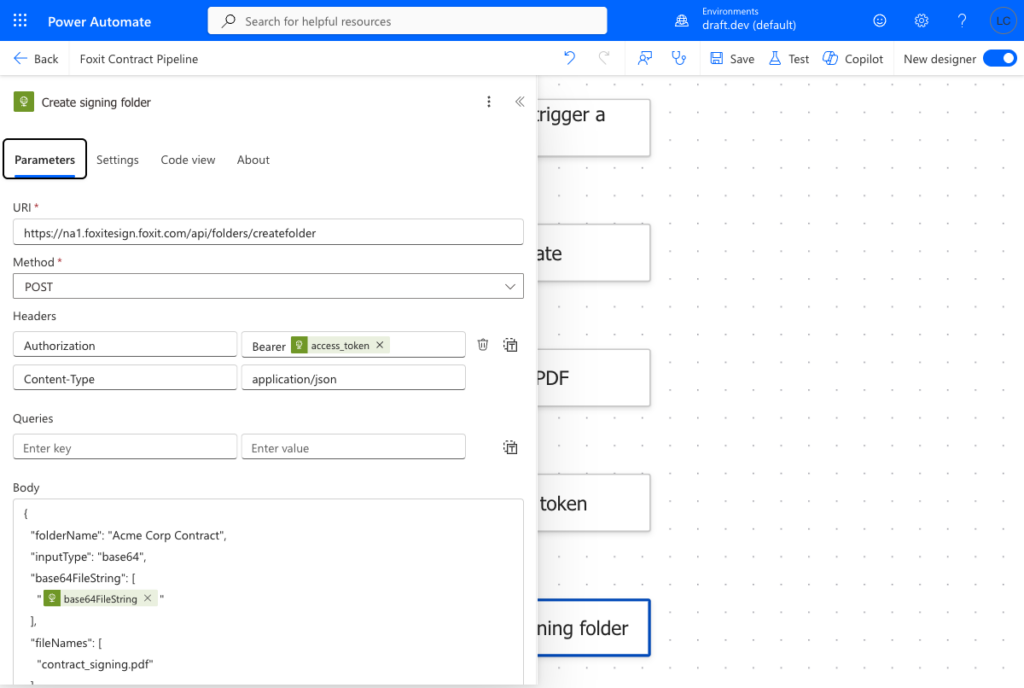
The Create signing folder action. The access_token and base64FileString chips are dynamic references to the two prior HTTP actions, so the eSign token and the generated PDF flow straight into this call with no copy-paste.
Two behaviors are worth handling before you ship. Every party number referenced by a Text Tag must have a matching entry in the parties array, because if a tag points at a party that is not listed, a sendNow: true create still returns success but silently drops that party’s fields, so their signature is never routed. If you need a human to approve the contract before it leaves, set sendNow to false to create a draft without emailing anyone, then dispatch it later with POST https://na1.foxitesign.foxit.com/api/folders/sendDraftFolder.
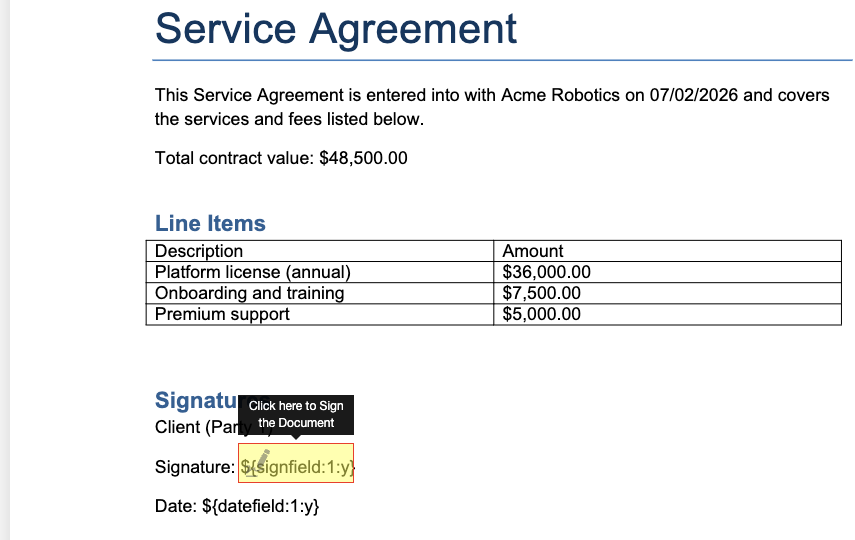
What the recipient sees after createfolder sends the invitation. The signature field is the one defined by the ${signfield:1:y} tag.
Step 4: Receive the Webhook and Archive the Signed Document
Create a second automated flow using the When a HTTP request is received trigger. Saving the flow generates a callback URL. Register that URL as the webhook endpoint on the eSign portal’s API settings page, which is owner-only, and select the signing events you want delivered.
Archive on the right event. The folder status moves through DRAFT, then SHARED, then PARTIALLY SIGNED, then COMPLETED, then EXECUTED. Trigger the archive on folder_executed, not folder_completed. The folder_completed event fires when all signatures are in but before the digital signature has been applied to the PDF, whereas folder_executed guarantees the file you download is the final, digitally signed document.
Verify each callback before acting on it. Foxit delivers every webhook as POST <your-url>?signature=<base64>, where the signature is the base64 of an HMAC-SHA-256 of the raw request body keyed with your webhook secret. Power Automate’s expression language has no native HMAC function, so there are two practical paths. The stronger one calls a small Azure Function or an Office Script that recomputes the HMAC over the raw body and returns a match boolean, which the flow checks in a Condition. The lighter one restricts the trigger to your tenant and treats the webhook secret as a shared value checked in a Condition, which is simpler but weaker. Choose based on how exposed the endpoint is.
Once a callback is verified and the event is folder_executed, parse folderId from the payload and download the signed file. Add an HTTP action with the bearer token set to GET https://na1.foxitesign.foxit.com/api/folders/download?folderId=@{triggerBody()?['folderId']}, which returns the executed PDF as application/pdf. Pass the response body to the OneDrive for Business Create file action, naming the destination folder by deal name or date so contracts stay retrievable.
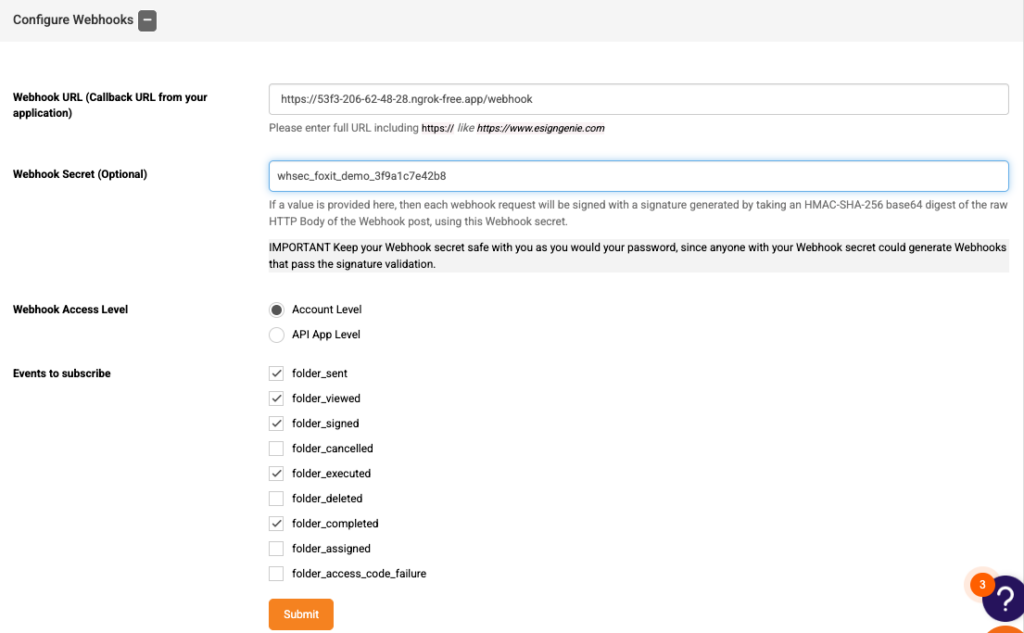
The owner-only webhook settings, where you paste the Power Automate callback URL and pick the events to receive.
If you cannot expose a public endpoint, poll instead. GET https://na1.foxitesign.foxit.com/api/folders/viewActivityHistory?folderId={id} returns the audit trail, with actions such as Created, Invitation Sent, Opened, Viewed, Signed, and Folder Executed. This endpoint is GET-only and only returns data once the folder has been shared or sent, so run it on a schedule from a separate flow.
Common Mistakes
Most failures in this pipeline come from a small set of recurring errors. Check these first when something does not work.
- Using one credential pair or one token for both APIs : Document Generation uses
client_idandclient_secretheaders onna1.fusion.foxit.com, while eSign uses a bearer token onna1.foxitesign.foxit.com. They are separate. - Sending the eSign PDF without
inputType: the base64 upload needsinputTypeset to"base64"alongside thebase64FileStringarray, or the API returnsfileUrls or base64FileString cannot be empty. - Omitting
processTextTags: withoutprocessTextTagsset totrue, the tags stay as inert text and the signer can finish without signing. - A tag party number with no matching party : if
${signfield:2:y}appears but thepartiesarray has no party 2, the send succeeds and that party’s fields vanish silently. - Missing a party email field : each party needs
emailId, notemail. The wrong key returnsemail id of party cannot be empty. - Archiving on
folder_completed: download onfolder_executedinstead, or you may pull a PDF before the digital signature is applied. - A stray space or smart quote in a tag : a literal space inside
${...}or a curly quote from Word autocorrect breaks tag recognition. Use straight quotes and underscores.
API Workflow Automation FAQ
Does this work with n8n or Zapier instead of Power Automate?
Yes. Any platform that can make HTTP requests and receive a webhook works, since the Foxit calls are identical. Only the orchestration layer changes.
Do I need a paid plan to test the Foxit side?
No. The free Developer plan gives 500 credits per year with instant activation and no credit card. The paid dependency here is the Power Automate premium license for the HTTP action.
Are Document Generation and eSign on the same credentials?
No. Each API has its own Client ID and Secret, so store two credential pairs and use each on its own host.
Can I skip generation and send an existing PDF to eSign?
Yes. The createfolder call accepts a base64 PDF directly, or a public file URL through fileUrls and fileNames, so the generation step is optional if you already have the document.
How do I add a second signer?
Add party-2 Text Tags to the template, such as ${signfield:2:y}, and a matching party-2 entry to the parties array. Keep the party numbers in the tags and the array aligned.
Next Step
The fastest way to confirm the pieces before building the flow is to run one call by hand. Create your free Foxit Developer account, pull your Document Generation and eSign Client IDs and Secrets from the APIs Dashboard, and run a single GenerateDocumentBase64 call against contract_signing.docx in a REST client. Once it returns a base64 PDF, you know the credentials and payload are right, and the rest of the Power Automate Foxit API integration is just wiring the same calls into actions. Create your free account to get started.