Adding a signing step to an existing app sounds straightforward until you try to implement it. Getting a document signed is a simple idea, but the actual API surface, how authentication works, how you mark up a PDF, and how you learn that signing finished all take longer to figure out than they should. This guide walks a complete Foxit eSign API integration from the first authenticated request through to a webhook-confirmed, digitally signed document. Comfort with REST APIs and bearer tokens is enough to follow along.
What an eSignature API is and how signing workflows work
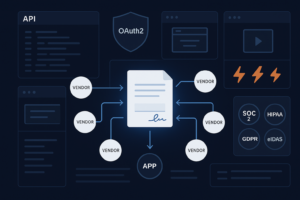
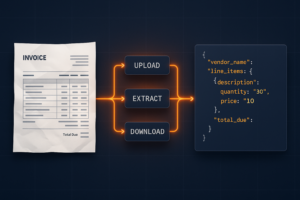
An eSignature API is a REST interface that owns the document-signing lifecycle, covering preparation, delivery, the signing session, and the audit trail. You supply the document and the signers, and the API handles field rendering, identity capture, signature application, and tamper-evident recordkeeping, so none of that infrastructure is yours to build.
The distinction that matters most for app developers is redirect-based versus embedded signing. Redirect-based signing sends the user to a hosted URL to sign and returns them afterwards, which means they leave your product mid-task. Embedded signing renders the session inside your own application, typically in an iframe, so the user never changes context. If signing sits in the middle of an onboarding or checkout flow, embedded keeps that flow intact.
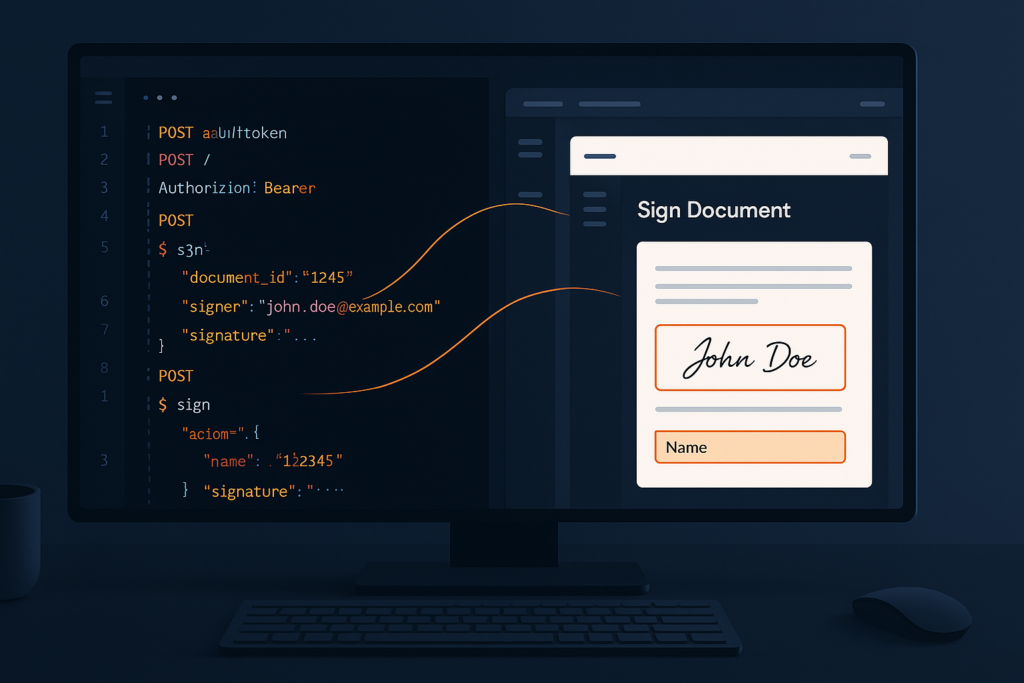
Foxit eSign supports both. The lifecycle you implement runs through five stages, starting with OAuth 2.0 authentication, then PDF preparation with Text Tags, a POST to /esign/api/v1/folders/createfolder that defines signers and mints a session, the signer completing the embedded session, and a folder_executed webhook confirming the document is final.

The five stages this guide implements in order. Each one maps to a section below.
Prerequisites
Signing up for eSign API access is self-serve on the Foxit API Platform — no sales ticket and no waiting for an administrator. The platform provisions a trial eSign account for you and manages its credentials, so the whole setup is a short walkthrough:
- Create and sign in to your Foxit API Platform account. You need an active Foxit API plan and a complete CAS profile — first name, last name, email address, and company name (a company address is required for eSign provisioning). Your eSign account is provisioned from those profile details, so complete them before you start.
- Open the Dashboard and select Get started with eSign in the Dashboard header. That takes you to the eSign activation page.
- Choose your document-storage region. The activation card preselects United States, with European Union and Canada as alternatives. Select Activate with [region] storage. Confirm the region before activating: once the remote account exists, the region is locked, and changing it later means submitting a case with Foxit Support.
- Wait for provisioning to complete. You may see “Creating your eSign account” and then “Confirming your eSign account” — the second is a reliability check that reconciles ambiguous creation results, so let it finish instead of retrying activation.
- Confirm eSign is ready. A successful activation displays “eSign is ready”, your eSign company number, and the selected region. The platform manages the API account and its credentials, and the same unified
client_id/client_secretyou use for PDF Services also authenticate eSign API, Document Generation, and Embed API — there is no separate eSign key pair to generate. If credential retrieval is still pending or failed, use Resume credentials or Retry credentials on the page; the first-call button stays disabled until credentials are ready. - (Optional but worth it) Run the sample request on the activation page. It uses your profile’s name and email as the first signing party, sends a Base64-encoded one-page contract, adds Signer Name, Today’s Date, Signature, and Date Signed fields, creates a draft with sending disabled, and returns an embedded sending session URL — a quick end-to-end check that everything is wired up. The button switches to Running and then reports “Sample draft created. The embedded sending session is ready.”
Two things to know before you build: your provisioned account is an eSign Business trial that lasts 30 days and starts in TEST mode, so every envelope carries a watermark. Moving the account to Production mode is a Sales/Operations step performed in Foxit Monitor, not something the API can do.
Beyond the account, the rest of the prerequisites are lightweight:
- Python 3.8+ with pip and a venv, for the webhook handler later in this guide.
- Flask and requests for the sample code.
- curl for the token exchange, and ngrok or any tunnel that gives your local webhook endpoint a public HTTPS URL.
- A code editor, VS Code with the Python extension being a reasonable default alongside PyCharm.
- A tagged sample PDF, so you do not have to author one. This guide uses agreement-signable.pdf, which already carries Text Tags for a single signer.
Scaffold the workspace in one shot:
mkdir foxit-esign && cd foxit-esign
python3 -m venv .venv && source .venv/bin/activate
pip install flask requests
export ESIGN_HOST="https://na1.foxitesign.foxit.com"export ESIGN_CLIENT_ID="your_api_key"
export ESIGN_CLIENT_SECRET="your_api_secret"
export WEBHOOK_SECRET="your_webhook_secret"
Step 1: Authenticate with the Foxit eSign API
The platform provisions your eSign account and manages its credentials, and that single pair is shared across eSign API, PDF Services, Document Generation, and Embed API. No bearer token, no client_credentials grant, no expires_in to watch.
The quickest way to prove a credential pair works is a minimal folder creation — the same /esign/api/v1/folders/createfolder endpoint Step 3 explains field by field:
curl -X POST "$ESIGN_HOST/esign/api/v1/folders/createfolder" \
  -H "client_id: $ESIGN_CLIENT_ID" \
  -H "client_secret: $ESIGN_CLIENT_SECRET" \
  -H "Content-Type: application/json" \
  -d '{
    "folderName": "Auth check",
    "inputType": "url",
    "fileUrls": ["https://github.com/lucienchemaly/foxit-demo-templates/raw/main/esign/agreement-signable.pdf"],
    "fileNames": ["agreement.pdf"],
    "parties": [
      {
        "firstName": "Jane",
        "lastName": "Smith",
        "emailId": "[email protected]",
        "permission": "FILL_FIELDS_AND_SIGN",
        "sequence": 1
      }
    ],
    "processTextTags": false,
    "processAcroFields": false,
    "createEmbeddedSigningSession": false,
    "createEmbeddedSendingSession": true,
    "sendNow": false
  }'
A valid credential pair returns JSON with a folder object carrying folderId and folderStatus (DRAFT here, since sendNow is false), so the response doubles as your auth check — a rejected pair comes back as an error before any folder exists. Send the same two headers on every subsequent request. There is nothing to mint or refresh like an OAuth token; if the platform ever flags the stored credentials as stale, refresh them from the activation page with Resume credentials or Retry credentials. And because eSign shares the PDF Services credential pair, the two integrations are interchangeable — one pair of credentials covers both.
Step 2: Prepare a document and define signature fields with Text Tags
Foxit eSign reads field definitions out of the PDF itself at upload time. You embed them as Text Tags, plain-text strings placed where each field belongs, and the API converts them into interactive fields on ingest.
The syntax is ${fieldtype:party_number:required:field_name:width}, where y marks a field required and n marks it optional, the party number maps to a signer’s sequence, and width is expressed as underscores.
${signfield:1:y:____}                 # required signature, party 1
${datefield:1:y::____}                # required date, party 1
${i:1:______}                         # initials field, party 1
${t:1:y:Full_Name:__________}         # required text field, party 1, named "Full_Name"
${signfield:2:y:____}                 # required signature, party 2
Each tag names a type, either in full or by its short alias. The supported set covers signfield (s), initialfield (i), datefield (d), textfield (t), textboxfield (tb), checkboxfield (c), radiobuttonfield (rb), securedfield (sc), attachmentfield (a), imagefield (img), accept (ab), decline (db), payfield (pf), and formulafield (ff). Author them in lowercase to match the documented syntax.
Express width as underscores and never as a literal space, because a space stops the tag from being recognized. A tag written ${s:1: } renders in the signing UI as plain ${s:1: } text with no field attached, while ${signfield:1:y:____} becomes a real signature field. That failure is silent, so the create call still succeeds and you only notice when a signer has nothing to sign.
Two preparation details save support tickets later. Foxit eSign converts tags to fields but does not delete the tag text, so set the tag’s text color to match the page background if you do not want signers reading raw ${...} strings. And paste tags through a plain-text editor first, because smart-quote autocorrect in Word or Google Docs silently swaps straight ASCII characters for typographic ones and tag parsing then fails without an error.
If you would rather not tag a document by hand for a first run, agreement-signable.pdf is already prepared and hosted at a public URL you can pass straight to the next step.
Step 3: Send the document and mint an embedded session
One call to /esign/api/v1/folders/createfolder submits the document, defines the signers, and, when you ask for it, returns a ready-to-render signing URL. Foxit calls the signing container a folder rather than an envelope.
{
  "folderName": "Customer Agreement - Acme Corp",
  "fileUrls": ["https://github.com/lucienchemaly/foxit-demo-templates/raw/main/esign/agreement-signable.pdf"],
  "fileNames": ["agreement.pdf"],
  "parties": [
    {
      "firstName": "Jane",
      "lastName": "Smith",
      "emailId": "[email protected]",
      "permission": "FILL_FIELDS_AND_SIGN",
      "sequence": 1
    }
  ],
  "processTextTags": true,
  "createEmbeddedSigningSession": true,
  "embeddedSignersEmailIds": ["[email protected]"],
  "sendNow": false
}
In this body you point the API at the tagged PDF with fileUrls and give it a display name through fileNames, define the single signer in parties with firstName, lastName, emailId, the FILL_FIELDS_AND_SIGN permission and a signing sequence, then set processTextTags to true so the embedded tags become real fields. Asking for createEmbeddedSigningSession and naming the signer in embeddedSignersEmailIds returns a session URL in the same response, and sendNow set to false keeps Foxit from emailing an invitation, which is what you want while testing.
One nuance to expect here. sendNow: false on its own produces a DRAFT folder, but pairing it with createEmbeddedSigningSession returns folderStatus of SHARED, since the folder has to be live for the session URL to open. No email goes out either way, so the flag still suppresses the invitation, and the status you see just reflects that the document is now signable. To attach the file as bytes instead of a URL, send base64FileString as an array together with inputType set to "base64".
The response nests the folder identifier at folder.folderId and carries an embeddedSigningSessions array. Each entry holds emailIdOfSigner, the raw embeddedToken, and the renderable embeddedSessionURL, which follows this shape:
https://{HOST_NAME}/embedded/embeddedsign?eetid={URL-ENCODED-EMBEDDED-TOKEN}
Three behaviors are worth designing around before you ship. Omitting embeddedSignersEmailIds returns email id of embedded signer(s) not submitted, so always list embedded signers explicitly. Every party number used in a Text Tag needs a matching entry in parties, because a sendNow: true create still reports success while silently dropping the fields of a party that is not listed, which means a mandatory signature is never routed. And for a multi-party document where everyone signs in your app, createEmbeddedSigningSessionForAllParties set to true covers all recipients rather than naming them one by one.
To dispatch a draft later, POST to /api/folders/sendDraftFolder.
Folder state moves through DRAFT, SHARED, COMPLETED, and finally EXECUTED once the digital signature is applied. A run of this guide’s single-signer flow produced exactly that path, with the activity log labelling the creation event CREATED and then recording Envelope viewed, Jane Smith signed this folder at COMPLETED, and Document(s) successfully executed at EXECUTED. PARTIALLY SIGNED appears only when a folder has more than one party and some but not all of them have signed, so you will not see it on a single-signer document.
Step 4: Render the signing session in your app
Load the embeddedSessionURL in an iframe. The sandbox attribute needs a specific minimum set of permissions, and trimming it is a common way to break the signing UI with no visible error.
<iframe
  id="signing-session"
  src="PASTE_EMBEDDED_SESSION_URL_HERE"
  width="100%"
  height="780px"
  style="border: none;"
  sandbox="allow-scripts allow-same-origin allow-forms allow-popups allow-top-navigation"
></iframe>
In this markup the src receives the embeddedSessionURL from the createfolder response, and the five sandbox permissions are the minimum the signing UI needs. Removing allow-popups or allow-top-navigation breaks the flow in ways that surface no obvious error, so keep all five unless you have tested a reduced set end to end. Session URLs are short-lived, so generate one when the user is ready to sign rather than caching it, and request a fresh one per signer through /esign/api/v1/embedded/regenerateEmbeddedSigningSession when a session goes stale.
To check the flow before wiring it into your own UI, download the ready-to-run iFrame test page, open it in a browser, paste your embeddedSessionURL into the input, and load it. A correctly tagged document renders with active signing controls.
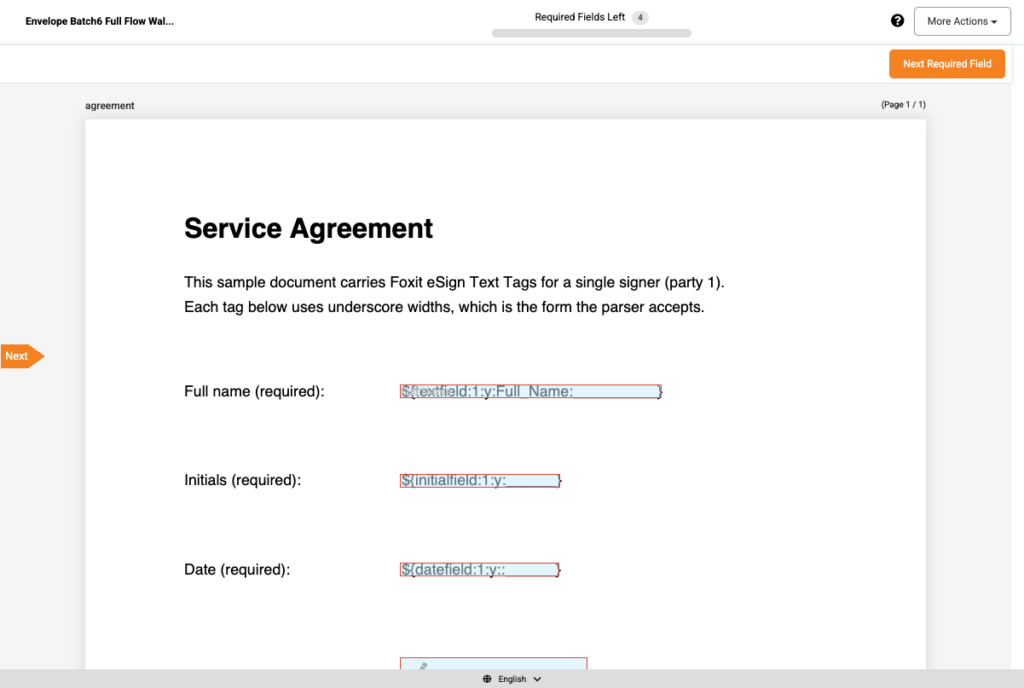
A real session opened from the embeddedSessionURL this guide’s request returns. All four tags in the sample became required fields, which is what the counter is reporting. The raw tag text still shows through each box, which is exactly why you color it to match the page background before shipping.
Step 5: Confirm completion with webhooks
Polling for completion wastes requests and adds latency. Register a webhook instead and Foxit eSign posts to your endpoint as each signing event happens.
Registration lives on the eSign portal’s API settings page at /consumer/consumerdetails, under Configure Webhooks, where you set the callback URL, a webhook secret, and the events you want. That page is visible only to the account owner, so an admin-level user will not find it. Your endpoint has to be reachable over public HTTPS.
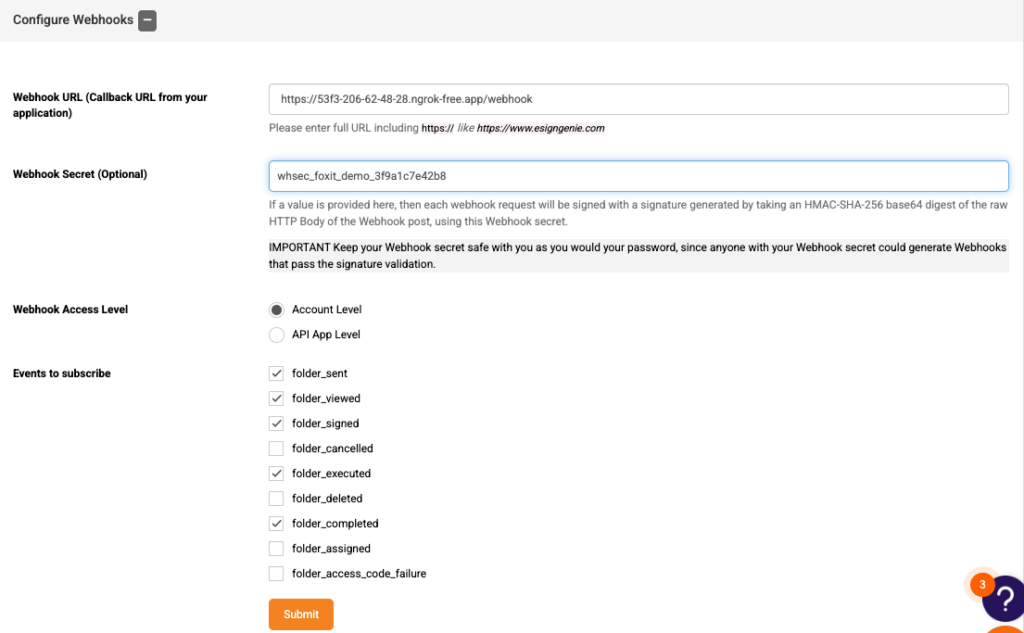
The owner-only webhook settings. The event checkboxes control which callbacks reach your endpoint.
The events available are folder_sent, folder_viewed, folder_signed, folder_cancelled, folder_executed, folder_deleted, folder_completed, folder_assigned, and folder_access_code_failure. In practice folder_viewed, folder_signed, folder_completed, and folder_executed are the ones that fire on an API-dispatched folder.
The event to build on is folder_executed. folder_completed fires once every party has signed, but folder_executed fires after Foxit applies the digital signature and locks the audit trail, so it is the point at which a download gives you the final document.
Foxit signs every callback. It delivers the POST as <your-url>?signature=<base64>, where the signature is the base64 of an HMAC-SHA-256 over the raw request body keyed with your webhook secret. Verify it against the unparsed bytes, since re-serializing the JSON changes whitespace or key order and breaks the comparison.
import base64
import hashlib
import hmac
import os

from flask import Flask, request, jsonify

app = Flask(__name__)
WEBHOOK_SECRET = os.environ["WEBHOOK_SECRET"]


def verify_signature(raw_body: bytes, signature: str) -> bool:
    expected = base64.b64encode(
        hmac.new(WEBHOOK_SECRET.encode(), raw_body, hashlib.sha256).digest()
    ).decode()
    return hmac.compare_digest(expected, signature)


@app.route("/webhooks/esign", methods=["POST"])
def handle_esign_event():
    raw_body = request.get_data()
    if not verify_signature(raw_body, request.args.get("signature", "")):
        return jsonify({"error": "invalid signature"}), 403

    payload = request.get_json(silent=True) or {}
    event_name = payload.get("event_name")
    folder = payload.get("data", {}).get("folder", {})

    if event_name == "folder_executed":
        # The document is final here. Archive it, update your record, notify the user.
        app.logger.info("Signing finished for folder %s", folder.get("folderId"))

    return jsonify({"status": "received"}), 200
In this handler you read the unparsed body first, recompute the HMAC over those exact bytes with your webhook secret, and compare it against the signature query parameter using hmac.compare_digest so the check is not timing-dependent. A mismatch returns 403 before any business logic runs, which stops a spoofed POST to your public URL from triggging an archive. Only after the signature passes do you parse the JSON, read event_name, and branch on folder_executed to run downstream work, returning 200 so Foxit records the delivery as successful. A ready-to-run version of this receiver lives at webhook_receiver.py in the demo repo.
Test the whole path against a draft. Create the folder with sendNow set to false, dispatch it, sign in the embedded session, and watch the events arrive. Once the signer finishes, the session redirects to a result URL carrying event=signing_success, and the document reaches EXECUTED within a few seconds.
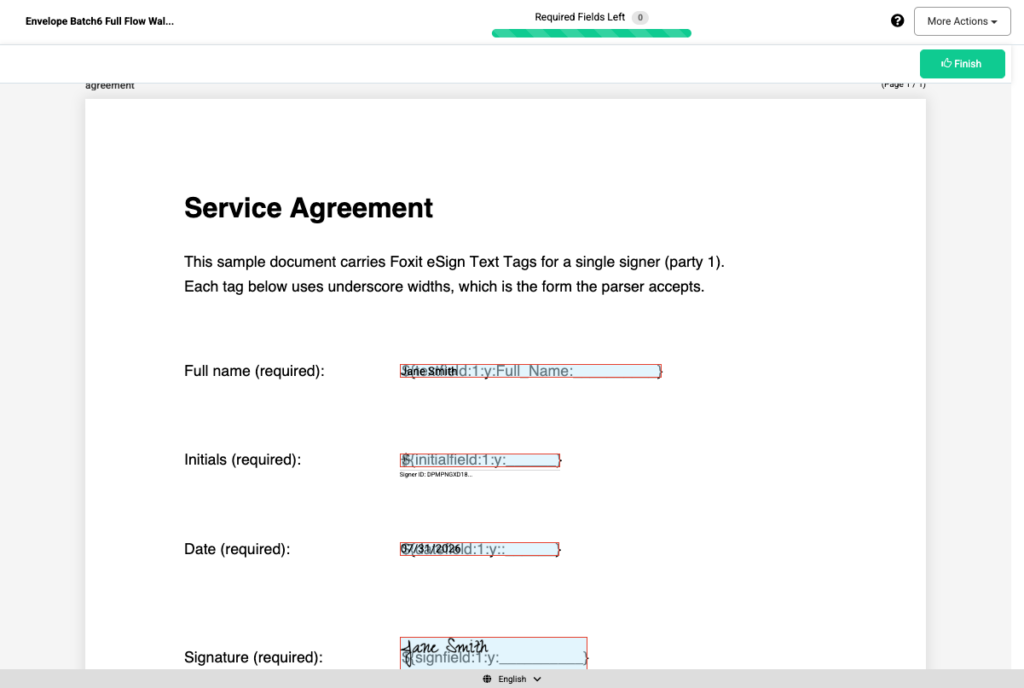
The session once every field is filled. The counter reads zero and Finish activates, which is the state that produces folder_completed and then folder_executed.
Step 6: Retrieve the executed document and its audit trail
With folder_executed in hand, pull the final PDF. The download takes the folder id as a query parameter.
curl -o executed.pdf \
  "$ESIGN_HOST/api/folders/download?folderId=35117696" \
  -H "Authorization: Bearer $ACCESS_TOKEN"
The response streams the executed PDF, which arrives with a content type of application/octet-stream rather than application/pdf, so write the bytes to a file rather than sniffing the header. The returned document carries the filled field values and the signature certificate, so a text extraction of it contains the signer’s typed name, the date, and the per-signer Signer ID recorded on the certificate page.
For the audit trail itself, GET /api/folders/viewActivityHistory?folderId={id} returns a details object holding the folder metadata plus an activities array, where each entry carries an activity description and the folderStatus at that moment. That endpoint is GET-only and only returns data once the folder has been shared, so a pure DRAFT folder reports nothing useful.
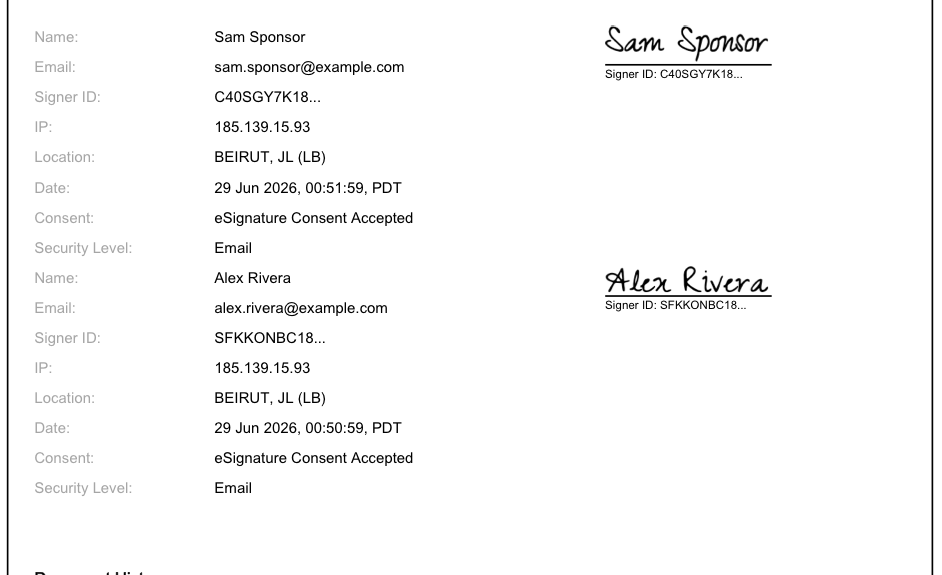
The signature certificate attached to a document once folder_executed has fired. Each signer’s adopted signature sits beside the identity record Foxit captured, which is the tamper-evident audit trail you are archiving alongside the PDF.
Common mistakes
- Dropping the
/api/prefix : every eSign path sits under/api/, so it is/api/folders/createfolder, not/folders/createfolder. - snake_case request fields : the body is camelCase.
folderName,fileUrls,emailId, andsendNowwork, whilefolder_name,document_url,email, andsend_nowdo not. - Omitting
processTextTags: without it the tags stay inert text, the signer sees raw${...}strings, and they can finish without signing anything. - A tag party with no matching
partiesentry : the create returns success and that party’s fields disappear silently, so their signature is never collected. - Skipping signature verification : a public webhook URL that acts on any POST is a spoofing target. Verify the HMAC before you touch the payload.
- Archiving on
folder_completed: that fires before the digital signature is applied. Wait forfolder_executed. - Caching an
embeddedSessionURL: sessions expire. Mint one when the signer is ready, and regenerate when needed. - Trimming the iframe
sandboxlist : removingallow-popupsorallow-top-navigationbreaks signing with no error message. - Smart quotes or a space inside a tag : both stop tag recognition. Use straight ASCII and underscores.
- Reusing PDF Services credentials : eSign has its own portal, host, and key pair.
eSignature API FAQ
What is an eSignature API?
A REST interface that handles the document-signing lifecycle, covering preparation, delivery, the signing session, and the audit trail, so your app makes calls rather than building signing infrastructure.
What is embedded signing and why does it improve the user experience?
Embedded signing renders the session inside your own application instead of redirecting to a hosted page, so the signer finishes without leaving your product. That matters most when signing sits inside a flow you do not want to interrupt, like onboarding or checkout.
How do Text Tags relate to the parties in the API call?
The party number in a tag maps to a signer’s sequence in the parties array, so ${s:1: } is signed by the party with sequence: 1. Keeping those aligned is the difference between fields routing correctly and vanishing silently.
What is the difference between folder_completed and folder_executed?
folder_completed fires when all parties have signed. folder_executed fires after Foxit applies the digital signature and locks the audit trail, which is why downstream archiving should trigger on folder_executed.
How do I verify a webhook actually came from Foxit?
Recompute a base64 HMAC-SHA-256 of the raw request body using your webhook secret and compare it with the signature query parameter. Verify against raw bytes, never re-serialized JSON.
Can one folder hold several documents?
Yes. Pass additional entries in fileUrls with matching fileNames. Each document carries its own Text Tags, and party assignments stay consistent across the folder.
Do I need a paid plan to build this?
No. The free tier gives you credentials and lets you run the full flow, and no credit card is required to create the account.
Can I review a document before it reaches signers?
Yes. Create it with sendNow set to false for a DRAFT folder, inspect it in the eSign dashboard, then dispatch with /api/folders/sendDraftFolder.
Wrapping up
That is the full path for an eSignature API integration. Authenticate with the client_credentials grant, prepare a PDF with Text Tags, create the folder with processTextTags and an embedded session, render the returned embeddedSessionURL in an iframe, and act on a signature-verified folder_executed webhook.
The same shape extends to multi-signer approval chains, CRM-triggered signing when a deal closes, and template-based documents where fields arrive pre-filled from your own data. Those build on the pieces already in place rather than replacing them.
Ready to build? Create a free account (no credit card required) at account.foxit.com/site/sign-up, generate your API Key and Secret from the API tab, and run the token call above against agreement-signable.pdf to see a session URL come back.