Most teams still handle contract metadata the same way they did a decade ago. Someone opens the signed PDF, copies the effective date and renewal terms into a spreadsheet, and hopes nobody forgets to check back before the notice period closes. When the process breaks down, it usually breaks down quietly. A regex script built for one contract template chokes on the next one, and a renewal date slips past unnoticed.
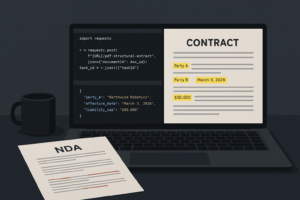
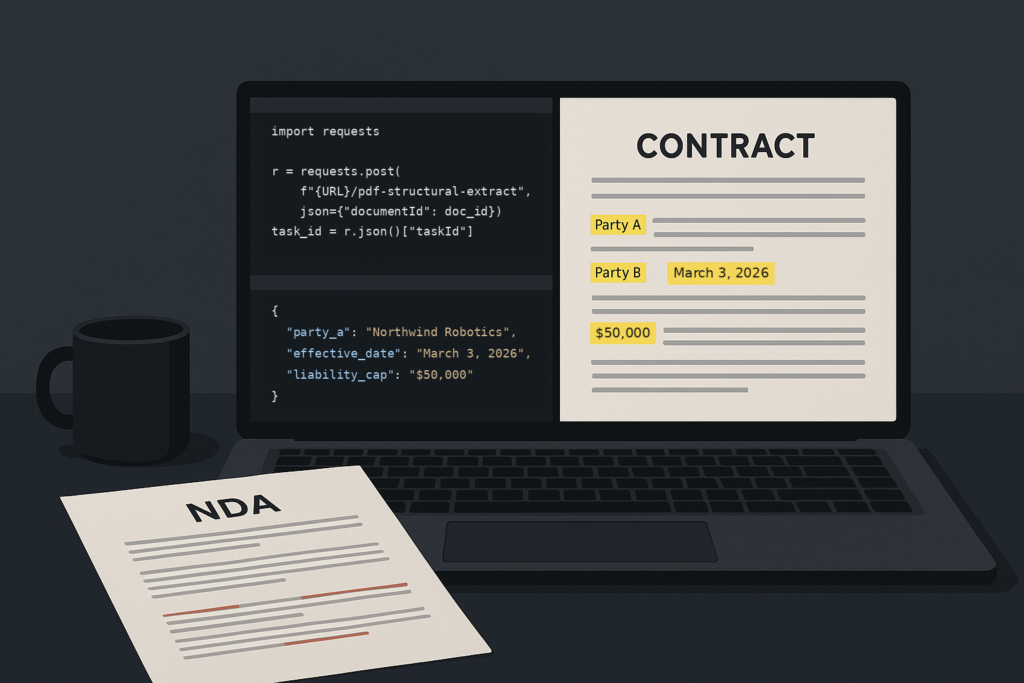
This tutorial builds a two-stage pipeline that gets the same information out of a contract programmatically. The first stage uses Foxit’s PDF Services API to extract structured content metadata (party names, dates, notice periods, liability terms) from a signed PDF. The second stage calls the Foxit eSign API’s activity history endpoint to pull the signing audit trail, so the final record captures both what the contract says and how it got signed. By the end, you’ll have one JSON object per contract that’s ready to feed into a CLM tool, a CRM, or a renewal-alert script, built from a real API response rather than a screen-scrape.
What contract metadata looks like in practice
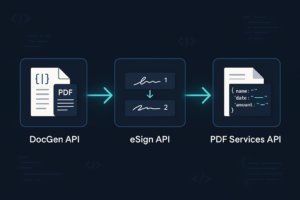
Before writing any code, it helps to know what you’re building toward. The two API calls this tutorial makes run independently against the same signed PDF and merge into one record, as shown below.
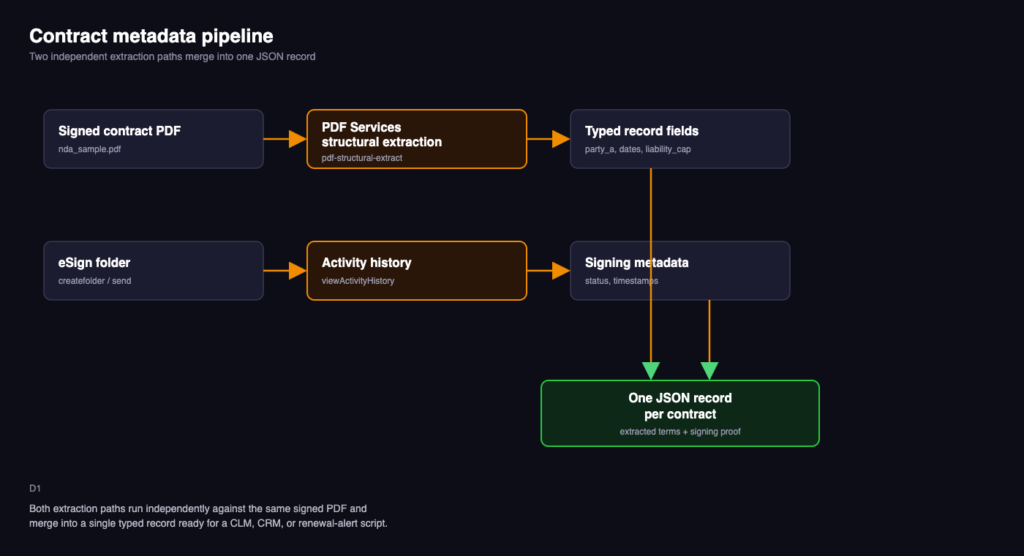
The goal isn’t a wall of extracted text. It’s a small, typed record with the fields that actually drive downstream decisions:
{
  "party_a": "Northwind Robotics",
  "party_b": "Blue Harbor Analytics LLC",
  "effective_date": "March 3, 2026",
  "renewal_date": "March 3, 2028",
  "termination_notice_days": 30,
  "liability_cap": "$50,000"
}
That’s the schema this tutorial targets. Everything downstream, a renewal-alert cron job, a query against a CLM database, a BI dashboard, consumes a record shaped like this. The contract’s prose is the source of truth, but the schema is what actually gets used. A structural extraction API gets you from one to the other without hand-writing a parser for every contract template your organization uses.
Prerequisites
You’ll need the following before starting:
- Python 3.8 or later, with pip for installing packages.
- A virtual environment tool such as venv (included with Python) to isolate this project’s dependencies.
- The requests library for making HTTP calls.
- A code editor. VS Code with the Python extension works well for this walkthrough.
- A free Foxit developer account. Sign up here. No credit card is required.
Set up your workspace:
mkdir contract-extraction && cd contract-extraction
python3 -m venv .venv
source .venv/bin/activate
pip install requests
Those four commands create the project folder, create and activate an isolated virtual environment inside it, and install the one library this tutorial’s code depends on.
Authenticating with the Foxit PDF Services API
Once you’ve signed up for a free developer account, the sign-up flow provisions API credentials immediately. There’s no separate approval step.
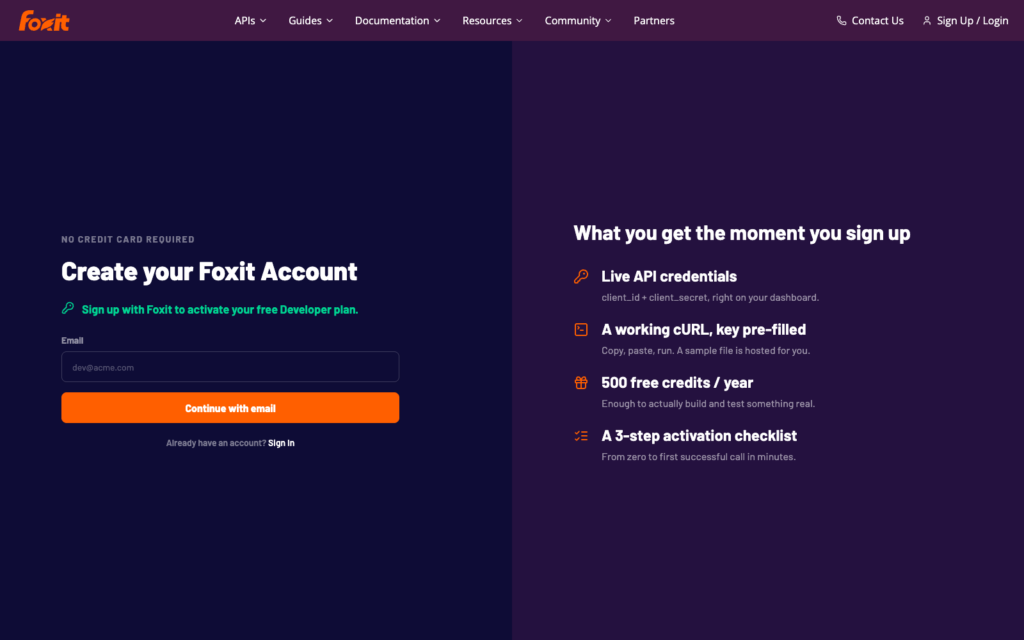
When you sign in, your dashboard has a client_id and client_secret. The PDF Services API and DocGen API authenticate with these two values sent as request headers, with no OAuth token exchange required.
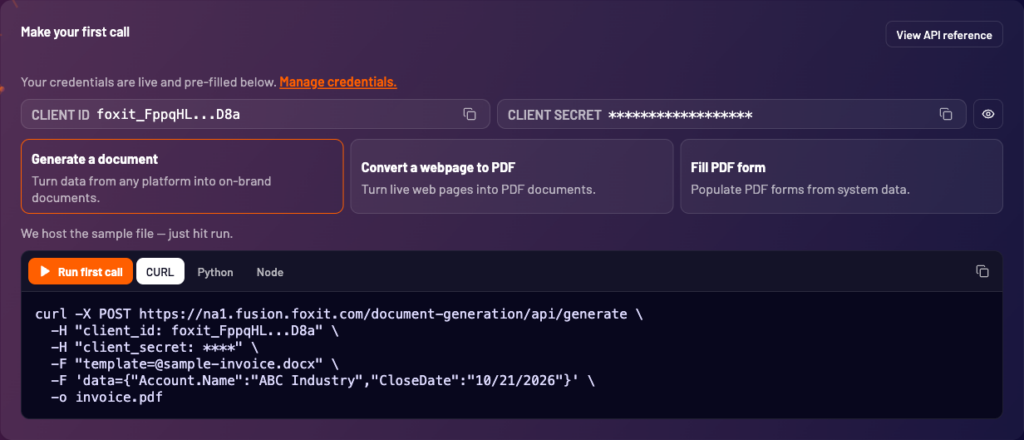
export FOXIT_CLIENT_ID="your_client_id"
export FOXIT_CLIENT_SECRET="your_client_secret"
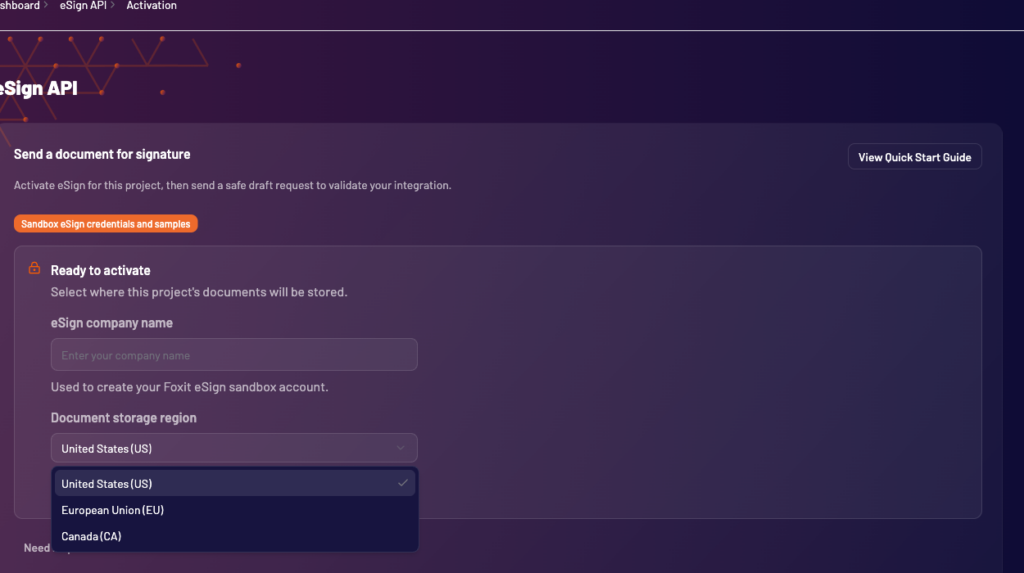
Foxit eSign, which this tutorial’s second stage uses to pull signing metadata, runs on a separate host with its own token-based authentication, and needs a one-time activation step from your dashboard (look for “Get started with eSign”) before its endpoints will accept calls. Activate it now so it’s ready by the time you reach that section; the eSign section below covers the token exchange itself.
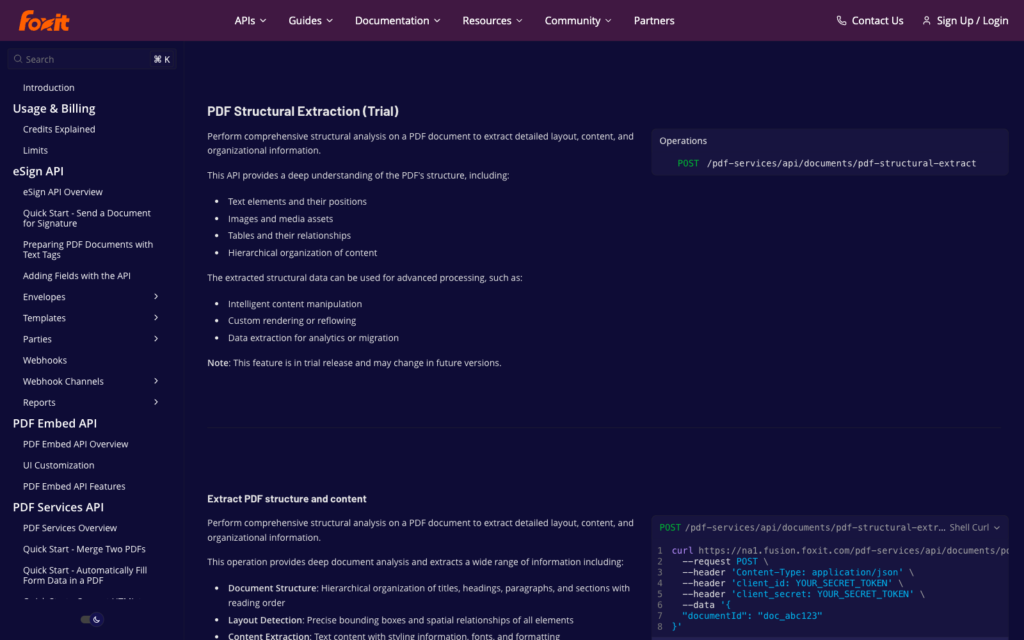
For the full authentication reference, see the Foxit API docs, or try a call directly against the interactive API reference before writing any code.
Uploading a contract and calling the extraction endpoint
The extraction flow uses two calls, uploading the PDF to get a document ID, then posting that document ID to the structural extraction endpoint.
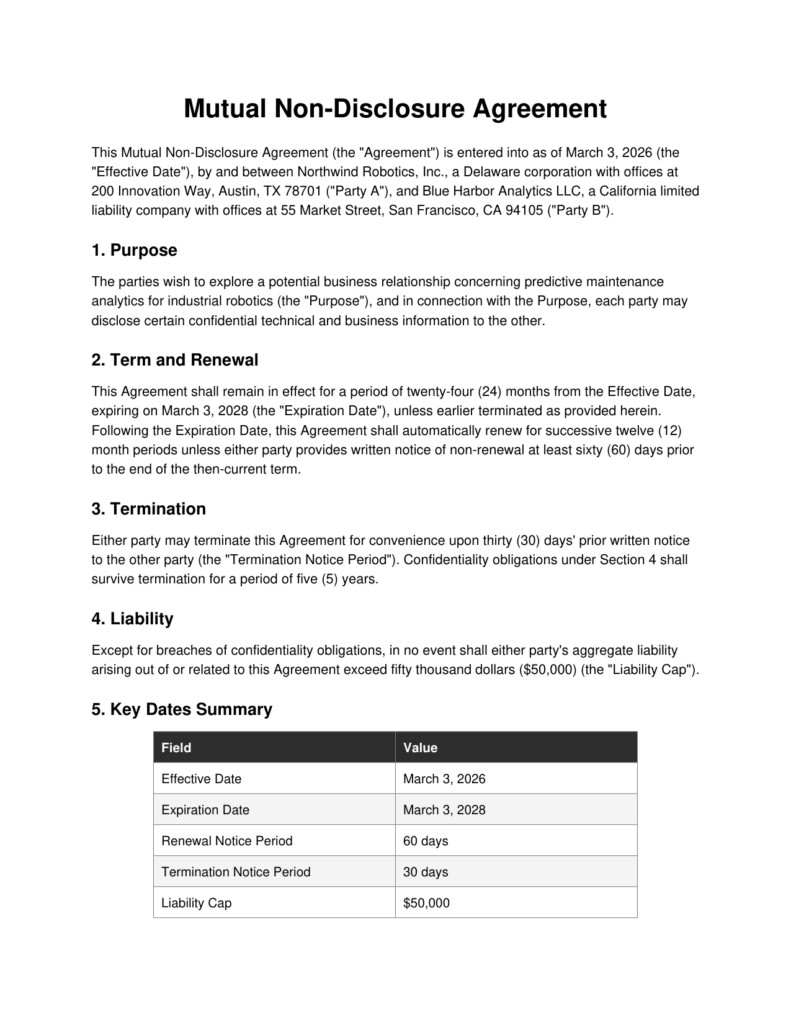
This tutorial uses a short sample NDA between two fictional companies, with a purpose clause, a term-and-renewal clause, a termination clause, a liability cap, and a key-dates summary table. It’s built to mirror the clause structure of a real commercial NDA.
Step 1: Upload the document
import os
import requests

BASE_URL = "https://na1.fusion.foxit.com"
HEADERS = {
    "client_id": os.environ["FOXIT_CLIENT_ID"],
    "client_secret": os.environ["FOXIT_CLIENT_SECRET"],
}

with open("nda_sample.pdf", "rb") as f:
    upload_response = requests.post(
        f"{BASE_URL}/pdf-services/api/documents/upload",
        headers=HEADERS,
        files={"file": ("nda_sample.pdf", f, "application/pdf")},
    )
upload_response.raise_for_status()
document_id = upload_response.json()["documentId"]
print(document_id)
In this code, you open the local PDF, POST it as multipart form data to the upload endpoint, and read back a documentId. That ID is a handle to the file inside Foxit’s system; every subsequent call in this pipeline references the document by this ID rather than re-uploading the file.
Run this command from your terminal:
python3 step1_upload.pyThe expected output should look like the following:
6ab519b2c7ca700694bf3174Step 2: Call the structural extraction endpoint
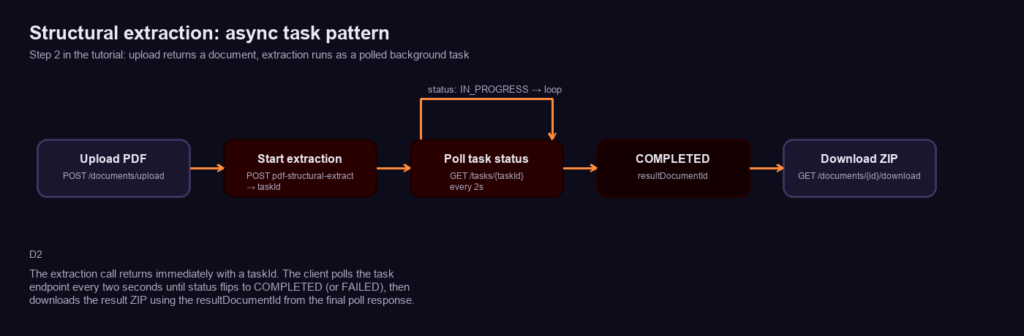
The extraction call returns immediately with a taskId, and the client polls the task endpoint every two seconds until the status flips to COMPLETED, as shown below.
import time

extract_response = requests.post(
    f"{BASE_URL}/pdf-services/api/documents/pdf-structural-extract",
    headers={**HEADERS, "Content-Type": "application/json"},
    json={"documentId": document_id},
)
extract_response.raise_for_status()
task_id = extract_response.json()["taskId"]

while True:
    task_response = requests.get(f"{BASE_URL}/pdf-services/api/tasks/{task_id}", headers=HEADERS)
    task = task_response.json()
    print(task)
    if task["status"] == "COMPLETED":
        result_document_id = task["resultDocumentId"]
        break
    if task["status"] == "FAILED":
        raise RuntimeError(task.get("error"))
    time.sleep(2)

download_response = requests.get(
    f"{BASE_URL}/pdf-services/api/documents/{result_document_id}/download",
    headers=HEADERS,
)
with open("extraction_result.zip", "wb") as f:
    f.write(download_response.content)
This code starts the extraction as an asynchronous task, since structural analysis takes longer than a typical request-response cycle. It posts the documentId, gets back a taskId, then polls the task status endpoint every two seconds until the status flips to COMPLETED or FAILED. Once complete, the task response includes a resultDocumentId pointing at a ZIP archive, downloaded in the final step. On the sample NDA, this whole flow (upload, extract, poll, download) completes in well under ten seconds.
Run this command from your terminal:
python3 step2_extract.pyThe expected output should look like the following:
{'taskId': '6ab519d30a17a67b90dea85d', 'status': 'IN_PROGRESS', 'progress': 20}
{'taskId': '6ab519d30a17a67b90dea85d', 'status': 'COMPLETED', 'progress': 100, 'resultDocumentId': '6ab519d5316b427cfaec5212'}
Unzip extraction_result.zip and, on this run, you get exactly two files. Run this command from your terminal:
unzip extraction_result.zip && lsThe expected output should look like the following:
page_p0.pdf_0.png
StructureInfo.json
That JSON is the real output of this article. Here’s an abbreviated version of what it actually contains, taken from the same live run against the sample NDA (the full StructureInfo.json from this run is available if you want to see every element):
{
  "analyzeResult": {
    "elements": [
      {
        "type": "title",
        "content": { "text": "Mutual Non-Disclosure Agreement" },
        "region": { "page": 1, "boundingBox": [142, 70, 470, 70, 470, 99, 142, 99] },
        "id": "title1"
      },
      {
        "type": "paragraph",
        "content": {
          "text": "This Mutual Non-Disclosure Agreement (the \"Agreement\") is entered into as of March 3, 2026 (the \"Effective Date\"), by and between Northwind Robotics, Inc., ... (\"Party A\"), and Blue Harbor Analytics LLC, ... (\"Party B\")."
        },
        "id": "paragraph1"
      },
      {
        "type": "head",
        "content": { "text": "2. Term and Renewal" },
        "id": "head2",
        "level": 1
      },
      {
        "type": "table",
        "content": {
          "body": {
            "rowCount": 6,
            "columnCount": 2,
            "cells": [
              { "paragraph": { "content": { "text": "Effective Date" } }, "rowIndex": 1, "columnIndex": 0 },
              { "paragraph": { "content": { "text": "March 3, 2026" } }, "rowIndex": 1, "columnIndex": 1 }
            ]
          }
        }
      }
    ]
  }
}
The response is a flat list of elements, each carrying a type (title, head, paragraph, or table, among others) and the element’s content.text. For title, head, and paragraph elements, a region.boundingBox gives its position on the page. table elements don’t follow that shape, since their region is an empty object, and position instead lives in a plural regions array (alongside a plural scores array), so code that reads element["region"]["boundingBox"] generically across every element type raises a KeyError the moment it reaches a table. Paragraphs carry plain text; tables carry a content.body.cells array with rowIndex/columnIndex coordinates instead of a 2D array, since that’s the shape that survives merged cells and irregular tables cleanly. Every field name here comes directly from a real response; none of it is asserted from documentation alone.
Mapping the raw extraction response to a typed schema
StructureInfo.json describes the document’s structure. It doesn’t hand you party_a and effective_date directly, so the next step is a small amount of post-processing that turns the element list into the schema from the introduction.
import json
import re
import zipfile

with zipfile.ZipFile("extraction_result.zip") as z:
    with z.open("StructureInfo.json") as f:
        structure = json.load(f)

elements = structure["analyzeResult"]["elements"]

def normalize(text):
    return " ".join(text.split())

paragraphs = [normalize(el["content"]["text"]) for el in elements if el["type"] == "paragraph"]
full_text = " ".join(paragraphs)

record = {}

match = re.search(r'([A-Z][\w\s,.]+?)\s*\("Party A"\)', full_text)
if match:
    record["party_a"] = match.group(1).split(",")[0].strip()

match = re.search(r'([A-Z][\w\s,.]+?)\s*\("Party B"\)', full_text)
if match:
    record["party_b"] = match.group(1).split(",")[0].strip()

match = re.search(r'as of\s+([A-Z][a-z]+ \d{1,2}, \d{4})', full_text)
if match:
    record["effective_date"] = match.group(1)

match = re.search(r'expiring on\s+([A-Z][a-z]+ \d{1,2}, \d{4})', full_text)
if match:
    record["renewal_date"] = match.group(1)

match = re.search(r'upon \w+ \((\d+)\) days.{0,10}prior written notice', full_text)
if match:
    record["termination_notice_days"] = int(match.group(1))

match = re.search(r'\$([\d,]+)\)?\s*\(the "Liability Cap"\)', full_text)
if match:
    record["liability_cap"] = f"${match.group(1)}"

print(json.dumps(record, indent=2))
This code reads the ZIP directly without extracting it to disk, then joins every paragraph element’s text into one searchable string. Because the raw text carries mid-string line breaks where a sentence wraps across a line in the source PDF, the normalize helper collapses any run of whitespace down to a single space before the string gets used, which is what keeps the regular expressions below from silently failing on a hidden newline. From there, a handful of targeted patterns pull out the fields this NDA’s clause language reliably contains, including the parenthetical ("Party A")/("Party B") labels this template uses to tag each signer, the “as of” and “expiring on” date phrases, the notice-period clause, and the dollar figure tagged (the "Liability Cap") in the liability clause. The liability clause writes the figure as fifty thousand dollars ($50,000) (the "Liability Cap"), so the regex allows an optional closing parenthesis between the digits and the label rather than assuming the label follows the number directly. Run against the sample NDA, this produces exactly the record shown in the introduction.
Run this command from your terminal:
python3 map_schema.pyThe expected output should look like the following:
{
  "party_a": "Northwind Robotics",
  "party_b": "Blue Harbor Analytics LLC",
  "effective_date": "March 3, 2026",
  "renewal_date": "March 3, 2028",
  "termination_notice_days": 30,
  "liability_cap": "$50,000"
}
A production version of this would likely walk the table element’s cells too, since the sample NDA’s key-dates table restates the same fields in a much more parseable, label-value shape, but the paragraph-text approach shown here works even for contracts that don’t include a summary table.
Enriching the record with eSign audit metadata
The extraction above tells you what the contract says. It doesn’t tell you whether it’s actually been signed, or by whom, or when. That’s what Foxit eSign’s activity history endpoint adds, closing the loop between “here’s what the contract promises” and “here’s proof it was executed.”
eSign authenticates separately from PDF Services, with its own client ID and secret and its own token exchange. Find this pair by signing in to the eSign portal as the account owner, opening the account’s API settings page, and clicking “View All Credentials” (this is owner-gated and triggers a one-time email confirmation, so a non-owner login won’t see the button). Export them the same way you exported the PDF Services pair:
export FOXIT_ESIGN_CLIENT_ID="your_esign_client_id"
export FOXIT_ESIGN_CLIENT_SECRET="your_esign_client_secret"
With those in place, exchange them for a bearer token:
esign_response = requests.post(
    "https://na1.foxitesign.foxit.com/api/oauth2/access_token",
    data={
        "client_id": os.environ["FOXIT_ESIGN_CLIENT_ID"],
        "client_secret": os.environ["FOXIT_ESIGN_CLIENT_SECRET"],
        "grant_type": "client_credentials",
        "scope": "read-write",
    },
)
esign_response.raise_for_status()
esign_token = esign_response.json()["access_token"]
This posts your eSign credentials as form-encoded data (not JSON) and gets back a bearer token, which every subsequent eSign call uses in an Authorization header. This is a separate credential pair and a separate token from the PDF Services calls above; see the eSign activation note in the “Authenticating with the Foxit PDF Services API” section above if you haven’t turned this on yet.
Sending the same credentials as a JSON body instead of data= is a real, reproducible mistake. Run this command from your terminal to reproduce it:
python3 -c "
import os, requests
r = requests.post(
    'https://na1.foxitesign.foxit.com/api/oauth2/access_token',
    json={
        'client_id': os.environ['FOXIT_ESIGN_CLIENT_ID'],
        'client_secret': os.environ['FOXIT_ESIGN_CLIENT_SECRET'],
        'grant_type': 'client_credentials',
        'scope': 'read-write',
    },
)
print(r.status_code, r.reason)
"
The expected output should look like the following:
415 Unsupported Media TypeSending the NDA for signature
The activity history endpoint only has something to report once a contract has actually gone out for signature, so this tutorial sends the same sample NDA through eSign to get a real folder ID to query. POST /api/folders/createfolder accepts the file directly as base64, which sidesteps hosting it somewhere with a public URL first:
import base64

with open("nda_sample.pdf", "rb") as f:
    encoded_pdf = base64.b64encode(f.read()).decode("utf-8")

create_folder_response = requests.post(
    "https://na1.foxitesign.foxit.com/api/folders/createfolder",
    headers={"Authorization": f"Bearer {esign_token}"},
    json={
        "folderName": "nda_sample",
        "inputType": "base64",
        "base64FileString": [encoded_pdf],
        "fileNames": ["nda_sample.pdf"],
        "parties": [
            {"partyNumber": 1, "name": "Alex Rivera", "email": "[email protected]"}
        ],
        "sendNow": True,
    },
)
create_folder_response.raise_for_status()
folder_id = create_folder_response.json()["folder"]["folderId"]
print(folder_id)
This code base64-encodes the same nda_sample.pdf used in the extraction step and posts it to the folder-creation endpoint, along with inputType: "base64" (required whenever the file comes as base64 rather than a fileUrls array) and a single party to sign. sendNow: true dispatches the invitation immediately instead of leaving the folder in DRAFT, and the response nests the new folder’s ID at folder.folderId, which is the folder_id the next call reads.
Once a contract has actually been sent for signature, its activity history is available by folder ID:
history_response = requests.get(
    f"https://na1.foxitesign.foxit.com/api/folders/viewActivityHistory?folderId={folder_id}",
    headers={"Authorization": f"Bearer {esign_token}"},
)
history_response.raise_for_status()
activity = history_response.json()["details"]
print(json.dumps(activity, indent=2))
Called against a real folder right after sending it for signature, this is the actual response:
{
  "folderId": 36096051,
  "enclosedDocuments": "nda_sample",
  "envelopeRecipients": "Alex Rivera",
  "author": "annika annika",
  "status": "SHARED",
  "dateCreated": "24 Sep 2026, 02:48:35, PDT",
  "dateSent": "24 Sep 2026, 02:48:35, PDT",
  "activities": [
    {
      "activity": "annika annika created this folder",
      "folderStatus": "CREATED",
      "action": "Created",
      "time": "24 Sep 2026, 02:48:35, PDT",
      "source": "API"
    },
    {
      "activity": "Invitation sent to Alex Rivera ( [email protected])",
      "folderStatus": "SHARED",
      "action": "Invitation Sent",
      "time": "24 Sep 2026, 02:48:35, PDT",
      "source": "Web"
    }
  ]
}
The endpoint refers to the contract’s signing container as a “folder” in the API’s own field names (folderId, folderStatus), even though the eSign portal’s UI labels the same thing an “envelope.” Both terms describe the same object; this article uses “folder” since that’s what the API actually returns. details.status tracks the folder’s lifecycle (SHARED once sent, moving through PARTIALLY SIGNED or COMPLETED as signers act, ending at EXECUTED once every signature is applied and finalized), and activities is an ordered log of every event with a timestamp and a source (API or Web, depending on how the action was triggered). Before you build this into a pipeline, know that this endpoint only works once a folder has actually been shared or sent. Calling it against a folder still in DRAFT status returns an error rather than an empty activity list, so don’t rely on it as a general-purpose status check before the folder is sent. Run this command from your terminal, pointed at a folder still in DRAFT status:
python3 view_activity_history.pyThe expected output should look like the following:
{"result": "error", "error_description": "logs of a non-shared folder can not be viewed."}
The final step merges this into the schema dict built earlier:
record["folder_status"] = activity["status"]
record["signing_activity"] = [
    {"event": a["action"], "time": a["time"]} for a in activity["activities"]
]

print(json.dumps(record, indent=2))
That gives you one complete record per contract, its extracted terms and its signing history, in a single dict. Run this command from your terminal:
python3 merge_record.pyThe expected output should look like the following, using the same folder queried above:
{
  "party_a": "Northwind Robotics",
  "party_b": "Blue Harbor Analytics LLC",
  "effective_date": "March 3, 2026",
  "renewal_date": "March 3, 2028",
  "termination_notice_days": 30,
  "liability_cap": "$50,000",
  "folder_status": "SHARED",
  "signing_activity": [
    { "event": "Created", "time": "24 Sep 2026, 02:48:35, PDT" },
    { "event": "Invitation Sent", "time": "24 Sep 2026, 02:48:35, PDT" }
  ]
}
With these three steps, you can turn any signed contract into a single record your downstream system can use: run the extraction, pull the audit trail, and merge the two.
Common mistakes
- Sending JSON to the eSign token endpoint : it requires form-encoded data (
data=, notjson=inrequests). A JSON body returns a 415 error. - Calling the activity history endpoint on a draft folder : it only works once the folder has been shared or sent; a draft returns an error instead of an empty result.
- Assuming
region.boundingBoxis a four-number rectangle : it’s an eight-number polygon (four corner point pairs), not[x, y, width, height]. - Reading
element["region"]["boundingBox"]on every element type without checkingtypefirst :tableelements carry an emptyregionobject and expose position throughregionsandscores(both plural) instead, so a generic per-element loop raises aKeyErrorthe moment it reaches a table. - Treating table cells as a 2D array : table content lives in
content.body.cells, a flat list withrowIndex/columnIndexon each cell, not a nestedrowsarray. - Skipping whitespace normalization before regex matching : paragraph text preserves the source PDF’s line wraps as literal characters mid-sentence, which breaks patterns that assume a single space between words.
Get started
The pipeline in this tutorial extracts what a contract says and proves how it was signed, in two API calls plus a lightweight mapping step, no regex-per-template maintenance burden and no manual copy-paste. Once you have a structured record per contract, the obvious next steps are automated renewal alerts before a notice period closes, obligation tracking against the liability and termination terms, and pushing the merged record straight into a BI dashboard or CLM system.
Create a free Foxit developer account, no credit card required, and run this extraction against one of your own contracts using the interactive API reference.
Contract metadata extraction FAQs
What is contract metadata extraction?
Contract metadata extraction is the process of pulling key details out of a contract, such as party names, effective dates, renewal dates, notice periods, and liability caps, and turning them into structured data. Instead of copying terms into a spreadsheet by hand, you get a typed record that feeds a CLM tool, a CRM, or a renewal-alert script.
What contract fields can I extract with the Foxit API?
You can extract any text the contract contains, including parties, effective and renewal dates, termination notice periods, and liability caps. The Foxit PDF Services API returns the document’s titles, headings, paragraphs, and tables as structured JSON. A short mapping step then turns that output into the exact fields your downstream system needs.
Do I need a separate parser for every contract template?
No. The structural extraction API returns the same JSON format for every PDF, so you don’t need to parse raw layouts for each template. You still map fields to your schema, usually with patterns tuned to your clause language. Contracts with a key-dates summary table are easier, since the table cells come back as label-value pairs.
How do I get the signing audit trail for a contract?
Call the Foxit eSign activity history endpoint with the contract’s folder ID. It returns the folder’s status and a timestamped log of every event, such as when the contract was created and when invitations went out. The endpoint only works after the folder has been shared or sent. A draft folder returns an error.
Can I try the Foxit API for free?
Yes. A free Foxit developer account gives you live API credentials right away, with no credit card and no approval step. The free plan includes 500 credits per year, which is enough to build and test a full contract metadata extraction pipeline. You can also test calls in the interactive API reference before writing code.